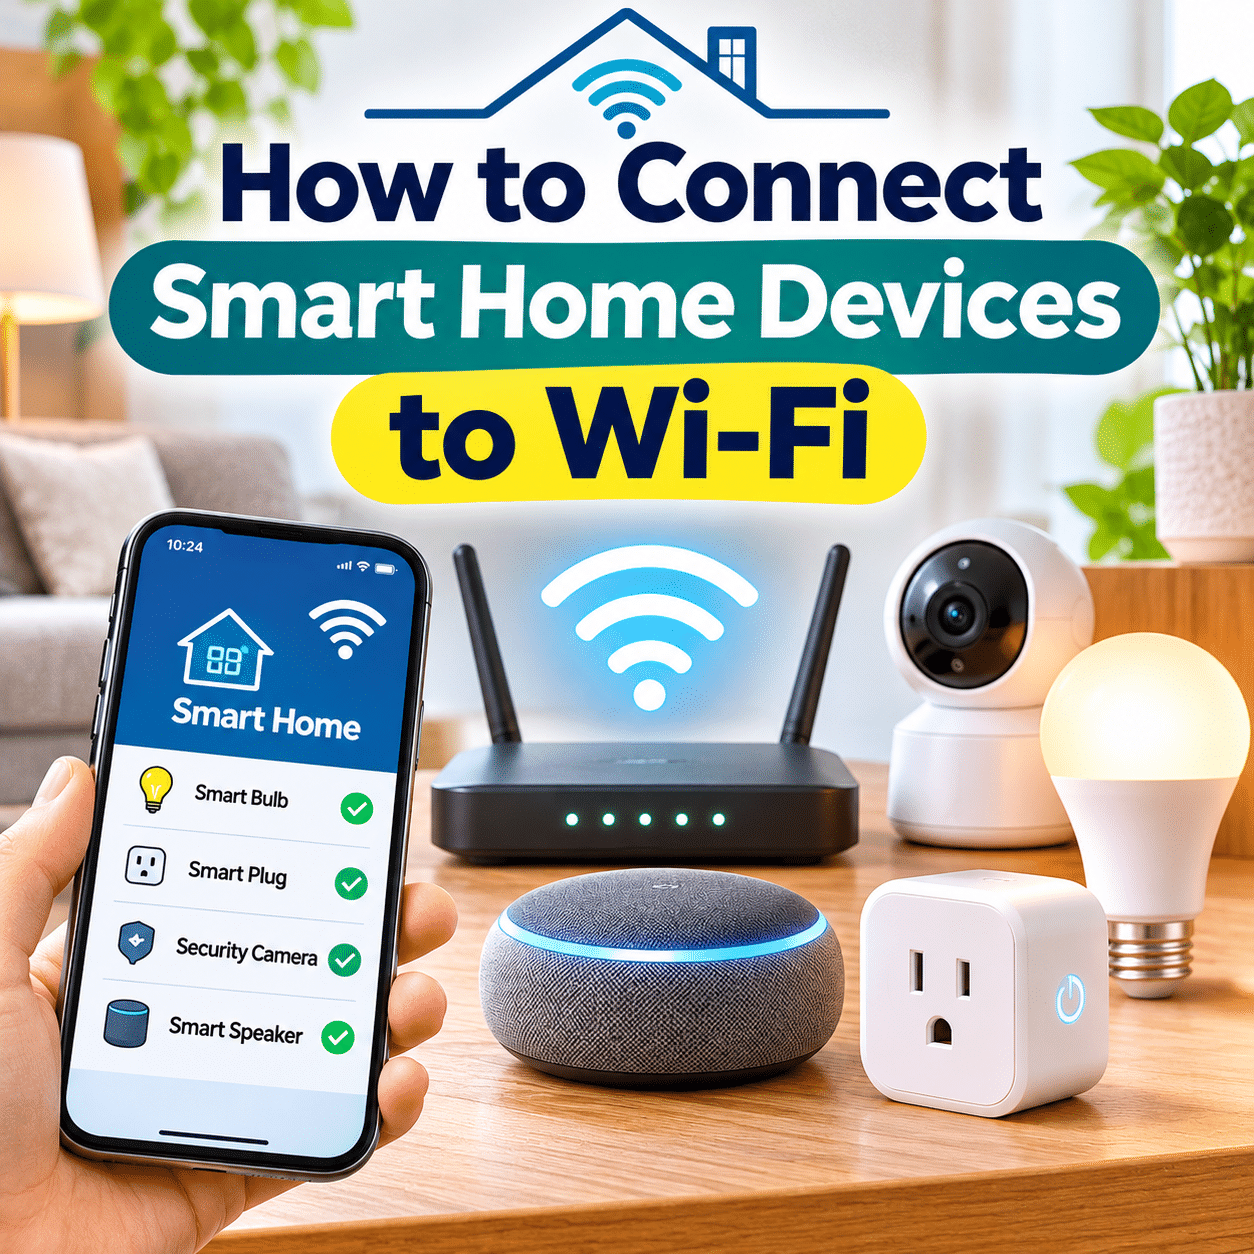
Connecting smart home devices to Wi-Fi is one of the first steps toward creating a more convenient, connected, and automated living environment. Whether you are installing smart light bulbs, plugs, cameras, speakers, or household appliances, a reliable wireless connection helps these devices communicate with their applications and supported smart home platforms.
For beginners, the process may seem straightforward: plug in a device, open an application, and connect it to the internet. However, smart home setup can sometimes involve unexpected challenges, including incompatible Wi-Fi bands, weak wireless signals, router security settings, and devices that refuse to complete pairing.
Understanding how these connections work can save time and prevent frustration.
Fortunately, most common connection problems can be avoided with a little preparation. By checking your network, following the correct pairing process, and learning a few basic troubleshooting techniques, you can build a smart home that works consistently.
This guide explains how to connect smart home devices to Wi-Fi, prepare your router, understand wireless compatibility, troubleshoot connection problems, and maintain reliable connectivity as your smart home expands.
The goal is not simply to get a device online once. It is to establish a dependable connection that supports everyday use over time.
1. Understand How Smart Home Devices Connect to Wi-Fi
Wi-Fi allows compatible smart home devices to communicate through a wireless network.
A typical home Wi-Fi setup includes three main components:
- Router or wireless access point: Provides the local wireless connection.
- Smart home device: Connects to the network using its supported wireless technology.
- Smartphone or controller: Helps configure and manage the device.
Many Wi-Fi smart devices communicate with their manufacturer’s cloud service to support remote access, notifications, and other connected features.
Others support local communication, allowing certain controls and automations to operate within the home network.
For example, a smart plug may connect to your router and receive commands through its application.
Depending on the product, those commands may travel through a local network connection or an internet-based service.
Understanding this distinction becomes useful when troubleshooting connection problems or internet outages.
2. Know Which Smart Home Devices Use Wi-Fi
Not every smart home device connects directly to Wi-Fi.
Common Wi-Fi-enabled products include:
- Smart plugs.
- Smart light bulbs.
- Smart cameras.
- Video doorbells.
- Smart speakers.
- Smart displays.
- Selected thermostats.
- Smart appliances.
- Wi-Fi-enabled air purifiers.
- Connected lighting controllers.
Other devices use technologies such as Zigbee, Thread, Z-Wave, or Bluetooth.
These products may communicate through a compatible hub, controller, or border router rather than connecting directly to your Wi-Fi network.
Before beginning setup, check the manufacturer’s specifications to confirm the device’s communication requirements.
Trying to connect a Zigbee-only sensor directly to a Wi-Fi router will not work.
3. Understand the Difference Between Wi-Fi and Internet Access
Wi-Fi and internet access are related, but they are not the same.
Wi-Fi creates a wireless connection between devices and a local network.
Internet access allows connected equipment to communicate with online services.
A smart home device may remain connected to your Wi-Fi network even when your internet service is temporarily unavailable.
Whether it continues functioning depends on its design.
| Connection Situation | Possible Device Behavior |
|---|---|
| Wi-Fi and internet available | Local and cloud-supported functions may operate |
| Wi-Fi available, internet unavailable | Supported local controls may continue working |
| Wi-Fi unavailable | Direct Wi-Fi communication is interrupted |
| Manufacturer cloud service unavailable | Cloud-dependent features may stop working |
| Router powered off | Devices depending on that router lose network connectivity |
Some smart devices require internet access during initial setup.
Others can be configured and operated locally.
Check the product documentation to understand which functions depend on external services.
4. Check Your Router Before Connecting Devices
A router is an important foundation of a Wi-Fi-based smart home.
Before installing devices, confirm that your router is working correctly.
Check the following:
- The router is powered on.
- Your internet connection is functioning if setup requires it.
- Your smartphone can connect to the intended Wi-Fi network.
- The router supports the wireless standards required by the device.
- The network uses compatible security settings.
- The signal reaches the installation location.
- The router has capacity for additional connected devices.
If your router frequently disconnects or requires repeated restarts, resolve those problems before adding more equipment.
A smart device cannot maintain a dependable connection through an unstable network.
5. Understand 2.4 GHz, 5 GHz, and 6 GHz Wi-Fi
Modern Wi-Fi networks may operate on different frequency bands.
The most common bands are 2.4 GHz and 5 GHz, while newer equipment may also support 6 GHz.
Each band has different characteristics.
| Wi-Fi Band | General Characteristics | Smart Home Considerations |
|---|---|---|
| 2.4 GHz | Broad compatibility and generally better penetration through obstacles | Commonly supported by smart plugs, bulbs, and sensors |
| 5 GHz | Higher potential throughput and typically more available channel capacity | Used by selected cameras, speakers, and other devices |
| 6 GHz | Additional spectrum for compatible newer equipment | Requires supported routers and devices; uncommon for basic IoT products |
Many inexpensive smart home devices support only 2.4 GHz Wi-Fi.
This is not necessarily a disadvantage.
Most smart bulbs and plugs transmit relatively small amounts of data, so they do not require high wireless speeds.
For these devices, coverage and connection stability are usually more important than maximum throughput.
6. Why Many Smart Devices Require 2.4 GHz Wi-Fi
The 2.4 GHz band is widely used in smart home products for several reasons.
It generally provides useful coverage over longer distances and through obstacles compared with higher-frequency bands under similar conditions.
It is also supported by many low-cost wireless chipsets.
Smart plugs, bulbs, and simple sensors often exchange only small amounts of information.
For example, turning a light on or off requires very little network bandwidth.
However, the 2.4 GHz band can experience interference from neighboring networks and certain household electronics.
Its performance depends on channel congestion, signal strength, router configuration, and the surrounding environment.
A 2.4 GHz connection is not automatically reliable simply because it has greater potential coverage.
7. Check Whether Your Router Uses One or Multiple Network Names
Some routers broadcast separate network names for different Wi-Fi bands.
For example:
- HomeNetwork-2.4G
- HomeNetwork-5G
Other routers use one network name for multiple bands.
This arrangement is often called band steering or a unified SSID configuration.
Both approaches can work with smart home devices.
However, certain setup applications may have difficulty discovering or configuring 2.4 GHz-only devices when the smartphone is connected through a different band.
If pairing fails, consult the device instructions.
Depending on your router and device, temporarily connecting your smartphone to a dedicated 2.4 GHz network or adjusting band-steering settings may help.
Do not permanently disable 5 GHz simply because one device requires 2.4 GHz.
8. Confirm Your Wi-Fi Network Name and Password
Before beginning installation, make sure you know the correct network name and password.
The network name is commonly called the SSID.
A smart home device needs the correct credentials to join a protected Wi-Fi network.
Common mistakes include:
- Selecting a neighboring network.
- Entering an outdated password.
- Confusing similar network names.
- Adding an extra space.
- Using the wrong uppercase or lowercase characters.
- Connecting to a guest network with restrictive settings.
Wi-Fi passwords are case-sensitive.
If you recently changed your router password, previously connected devices may need to be reconfigured.
Avoid repeatedly guessing passwords.
Confirm the correct credentials through your router settings or another trusted source.
9. Use Compatible Wi-Fi Security Settings
Wireless security protects your network from unauthorized access.
Modern routers commonly support WPA2 and WPA3 security.
However, older smart home devices may not support every security mode.
For example, a device designed for WPA2-Personal may fail to connect to a network configured for WPA3-only authentication.
For compatibility, review the device manufacturer’s requirements.
A WPA2-Personal network using AES encryption remains a common option for equipment that does not support WPA3.
Where appropriate, WPA3-Personal offers stronger modern protections for compatible devices.
Avoid outdated security modes such as WEP or WPA with TKIP.
Do not weaken the security of your entire household network merely to accommodate an unsupported device.
If necessary, consider a properly secured, compatible IoT network.
10. Position the Router for Better Smart Home Coverage
Router placement can affect connection reliability throughout your home.
For better coverage:
- Place the router in a reasonably central location.
- Avoid enclosing it inside a metal cabinet.
- Keep it away from large metal surfaces.
- Reduce unnecessary obstructions.
- Position it away from strong sources of interference where practical.
- Test the signal in rooms containing smart devices.
- Consider additional access points if coverage remains inadequate.
Wi-Fi signals can be weakened by walls, floors, furniture, and building materials.
Concrete walls and metal structures can be particularly challenging.
A router that provides excellent coverage in one room may perform poorly in another.
Test actual connection quality rather than relying only on the router’s advertised coverage area.
11. Prepare Your Smartphone for Device Setup
Many smart home devices use a smartphone application for initial configuration.
Before starting, prepare your phone.
Recommended steps include:
- Connect to the intended home Wi-Fi network.
- Enable Bluetooth if required.
- Allow local network access when necessary.
- Enable location permissions only when needed for setup or intended features.
- Install the manufacturer’s official application.
- Update the application.
- Keep the phone near the device during pairing.
Some applications use Bluetooth to discover nearby devices before transferring Wi-Fi credentials.
Others use a temporary Wi-Fi connection or QR code.
Permissions vary by operating system, device, and setup method.
Grant only the permissions needed for the functionality you intend to use.
12. Download the Correct Smart Home Application
Most smart devices include setup instructions identifying the required application.
Download it from an official application store or a verified manufacturer source.
Avoid unofficial applications with similar names.
Before creating an account, review:
- Whether registration is required.
- Whether local setup is available.
- The manufacturer’s privacy policy.
- Supported platforms.
- Subscription requirements.
- Available security features.
Some devices can be added directly to a compatible smart home platform.
Others require initial configuration through their manufacturer’s application.
Follow the instructions for your exact product model.
13. Understand Common Smart Device Pairing Methods
Smart home devices may use different methods to establish their first connection.
Bluetooth-assisted pairing
The application discovers the device through Bluetooth and helps configure its network connection.
Access Point pairing
The device temporarily creates its own Wi-Fi network.
Your phone connects to that network during setup, allowing the application to transfer configuration information.
QR code pairing
The application scans a code supplied with the device or displays a code that another device reads.
Platform-based commissioning
Certain devices use standardized onboarding procedures supported by compatible smart home platforms.
The exact steps vary.
Do not assume every smart device uses the same pairing process.
14. Connect a Smart Home Device to Wi-Fi Step by Step
The following procedure applies broadly to many Wi-Fi-enabled smart devices.
Step 1: Read the setup instructions
Check the device’s supported Wi-Fi bands, security requirements, and pairing method.
Step 2: Power on the device
Connect it to a suitable power source.
For mains-powered equipment, follow electrical safety instructions.
Step 3: Activate pairing mode
Use the manufacturer’s specified procedure.
This may involve holding a button or waiting for an indicator light to flash.
Step 4: Open the official application
Sign in if required and locate the option to add a device.
Step 5: Select the correct product
Choose the exact model or appropriate device category.
Step 6: Follow the discovery process
Allow necessary Bluetooth, local network, or other setup permissions.
Step 7: Select your Wi-Fi network
Choose the network supported by the device.
Step 8: Enter the password
Carefully enter the correct credentials.
Step 9: Wait for connection confirmation
Do not interrupt the process unless the application indicates a problem.
Step 10: Name the device
Choose a clear name such as “Living Room Lamp.”
Step 11: Update firmware
Install available updates according to the manufacturer’s instructions.
Step 12: Test operation
Confirm the device responds consistently through its supported controls.
If pairing fails, avoid repeatedly resetting everything. Identify the likely cause before trying again.
15. How to Connect a Smart Light Bulb to Wi-Fi
Smart bulbs are popular beginner devices because they can provide convenient lighting control.
A typical setup involves:
- Confirming the bulb matches the fixture’s electrical specifications.
- Turning off power before installing the bulb.
- Installing the bulb according to the instructions.
- Restoring power.
- Activating pairing mode if required.
- Opening the manufacturer’s application.
- Selecting the correct Wi-Fi network.
- Completing the pairing process.
- Testing brightness and on/off controls.
Some bulbs indicate pairing mode by flashing.
Others use a different light pattern.
Use the manufacturer’s instructions rather than repeatedly switching power on and off without guidance.
After installation, remember that many smart bulbs require continuous power to remain connected.
16. How to Connect a Smart Plug to Wi-Fi
Smart plugs are another practical starting point.
They allow compatible electrical equipment to be controlled through a connected outlet.
General setup steps include:
- Check the plug’s electrical rating and regional compatibility.
- Insert it into a suitable wall outlet.
- Activate pairing mode.
- Open the official application.
- Add the smart plug.
- Select the supported Wi-Fi network.
- Enter the network password.
- Complete setup.
- Test the plug using a low-risk compatible device.
Smart plugs should not be used with equipment that could become hazardous if powered unexpectedly.
Avoid exceeding their rated electrical capacity.
Do not use an ordinary smart plug to remotely operate unattended heating appliances or other equipment unsuitable for automatic switching.
17. How to Connect a Smart Camera to Wi-Fi
Smart cameras often require additional preparation because they may transmit video continuously or when motion is detected.
Before installation:
- Check Wi-Fi coverage at the camera location.
- Confirm power requirements.
- Review supported network bands.
- Check whether cloud storage is required.
- Understand privacy and recording settings.
During setup, the camera may scan a QR code displayed on your smartphone or use another manufacturer-supported pairing method.
After connection:
- Install firmware updates.
- Enable account security features.
- Review video recording settings.
- Configure motion notifications.
- Test live viewing.
- Confirm the camera remains connected at its final location.
Avoid installing cameras where they unnecessarily record private areas or neighboring property.
Follow applicable privacy laws and household expectations.
18. How to Connect a Smart Speaker to Wi-Fi
Smart speakers generally use a companion application for initial setup.
A typical process includes:
- Connecting the speaker to power.
- Installing the appropriate application.
- Signing in to the required account.
- Allowing device discovery.
- Selecting the home Wi-Fi network.
- Completing configuration.
- Testing supported voice or application controls.
Some speakers support both 2.4 GHz and 5 GHz networks.
Others have specific network requirements.
After installation, check privacy settings, microphone controls, and household access permissions.
If you plan to use the speaker to control other smart devices, verify that those devices support the same ecosystem or compatible integrations.
19. Understand Why Some Devices Need a Hub
Some smart home devices do not communicate directly with Wi-Fi routers.
Instead, they connect to a compatible hub or controller.
For example, a Zigbee sensor may communicate with a Zigbee hub.
The hub may then connect to your home network through Wi-Fi or Ethernet.
This creates a connection path such as:
Smart Sensor → Compatible Hub → Home Network → Supported Application
A Thread device may similarly require a compatible Thread border router for communication with other IP networks.
These devices should not be treated as ordinary Wi-Fi accessories.
Check the product’s protocol and controller requirements before attempting setup.
20. Understand Wi-Fi Compatibility With Matter Devices
Matter is an interoperability standard that helps supported smart home devices work across compatible platforms.
Some Matter devices use Wi-Fi as their network transport.
Others use Thread or Ethernet.
Matter devices also commonly use Bluetooth Low Energy during commissioning, depending on the product and setup process.
A Matter-over-Wi-Fi device generally needs compatible Wi-Fi infrastructure and a supported Matter controller.
A Matter-over-Thread device requires appropriate Thread network infrastructure, including a compatible border router.
Matter compatibility does not mean that every device can connect directly to Wi-Fi.
Always check the device’s supported transport and commissioning requirements.
21. Check Signal Strength at the Installation Location
A device may connect successfully near the router but become unreliable when moved to its intended location.
This often indicates weak wireless coverage.
Possible symptoms include:
- Frequent offline notifications.
- Slow response times.
- Failed camera streams.
- Repeated reconnection attempts.
- Intermittent automation failures.
Test connectivity where the device will actually operate.
For example, a camera mounted near an exterior wall may experience different signal conditions from a phone tested in the center of the room.
A smartphone Wi-Fi indicator can provide a rough indication of coverage, but it does not guarantee that a particular smart device will perform identically.
Device antennas, placement, interference, and radio capabilities also matter.
22. Reduce Wi-Fi Interference
Wireless interference can make smart home devices unreliable even when the signal appears strong.
Potential sources include:
- Neighboring Wi-Fi networks.
- Certain cordless electronics.
- Bluetooth activity.
- Microwave ovens.
- Some wireless accessories.
- Poorly positioned networking equipment.
For 2.4 GHz Wi-Fi, channel planning can help reduce interference.
Channels 1, 6, and 11 are commonly used as nonoverlapping 20 MHz channels in regions where those channels are permitted.
However, the best choice depends on local regulations and nearby network activity.
Automatic channel selection may work well with modern routers.
If problems persist, review channel congestion and router settings rather than changing channels randomly.
23. Understand Wi-Fi Channel Width
Channel width influences wireless performance and interference.
On the 2.4 GHz band, 20 MHz channel width is often a practical choice for smart home compatibility and coexistence.
Wider channels can increase overlap with neighboring networks.
For many low-bandwidth IoT devices, stability is more important than maximum speed.
However, router settings should reflect your network environment and device requirements.
Avoid making unnecessary changes to a functioning network.
If a device manufacturer recommends a specific configuration, verify that it is compatible with the rest of your equipment.
24. Check Router Device Limits and Capacity
Every router has practical limits.
These limits depend on hardware, firmware, wireless conditions, network traffic, and the behavior of connected devices.
A household with several smart bulbs and plugs may experience no difficulty.
A larger installation with numerous cameras, speakers, sensors, and other connected products places different demands on the network.
Video cameras generally generate more traffic than simple smart plugs.
If your network becomes unreliable as devices are added:
- Review connected device counts.
- Check router resource usage where available.
- Update router firmware.
- Evaluate wireless congestion.
- Consider additional access points.
- Upgrade networking equipment if necessary.
Do not assume a router’s advertised maximum device count guarantees identical performance under every workload.
25. Use a Mesh Wi-Fi System When Appropriate
Mesh Wi-Fi systems can help provide broader wireless coverage across larger homes.
They use multiple network nodes to distribute wireless access.
A mesh system may be useful when:
- Several rooms have weak coverage.
- Thick walls reduce signal strength.
- Devices are installed across multiple floors.
- Outdoor cameras struggle to maintain connectivity.
- A single router cannot cover the property effectively.
However, mesh systems are not automatically better in every situation.
Poor node placement or weak wireless backhaul can reduce performance.
Where practical, wired connections between access points can improve reliability.
Before purchasing new equipment, determine whether the existing router can be repositioned or supplemented with a properly configured access point.
26. Understand Guest Networks and IoT Networks
Some routers allow you to create a separate network for guests or smart home equipment.
This can help organize connected devices and limit certain forms of network access.
However, network separation requires planning.
Some smart home applications depend on local discovery protocols or direct communication between smartphones, controllers, and devices.
Strict client isolation may prevent these features from working.
For example, a phone on one isolated network may not discover a smart device on another.
If you create an IoT network:
- Use strong security settings.
- Understand the router’s isolation features.
- Verify required local communication.
- Test device discovery.
- Test automations and controller access.
- Avoid unnecessary access between network segments.
For beginners, a secure and reliable network is more important than implementing complex segmentation without understanding its effects.
27. Troubleshoot a Device That Cannot Find Wi-Fi
A smart device may fail to display your home network during setup.
Possible causes include:
- Unsupported Wi-Fi frequency band.
- Weak signal.
- Hidden network name.
- Incompatible security settings.
- Incorrect pairing mode.
- Router configuration restrictions.
- Device firmware limitations.
Try the following:
- Confirm the router is broadcasting a compatible network.
- Move the device closer to the router.
- Verify the required Wi-Fi band.
- Check whether the network name is hidden.
- Review security compatibility.
- Restart pairing mode.
- Update the setup application.
- Consult the manufacturer’s troubleshooting instructions.
Avoid changing several router settings simultaneously.
Make one adjustment, test the connection, and record the result.
28. Troubleshoot an Incorrect Wi-Fi Password Error
Password errors are common during initial setup.
First, verify that you selected the correct network.
Then:
- Reenter the password carefully.
- Check uppercase and lowercase letters.
- Remove accidental spaces.
- Confirm that the password has not changed.
- Verify that the device supports the network’s security mode.
- Check whether the setup application has stored outdated credentials.
Some devices display a generic connection error even when the password is correct.
In those cases, the underlying issue may involve security compatibility or another network setting.
Do not assume every authentication failure is caused by mistyping.
29. Fix a Smart Device That Keeps Disconnecting
Repeated disconnections can be frustrating because the device may work normally for a short time before going offline.
Possible causes include:
- Weak signal.
- Wireless interference.
- Router instability.
- Power interruptions.
- Firmware problems.
- Network congestion.
- Manufacturer cloud service interruptions.
A practical troubleshooting sequence is:
- Check whether other devices are affected.
- Confirm the smart device has stable power.
- Test its connection near the router when possible.
- Review router and device firmware.
- Check network interference.
- Review relevant router logs if available.
- Check the manufacturer’s service status.
- Contact support if the problem persists.
If several devices disconnect simultaneously, investigate the network before resetting each individual device.
30. Understand IP Addresses and DHCP
Devices connected to a home network usually receive local IP addresses.
These addresses help network equipment communicate with one another.
Most home routers use DHCP to assign addresses automatically.
For example, a smart plug might receive an address such as:
192.168.1.105
The exact address depends on your network configuration.
Beginners generally do not need to assign IP addresses manually.
However, DHCP problems or address conflicts can occasionally cause connection failures.
If a device repeatedly loses its network configuration, check the router’s DHCP settings and address availability.
A DHCP reservation may be useful for certain equipment, but it is not necessary for every smart bulb or plug.
31. Understand Why Devices Sometimes Appear Offline in an App
An application may report that a smart device is offline even when the device remains connected to Wi-Fi.
Possible explanations include:
- A cloud service outage.
- Application synchronization delays.
- Expired account authorization.
- Local network discovery problems.
- Device firmware errors.
- Internet connectivity issues.
- A genuinely disconnected device.
To identify the cause:
- Check whether the device appears in the router’s connected-device list.
- Test supported local controls.
- Confirm internet connectivity.
- Restart the application.
- Review account status.
- Check for service interruptions.
- Follow manufacturer troubleshooting guidance.
Avoid performing a factory reset before investigating simpler explanations.
Resetting may remove device settings and require rebuilding automations.
32. Know When to Restart, Re-Pair, or Reset a Device
These actions are not interchangeable.
| Action | What It Generally Does | When It May Help |
|---|---|---|
| Restart | Reboots the device without intentionally erasing settings | Temporary software or connection problems |
| Re-pair | Reestablishes the device’s connection to an application or controller | Lost pairing or changed network configuration |
| Factory reset | Restores the device to its default configuration | Persistent setup failures or ownership transfer |
The exact behavior varies by manufacturer.
A factory reset may remove network credentials, account associations, and automation settings.
Before resetting:
- Check the official instructions.
- Record important configuration details.
- Understand whether the device must be removed from an existing account.
- Confirm that resetting will not disrupt essential household functions.
Use a factory reset as a deliberate troubleshooting step rather than the first response to every connection problem.
33. Reconnect Smart Devices After Changing Your Wi-Fi Password
Changing your Wi-Fi password can disconnect smart devices that still use the old credentials.
Some products allow network credentials to be updated through their applications.
Others require the device to enter pairing mode again.
A practical process is:
- Confirm the new Wi-Fi network is functioning.
- Identify devices that have disconnected.
- Check whether each application supports changing network settings.
- Follow the manufacturer’s reconnection instructions.
- Re-pair devices when necessary.
- Verify device names and room assignments.
- Test automations after reconnection.
For a large smart home, changing the network password may require considerable setup work.
Plan network changes carefully.
34. Move Smart Home Devices to a New Router
Replacing a router does not always require rebuilding your entire smart home.
Some devices may reconnect automatically if the replacement network uses the same compatible SSID, password, and security configuration.
However, this is not guaranteed.
Other devices may require manual reconnection or re-pairing.
Before replacing the router:
- Record your existing network settings.
- Review device compatibility.
- Check whether the new router supports required wireless bands.
- Consider using the same network credentials where appropriate.
- Understand which devices depend on local controllers.
- Back up supported controller configurations.
After installation, test devices individually and verify important automations.
35. Keep Smart Home Devices Secure on Wi-Fi
Connected devices can introduce security risks if they are poorly maintained or configured.
Good security practices include:
- Use reputable manufacturers with clear update policies.
- Change default administrator passwords where applicable.
- Enable multifactor authentication for supported accounts.
- Keep device firmware updated.
- Use modern Wi-Fi encryption.
- Disable unnecessary remote access.
- Remove unused integrations.
- Review connected devices periodically.
- Avoid exposing device management interfaces directly to the internet.
Some devices require cloud connections for their intended functions.
Review these requirements before purchase.
Security is an ongoing process rather than a one-time setup task.
36. Protect Privacy When Connecting Cameras and Microphones
Devices with cameras or microphones deserve additional attention.
Before connecting them:
- Review what information is collected.
- Understand where recordings are stored.
- Check who can access live streams.
- Configure recording schedules.
- Enable account protection.
- Review notification and sharing settings.
- Consider physical privacy controls where available.
Avoid placing cameras in sensitive private spaces without a clear and appropriate purpose.
For shared households, communicate openly about monitoring equipment.
A reliable connection should not come at the expense of reasonable privacy.
37. Avoid Overloading Your Smart Home Network
Adding more devices does not always create a significant bandwidth problem.
Simple smart bulbs and plugs often transmit very little data.
However, multiple cameras, displays, and other bandwidth-intensive devices can increase network demand.
To maintain performance:
- Monitor overall network usage.
- Place high-bandwidth devices on appropriate supported bands.
- Use wired Ethernet for suitable stationary equipment.
- Avoid unnecessary video streaming.
- Check access point capacity.
- Expand wireless coverage when needed.
- Keep networking equipment updated.
Focus on actual network performance rather than the number of connected devices alone.
38. Test Smart Home Connections Before Creating Automations
A device should work reliably through manual controls before it becomes part of an automation.
For example, before scheduling a smart light:
- Turn it on through the application.
- Turn it off.
- Adjust brightness if supported.
- Repeat the test several times.
- Check its response from the intended location.
- Confirm that it remains connected.
- Test the automation afterward.
This helps separate connection problems from automation configuration errors.
If a device frequently goes offline, adding more routines will not solve the underlying connectivity issue.
39. Maintain Your Smart Home Wi-Fi Network
Regular maintenance helps keep connected devices dependable.
Weekly checks
- Confirm frequently used devices respond normally.
- Review offline notifications.
- Check cameras and other important connections.
- Investigate repeated disconnections.
Monthly checks
- Review router firmware updates.
- Check device software updates.
- Inspect connected-device lists.
- Review Wi-Fi coverage problems.
- Check account security settings.
- Remove obsolete integrations.
Periodic reviews
- Reassess router capacity.
- Review manufacturer support status.
- Test network recovery after ordinary interruptions.
- Check whether new devices require additional coverage.
- Evaluate whether your network configuration still meets household needs.
Maintenance does not need to be time-consuming.
Consistent checks can help prevent minor connectivity problems from becoming recurring disruptions.
40. Build a Reliable Smart Home Network for the Long Term
A dependable smart home begins with good networking fundamentals.
As your system grows, prioritize:
- Stable wireless coverage.
- Compatible communication standards.
- Secure router configuration.
- Clear device organization.
- Updated software.
- Practical troubleshooting habits.
- Appropriate local and cloud functionality.
- Manageable network complexity.
Avoid purchasing networking equipment solely because it promises faster speeds.
For many smart home devices, dependable coverage, compatibility, and consistent response times matter more than maximum internet speed.
The most effective network is one that supports your actual devices and household routines without unnecessary complexity.
Step-by-Step Guide: Connect Your First Smart Home Device to Wi-Fi
This practical walkthrough combines the essential setup steps into one beginner-friendly process.
Step 1: Identify the device’s connection requirements
Read the product documentation and confirm whether it uses Wi-Fi directly.
Check the supported frequency bands and security settings.
Step 2: Prepare your router
Make sure the router is powered on, functioning correctly, and broadcasting a compatible wireless network.
Step 3: Confirm your network credentials
Identify the correct SSID and password.
Step 4: Check signal strength
Test Wi-Fi coverage near the intended installation location.
Step 5: Prepare your smartphone
Connect to the appropriate network and enable necessary setup permissions.
Step 6: Install the official application
Download the correct application and complete any required account setup.
Step 7: Power on the smart device
Follow electrical and installation instructions.
Step 8: Activate pairing mode
Use the procedure specified by the manufacturer.
Step 9: Add the device
Open the application and follow its discovery or commissioning process.
Step 10: Enter Wi-Fi information
Select the supported network and provide the correct credentials.
Step 11: Wait for confirmation
Allow the setup process to complete without unnecessary interruptions.
Step 12: Assign a device name
Choose a clear, descriptive name.
Step 13: Update the device
Install available firmware updates.
Step 14: Test the connection
Verify that the device responds to supported controls.
Step 15: Check reliability
Use the device for several days and observe whether disconnections occur.
Step 16: Add compatible automations
Once the connection is stable, create simple routines that support everyday activities.
Practical Smart Home Wi-Fi Connection Checklist
Use this checklist whenever you install a new smart home device.
Before Installation
- Confirm the device uses Wi-Fi or identify its required hub.
- Check supported Wi-Fi frequency bands.
- Verify router compatibility.
- Confirm the network name and password.
- Check signal strength at the installation location.
- Review electrical and power requirements.
Router Preparation
- Confirm the router is functioning.
- Use compatible, secure Wi-Fi encryption.
- Check router firmware.
- Verify the required wireless band is available.
- Review network isolation settings if applicable.
- Check for obvious coverage problems.
Smartphone Preparation
- Connect to the intended Wi-Fi network.
- Install the official application.
- Enable required setup permissions.
- Enable Bluetooth if needed.
- Keep the phone near the device during pairing.
Device Connection
- Power on the device safely.
- Activate pairing mode.
- Select the correct product in the application.
- Enter the Wi-Fi credentials.
- Complete pairing.
- Assign a recognizable name.
- Install firmware updates.
Connection Testing
- Test basic device controls.
- Confirm the device remains connected.
- Check operation at its final location.
- Test supported local and remote functions.
- Verify important automations.
- Investigate recurring offline notifications.
Ongoing Security and Maintenance
- Use strong account passwords.
- Enable multifactor authentication where supported.
- Keep applications and firmware updated.
- Review connected devices periodically.
- Remove unused integrations.
- Recheck connectivity after router changes.
Frequently Asked Questions About Connecting Smart Home Devices to Wi-Fi
1. Why won’t my smart home device connect to Wi-Fi?
Common causes include unsupported Wi-Fi bands, incorrect passwords, weak signals, incompatible security settings, or pairing problems.
Check the device specifications and network configuration before performing a factory reset.
2. Do all smart home devices need 2.4 GHz Wi-Fi?
No.
Many smart plugs, bulbs, and sensors use 2.4 GHz, but other devices support 5 GHz or different communication technologies.
Always verify the exact product requirements.
3. Can a 2.4 GHz smart device work with a dual-band router?
Yes, provided the router offers a compatible 2.4 GHz network and the device supports its security configuration.
Some pairing applications may require additional setup steps when the router uses a unified network name.
4. Should I disable 5 GHz when connecting a smart device?
Usually not.
Some devices or setup applications may benefit from temporarily using a dedicated 2.4 GHz connection during pairing.
Follow manufacturer guidance rather than permanently disabling other Wi-Fi bands.
5. Can smart home devices connect to a guest Wi-Fi network?
Some can.
However, guest network isolation may prevent local discovery, controller communication, or certain automations.
Test compatibility before relying on a guest network for your smart home.
6. Do smart home devices need fast internet?
Many simple smart devices require very little bandwidth.
Cameras and video-enabled equipment may need substantially more.
Connection stability and adequate wireless coverage are often more important than maximum internet speed.
7. Can smart home devices work without internet access?
Some support local control and automation without an active internet connection.
Others rely on cloud services.
Check the manufacturer’s documentation for offline functionality.
8. Why does my smart bulb keep going offline?
Possible causes include weak Wi-Fi, interference, power interruptions, router problems, or firmware issues.
Also check whether the wall switch is cutting power to the bulb.
9. Can I connect smart home devices to a mesh Wi-Fi system?
Yes, if the mesh system provides the wireless bands and security settings required by the devices.
Some pairing procedures may require special attention to band steering or network isolation.
10. What happens if I change my Wi-Fi password?
Devices using the old password may disconnect.
Depending on the product, you may need to update network settings or repeat pairing.
11. Will my smart devices reconnect automatically after replacing the router?
Some may reconnect if the new router uses the same compatible network name, password, and security settings.
Others require manual setup.
Automatic reconnection is not guaranteed.
12. How many smart home devices can one router support?
The practical number depends on the router, wireless conditions, connected device behavior, and network traffic.
There is no universal number that applies to every home network.
13. Is it safe to connect smart home devices to my main Wi-Fi network?
It can be a practical option when the router is properly secured and devices are maintained.
Separate IoT networks may provide additional isolation, but they require compatible configuration.
14. Why does a device show as offline even when Wi-Fi works?
The device may be experiencing a cloud service issue, application problem, firmware error, or local communication failure.
Check whether it remains connected to the router before resetting it.
15. What should I do if a smart device still cannot connect after troubleshooting?
Review the manufacturer’s official support information and verify compatibility with your router.
If the device consistently fails on a known-working compatible network, contact the manufacturer or retailer for assistance.
Avoid weakening network security or making extensive router changes solely to accommodate an unreliable device.
Final Thoughts
Connecting smart home devices to Wi-Fi is a foundational skill for building a reliable connected home.
Although most devices are designed for straightforward installation, successful setup depends on more than entering a wireless password.
Understanding Wi-Fi bands, router compatibility, security settings, pairing methods, and signal coverage can help prevent common connection problems.
For beginners, the best approach is to install one device at a time, verify that it works reliably, and expand gradually.
When connection problems occur, troubleshoot systematically. Check network compatibility, signal quality, power, and application settings before performing unnecessary resets.
As your smart home grows, regular firmware updates, secure account management, and thoughtful network planning will help maintain dependable performance.
You do not need advanced networking knowledge to create a functional smart home. A clear understanding of the basics and a consistent setup process can make connected technology easier to manage.
A reliable smart home starts with a stable, secure, and compatible Wi-Fi connection—and becomes more useful when every connected device works consistently with your everyday routines.