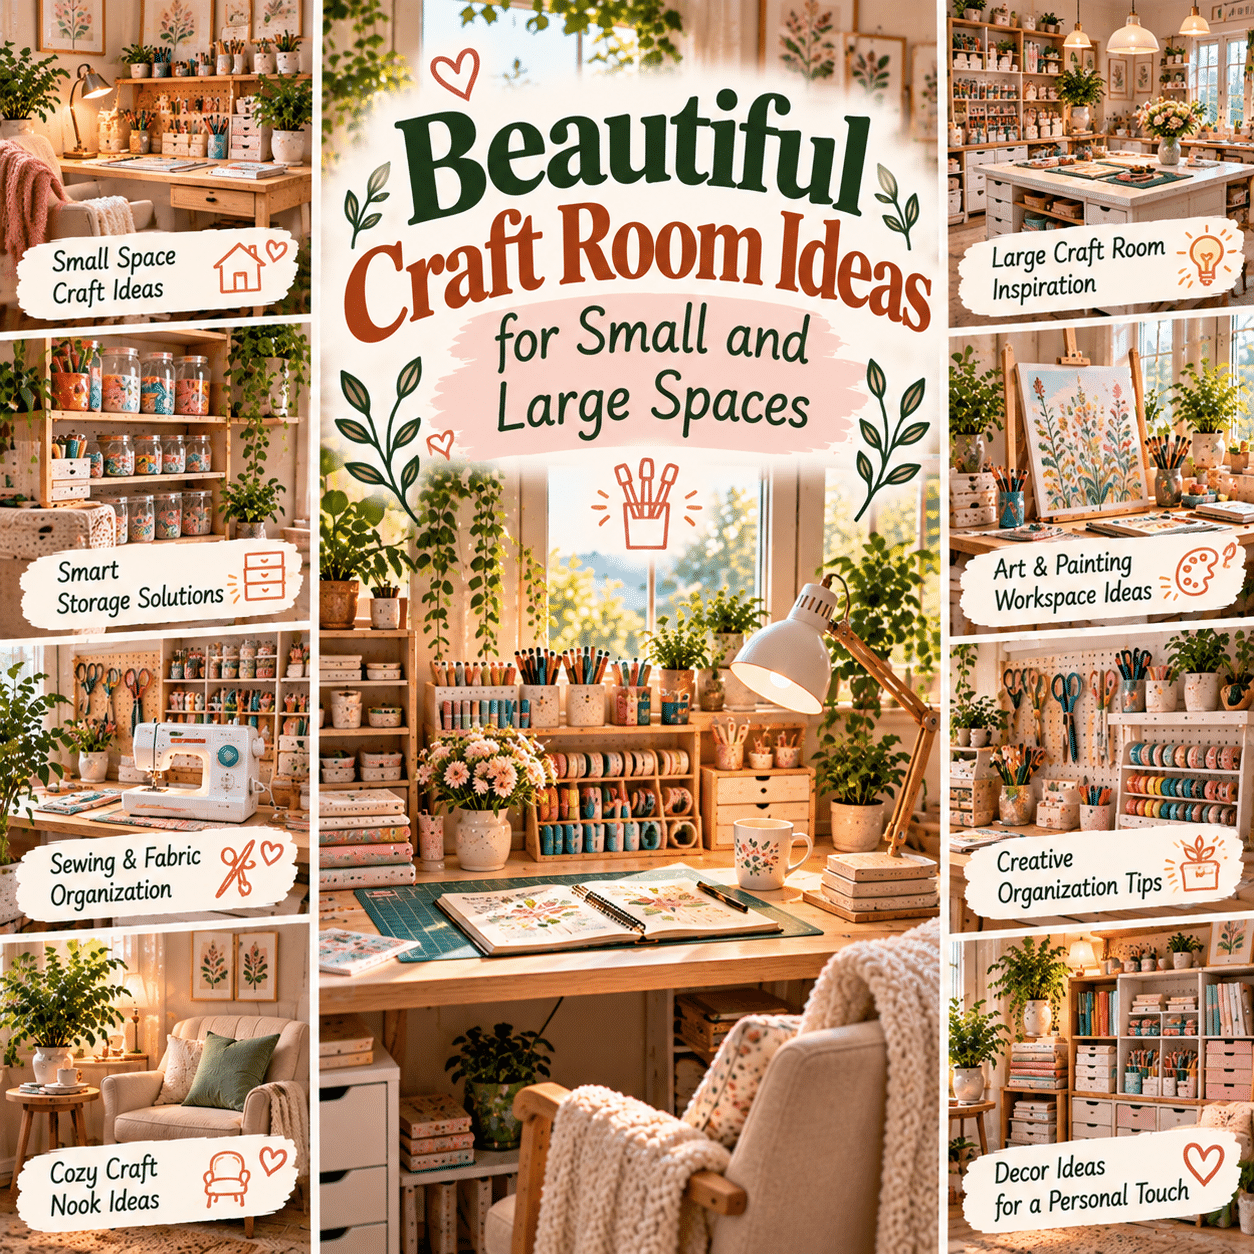
A beautiful craft room is more than a place to keep scissors, paintbrushes, fabric, and creative supplies. It is a personal space where imagination becomes something tangible, everyday ideas turn into handmade projects, and creative hobbies become easier to enjoy.
Whether you love sewing, painting, scrapbooking, knitting, drawing, jewelry making, paper crafting, or DIY home decoration, having an organized and comfortable workspace can make a meaningful difference to your creative experience.
The wonderful thing about designing a craft room is that creativity does not depend on square footage.
A small corner of a bedroom can become a charming art station. A spare closet can be transformed into a compact crafting nook. A dining room cabinet can hold a portable creative studio. Meanwhile, a larger room can accommodate dedicated worktables, organized supply walls, comfortable seating, and separate areas for different hobbies.
The goal is not simply to create a beautiful room that looks impressive in photographs. A successful craft space should make everyday projects more convenient, keep materials easy to find, provide suitable lighting, and support safe, comfortable work.
Thoughtful storage, flexible furniture, attractive color combinations, and personal decorative touches can help create an environment that feels both inspiring and practical.
This guide explores beautiful craft room ideas for small and large spaces, including clever storage solutions, creative layouts, cozy decorating styles, multifunctional furniture, specialized hobby stations, and simple ways to design a workspace that grows with your interests.
1. Start by Understanding Your Creative Needs
Before choosing furniture or decorating a craft room, think about the activities you enjoy most.
Different creative hobbies require different working arrangements.
A person who enjoys watercolor painting may need a stable table, good lighting, and a place to dry artwork. Someone who loves sewing may benefit from a dedicated machine station and fabric-cutting surface. A jewelry maker may require bright task lighting and organized compartments for small components.
Common craft room activities include:
- Sewing and quilting.
- Drawing and sketching.
- Watercolor and acrylic painting.
- Knitting and crocheting.
- Scrapbooking and memory keeping.
- Card making and paper crafts.
- Jewelry making.
- Embroidery and cross-stitch.
- Calligraphy and lettering.
- DIY home decoration.
- Clay modeling.
- Mixed-media artwork.
Identify Your Most Important Activities
List the crafts you practice regularly.
Consider which tools you use, how much space your projects require, and whether you need specialized equipment.
For example, a small desk may work perfectly for lettering but feel restrictive when cutting large pieces of fabric.
Designing around your actual creative habits helps prevent unnecessary purchases.
2. Choose the Right Location for Your Craft Room
A craft room can be located almost anywhere that offers suitable working conditions.
Possible locations include:
- A spare bedroom.
- A home office.
- A living room corner.
- A bedroom alcove.
- A dining area.
- A converted closet.
- A sheltered sunroom.
- A dedicated studio.
- A suitable garage workspace.
Consider Practical Conditions
Before selecting a location, evaluate:
- Natural light.
- Electrical outlets.
- Ventilation.
- Available floor space.
- Noise.
- Storage possibilities.
- Ease of cleaning.
- Access to household facilities.
Activities involving fumes, fine dust, heat, or power tools may require a separate, properly equipped work area rather than a bedroom or shared living space.
A convenient location is important, but safety and suitability should always come first.
3. Create a Small Craft Corner in Your Bedroom
A bedroom corner can become a welcoming creative station with just a few essentials.
Choose a compact desk and a comfortable chair.
Add an adjustable task lamp and a small organizer for frequently used supplies.
Keep the Design Light and Simple
A small craft corner might feature:
- A narrow wooden desk.
- A wall-mounted pegboard.
- A compact rolling cart.
- A neutral chair.
- A framed botanical print.
- Small labeled storage boxes.
Choose furniture that fits comfortably without blocking wardrobe doors or walking paths.
Keep Bedroom Activities Separate
If your hobbies involve messy materials, protect the desk and nearby furnishings.
Store paints, adhesives, and sharp tools securely.
Avoid using a bedroom for activities that require specialized ventilation or create hazardous dust.
4. Transform an Unused Closet into a Craft Nook
A closet can become a compact craft station when its dimensions and construction allow.
This arrangement is sometimes called a cloffice when a closet is adapted into a small office or creative workspace.
Remove unnecessary shelving only when doing so is safe and permitted.
Install an appropriately supported work surface and practical storage.
Make Every Inch Useful
Consider:
- Narrow shelves.
- Small drawers.
- Pegboards.
- Wall organizers.
- Under-desk storage.
- Compact task lighting.
Plan for Comfortable Use
Check legroom, chair clearance, lighting, and airflow.
Do not block ventilation or electrical access.
If the closet is too narrow for comfortable seating, it may work better as a craft supply cabinet than a workstation.
5. Design a Craft Space Under a Staircase
An under-stair area can offer useful storage or a compact creative nook.
Its unusual shape may accommodate a custom desk, drawers, or shelves.
Work with the Available Height
Place taller storage in areas with sufficient clearance.
Use lower sections for boxes or drawers.
Avoid placing seating where headroom is inadequate.
Ensure lighting, ventilation, and access remain suitable.
A thoughtfully designed under-stair craft area can make use of space that might otherwise remain empty.
6. Create a Portable Craft Station for Small Homes
Not every home has room for permanent craft furniture.
A portable station allows you to enjoy creative activities at a dining table, living room desk, or other suitable surface.
Use a sturdy box, storage tote, or rolling cart.
Organize by Project
Keep supplies for each hobby together.
For example, a portable card-making kit might contain:
- Decorative paper.
- Scissors.
- Adhesive.
- Stamps.
- Ink pads.
- Ribbons.
- Blank cards.
Choose containers that are easy to move and secure when stored.
A portable setup makes creativity possible without dedicating an entire room to crafting.
7. Use a Fold-Down Desk in a Compact Craft Room
A wall-mounted fold-down desk can provide a temporary work surface.
When not in use, it folds away to free floor space.
This can be useful in small apartments and multipurpose rooms.
Check Installation Requirements
The desk must be securely mounted to suitable structural support.
Follow the manufacturer’s load limits.
Avoid placing heavy cutting machines or other equipment on surfaces not designed to support them.
A fold-down desk works particularly well for lightweight activities such as journaling, drawing, and simple paper crafts.
8. Make a Craft Room Feel Larger with Light Colors
Color can influence how spacious a room appears.
Light-colored walls and furniture often create a visually open atmosphere, particularly when combined with good lighting.
Consider:
- Warm white.
- Cream.
- Pale beige.
- Soft gray.
- Sage green.
- Powder blue.
- Gentle blush.
- Light natural wood.
Add Color Through Accessories
If you enjoy bright colors, introduce them through storage containers, artwork, cushions, and stationery.
This creates personality without overwhelming a small room.
However, dark colors can also look beautiful when used thoughtfully. Personal preference matters more than following a strict decorating rule.
9. Use Vertical Storage to Save Floor Space
Vertical organization is especially valuable in small craft rooms.
Instead of placing numerous storage boxes on the floor, use suitable wall-mounted systems.
Ideas include:
- Floating shelves.
- Pegboards.
- Wall cabinets.
- Hanging organizers.
- Narrow bookcases.
- Rail systems.
- Wall-mounted tool holders.
Arrange Supplies by Weight
Store heavier materials on secure lower shelves.
Keep lightweight items higher when appropriate.
Use suitable anchors and follow weight limits.
Avoid placing unstable or heavy objects above frequently occupied seating areas.
10. Create a Pegboard Craft Supply Wall
A pegboard can be both a practical organizer and a decorative feature.
It allows you to display tools while keeping them accessible.
Possible items include:
- Scissors.
- Rulers.
- Measuring tapes.
- Lightweight baskets.
- Thread holders.
- Small craft tools.
- Washi tape organizers.
Organize by Frequency of Use
Place everyday tools within easy reach.
Store occasional supplies in drawers or cabinets.
A pegboard does not need to hold everything.
A combination of visible and concealed storage often creates a more balanced appearance.
11. Add a Rolling Cart for Flexible Storage
A rolling cart is one of the most versatile accessories for a craft space.
It can hold supplies beside a desk and move out of the way when additional floor space is needed.
Try a Three-Tier Arrangement
Top tier: Frequently used tools and current project supplies.
Middle tier: Paints, paper accessories, or yarn.
Bottom tier: Extra materials and heavier containers.
Choose a cart with suitable load capacity.
Use wheel locks where appropriate and keep heavier items on lower levels.
12. Choose a Multifunctional Craft Table
A multifunctional table can support several hobbies.
Look for a sturdy, easy-to-clean surface with enough space for your typical projects.
Some tables include drawers, adjustable heights, or folding extensions.
Match the Table to Your Activities
A seated desk height may be suitable for drawing and detailed handwork.
A higher work surface may be more comfortable for certain fabric-cutting and assembly tasks.
Consider whether adjustable furniture would genuinely improve your workflow.
The most expensive table is not necessarily the most useful one.
13. Create a Spacious Central Worktable
In a larger craft room, a central table can become the main working area.
It provides room for spreading out materials, assembling projects, and collaborating with others.
Leave Enough Clearance
Before choosing a large table, measure the room.
Allow sufficient space for:
- Chairs.
- Drawers.
- Cabinet doors.
- Walking paths.
- Moving materials.
- Accessing nearby storage.
A large table should improve the room’s functionality rather than dominate it.
14. Design a Craft Room with Separate Activity Zones
Larger craft rooms can benefit from dedicated zones.
Possible areas include:
- Main crafting.
- Cutting and measuring.
- Sewing.
- Painting.
- Supply storage.
- Drying artwork.
- Photography.
- Packing finished projects.
Organize the Workflow
Place related activities near one another.
For example, a sewing machine, fabric storage, and cutting table can form a convenient sewing zone.
A painting area may benefit from nearby water access and suitable cleanup facilities.
Avoid arranging equipment solely for visual symmetry if it creates inconvenient movement between tasks.
15. Create a Beautiful Sewing and Quilting Studio
A sewing room can combine practical equipment with attractive fabric displays.
Consider:
- A stable sewing machine table.
- A cutting surface.
- Thread storage.
- Fabric shelves.
- Pattern organizers.
- Comfortable seating.
- Suitable task lighting.
Organize Fabric by Category
You might group fabric by:
- Color.
- Material.
- Project.
- Pattern.
- Frequency of use.
Protect fabrics from moisture and prolonged direct sunlight.
Keep Tools Secure
Store needles, pins, rotary cutters, and scissors in designated locations.
Use blade covers and follow equipment instructions.
16. Build a Cozy Knitting and Crochet Corner
Knitting and crochet often require less tabletop space than other crafts.
A comfortable chair, good lighting, and organized yarn storage may be sufficient.
Create a Comfortable Seating Area
Consider adding:
- A supportive armchair.
- A small side table.
- A yarn basket.
- A reading lamp.
- A soft cushion.
- A nearby shelf.
Keep yarn away from moisture, dust, and pets that may chew or swallow loose strands.
17. Design an Inspiring Painting Studio
A painting studio can be arranged around a desk, easel, or both.
The ideal setup depends on your preferred medium.
Organize Painting Supplies
Useful features may include:
- Brush holders.
- Paint storage.
- Canvas racks.
- Paper drawers.
- Protective work mats.
- Suitable lighting.
- Drying space.
Plan for Safe Material Handling
Watercolor, acrylic, oil, and other media have different requirements.
Follow product labels for ventilation, storage, cleanup, and disposal.
Some solvents, pigments, sprays, and mediums require additional precautions.
Keep food and beverages separate from potentially hazardous materials.
18. Create a Watercolor and Illustration Corner
Watercolor painting and illustration can fit comfortably into a compact room.
Choose a stable table with enough room for paper, brushes, palettes, and water containers.
Keep the Work Area Organized
Place supplies so they are convenient without crowding the painting surface.
Use a protective mat.
Provide a safe place for artwork to dry.
Store paper flat and away from moisture.
An organized watercolor station can feel both artistic and visually peaceful.
19. Build a Scrapbooking and Paper Craft Room
Scrapbooking and paper crafting often involve large collections of relatively small materials.
Practical storage is essential.
Consider:
- Paper racks.
- Sticker folders.
- Drawer organizers.
- Cutting mats.
- Stamp storage.
- Ribbon holders.
- Portable project trays.
Keep Paper Easy to Access
Store paper according to size, color, or type.
Avoid bending delicate sheets.
Protect important photographs and keepsakes with appropriate storage materials.
20. Create a Jewelry-Making Craft Station
Jewelry making requires careful organization because many components are small.
A dedicated table with good task lighting can make detailed work more convenient.
Use Compartment Storage
Separate:
- Beads.
- Clasps.
- Findings.
- Wire.
- Chains.
- Tools.
- Unfinished pieces.
A work mat or tray with raised edges can help contain small components.
If projects involve soldering, resin, polishing dust, or chemicals, follow material-specific safety requirements.
21. Design a Clay and Pottery Work Area
Clay crafting can require a durable surface and careful cleanup.
Different types of clay have different handling requirements.
Choose Suitable Surfaces
Use a stable worktable and protective covering appropriate for the material.
Provide storage for tools and unfinished projects.
Control Dust and Follow Material Instructions
Traditional ceramic clay can generate fine dust containing respirable crystalline silica.
Avoid dry sweeping or brushing accumulated clay dust into the air.
Use appropriate wet-cleaning methods and other recommended controls.
Kiln firing requires suitable equipment, ventilation, and installation.
Polymer clay and other specialty materials must be handled and cured according to their manufacturers’ instructions.
22. Create a DIY Home Decor Workshop
DIY decoration projects may involve wood, fabric, paint, adhesives, and assembly tools.
A durable workbench can provide a practical foundation.
Separate Light Crafts from Workshop Activities
Lightweight decorating projects may be suitable for an indoor craft room.
However, sanding, sawing, spray painting, and other activities that create dust, fumes, noise, or heat may require a properly equipped workshop.
Choose the location and protective equipment according to the actual hazards.
23. Use Transparent Storage Containers
Clear containers make supplies easy to identify.
They are especially useful for small items such as:
- Buttons.
- Beads.
- Clips.
- Stickers.
- Decorative embellishments.
- Thread accessories.
- Craft hardware.
Choose Consistent Sizes
A limited range of container sizes can make shelves and drawers easier to organize.
Use labels when contents are difficult to distinguish.
Do not store hazardous chemicals in unlabeled decorative containers.
24. Add Drawer Dividers for Small Tools
Drawers can become disorganized when supplies are placed loosely inside.
Dividers help separate materials.
Use them for:
- Pens.
- Pencils.
- Erasers.
- Cutting tools.
- Measuring accessories.
- Stamps.
- Sewing notions.
Keep Everyday Tools Accessible
Place frequently used items in upper drawers.
Store occasional supplies farther away.
Choose an arrangement that is easy to maintain rather than excessively detailed.
25. Use Open Shelves as a Decorative Feature
Craft supplies can become part of the room’s visual design.
Neatly arranged yarn, colorful paper, and attractive containers may create a cheerful display.
Balance Open and Closed Storage
Open shelves are best for items that are attractive, frequently used, and appropriate for exposed storage.
Closed cabinets protect materials from dust and visual clutter.
A mixture of both often works well.
26. Create a Color-Coordinated Craft Room
A coordinated palette can make a busy creative space feel more harmonious.
Choose one dominant color, one supporting color, and a few accents.
For example:
- Cream furniture.
- Sage green storage.
- Natural wood details.
- Terracotta accessories.
Organize Supplies by Color When Useful
Color organization can be particularly convenient for yarn, markers, and decorative paper.
However, technical materials may be easier to organize by type or function.
Choose whichever method helps you find supplies quickly.
27. Design a Scandinavian-Inspired Craft Room
Scandinavian-inspired craft spaces often feature light wood, neutral colors, simple furniture, and practical organization.
Consider:
- Pale wooden tables.
- White shelving.
- Neutral storage boxes.
- Soft textiles.
- Simple lighting.
- Minimal wall art.
Introduce Texture
Woven baskets, cotton cushions, and wooden accessories can add warmth.
The room should feel welcoming without becoming overcrowded.
28. Create a Charming Cottage-Inspired Craft Room
A cottage-inspired craft room can feature floral details, gentle colors, and traditional furniture.
Consider:
- Cream cabinets.
- Wooden drawers.
- Floral cushions.
- Woven baskets.
- Vintage-inspired lamps.
- Botanical artwork.
Combine Beauty with Practicality
Decorative details should not interfere with the work surface.
Use washable or easy-to-maintain textiles where crafting materials may create spills.
29. Explore a Colorful Bohemian Craft Room
A bohemian-inspired craft space may combine patterns, natural textures, and personal artwork.
Consider:
- Colorful rugs.
- Woven baskets.
- Eclectic artwork.
- Wooden furniture.
- Patterned cushions.
- Handmade decorations.
Maintain Visual Balance
Choose a few recurring colors to connect the different elements.
Keep the main crafting surface relatively clear.
A creative room can be expressive without feeling chaotic.
30. Design a Modern Minimalist Craft Studio
A modern minimalist craft room focuses on clean lines, simple furniture, and concealed storage.
Possible features include:
- A streamlined desk.
- Built-in cabinets.
- Neutral drawers.
- Adjustable lighting.
- Minimal artwork.
- Clear work surfaces.
Avoid Sacrificing Convenience
Frequently used tools should remain accessible.
The goal is not to hide every object, but to reduce unnecessary visual clutter.
31. Create a Botanical Craft Room
A botanical theme can make a craft space feel connected to nature.
Combine:
- Sage green accents.
- Light wood furniture.
- Botanical prints.
- Woven organizers.
- Natural textiles.
- Suitable indoor plants.
Protect Supplies from Water
Keep planters away from paper, fabric, and electrical equipment.
Use stable containers and protective trays.
Choose plants appropriate for available light and household safety.
32. Add an Inspiration Wall
An inspiration wall can help display creative ideas and works in progress.
Use a corkboard, magnetic board, or suitable display panel.
Possible contents include:
- Color palettes.
- Sketches.
- Fabric samples.
- Project photographs.
- Design references.
- Personal artwork.
- Creative prompts.
Refresh the Display Regularly
Remove outdated references and make room for new ideas.
An inspiration wall should support creativity, not become another storage problem.
33. Display Finished Handmade Projects
Completed projects can give a craft room personality.
Consider displaying:
- Framed paintings.
- Embroidery pieces.
- Handmade ceramics.
- Decorative paper crafts.
- Small sculptures.
- Finished quilts.
- Personal illustrations.
Create a Rotating Gallery
Instead of displaying every project at once, select a few favorites.
Rotate them periodically.
This keeps the room visually fresh while protecting delicate work from overcrowding.
34. Add a Comfortable Relaxation Corner
A large craft room may have enough space for a small seating area.
This can provide a place to read patterns, sketch ideas, or take breaks.
Consider:
- A comfortable armchair.
- A small side table.
- A reading lamp.
- A bookshelf.
- A soft rug.
Keep Relaxation Areas Separate from Hazardous Work
Avoid placing upholstered seating near activities that generate significant dust, fumes, or sparks.
A cozy seating corner should remain clean and comfortable.
35. Design a Craft Room for Shared Family Activities
A family craft room can support different interests and age groups.
A central table may provide a shared working surface.
Individual storage boxes can keep personal supplies organized.
Plan for Safety
Keep sharp tools, chemicals, small choking hazards, and heated equipment securely stored.
Use age-appropriate materials.
Provide suitable supervision for children.
Washable surfaces and clear cleanup routines can make shared creativity easier.
36. Create a Craft Room That Doubles as a Home Office
A craft room and home office can share space when activities are organized thoughtfully.
Consider separate zones for computer work and hands-on crafting.
Protect Electronics
Keep liquids, paint, adhesives, and cutting tools away from computers and charging equipment.
Use drawers or cabinets to store supplies when switching between activities.
A flexible layout can support both productivity and creativity.
37. Add a Photography Corner for Finished Crafts
If you enjoy photographing your handmade projects, a small photography area can be useful.
Choose a clean background and suitable lighting.
Possible accessories include:
- A neutral backdrop.
- A small table.
- Reflective cards.
- Adjustable lights.
- Simple display stands.
Use Consistent Lighting
Consistent illumination helps maintain a cohesive appearance across project photographs.
Avoid harsh glare on glossy surfaces.
Keep electrical equipment away from water and other crafting materials.
38. Make Your Craft Room Comfortable for Long Sessions
Creative activities may involve extended periods of sitting, standing, or repetitive hand movements.
Thoughtful furniture arrangement can improve comfort.
Consider:
- Supportive seating.
- Suitable desk height.
- Adjustable lighting.
- Comfortable foot positioning.
- Convenient tool placement.
- Clear walking paths.
Take Movement Breaks
Change posture periodically.
Avoid remaining in uncomfortable positions for long periods.
If an activity repeatedly causes discomfort, adjust the workstation or seek appropriate professional guidance.
39. Improve Lighting for Detailed Craft Work
Lighting is essential for tasks such as sewing, painting, embroidery, and jewelry making.
A combination of general room lighting and adjustable task lighting is often useful.
Consider Color Accuracy
For color-sensitive work, lighting with good color rendering can help you evaluate materials more consistently.
Reduce Shadows
Position lamps according to the activity and your dominant hand.
Avoid placing lights where they produce distracting reflections or glare.
40. Create a Craft Room That Can Evolve Over Time
Creative interests naturally change.
You may begin with drawing and later explore sewing, pottery, or paper crafting.
A flexible room can accommodate new activities without requiring a complete redesign.
Choose Adaptable Furniture
Consider:
- Modular shelves.
- Movable carts.
- Adjustable tables.
- Stackable containers.
- Portable project boxes.
- Reconfigurable drawer systems.
Avoid Overbuying Equipment
Start with the tools and storage you genuinely need.
Expand gradually as your interests develop.
A beautiful craft room is one that continues to work for you over time.
How to Design a Beautiful Craft Room Step by Step
Creating a craft room becomes easier when you approach the project systematically.
Step 1: List Your Main Hobbies
Identify your most frequent creative activities.
Record the tools, materials, and work surfaces required.
Step 2: Evaluate Your Available Space
Measure the room or corner.
Consider doors, windows, electrical outlets, ventilation, and existing furniture.
Step 3: Establish Your Budget
Separate essential purchases from decorative upgrades.
Prioritize a stable work surface, comfortable seating, lighting, and appropriate storage.
Step 4: Choose a Functional Layout
Arrange furniture to support convenient movement and project workflows.
Keep walkways and access points clear.
Step 5: Select Your Main Worktable
Choose a table that suits the size and type of projects you typically create.
Protect the surface appropriately.
Step 6: Organize Storage by Frequency of Use
Keep everyday tools nearby.
Store occasional materials in labeled drawers, cabinets, or boxes.
Step 7: Improve Lighting and Ventilation
Provide suitable task lighting.
Address the specific ventilation requirements of your craft materials.
Step 8: Choose a Cohesive Decorating Style
Select colors and materials that feel inspiring.
Use existing furniture where practical.
Step 9: Add Personal Creative Details
Display artwork, inspiration boards, or meaningful handmade objects.
Keep the main work area functional.
Step 10: Test the Space with Real Projects
Complete several typical activities.
Notice whether tools are easy to find, surfaces are large enough, and cleanup is manageable.
Adjust the arrangement before purchasing additional furniture.
Craft Room Layout Ideas for Different Space Sizes
| Space Type | Suggested Layout | Best Features |
|---|---|---|
| Small bedroom corner | Narrow desk and wall organizer | Compact storage |
| Closet craft nook | Fold-down surface and shelves | Concealed workspace |
| Living room corner | Portable cart and multipurpose table | Easy setup and cleanup |
| Small spare room | Desk along one wall with vertical storage | Efficient floor use |
| Medium craft room | Main worktable with separate supply shelves | Flexible crafting |
| Large craft room | Central island with activity zones | Multiple workstations |
| Shared family room | Large table with individual storage | Collaborative projects |
| Home office combination | Computer desk and separate craft surface | Organized dual-purpose use |
| Dedicated studio | Specialized stations and material storage | Advanced creative workflows |
The best layout is the one that fits your activities and allows comfortable movement.
Craft Room Storage Solutions Compared
| Storage Solution | Best For | Important Consideration |
|---|---|---|
| Pegboard | Lightweight tools | Secure mounting |
| Rolling cart | Frequently used supplies | Stability and load capacity |
| Clear containers | Small craft materials | Labels and secure lids |
| Drawer dividers | Pens, tools, accessories | Suitable compartment sizes |
| Open shelves | Attractive, accessible supplies | Dust and sunlight exposure |
| Closed cabinets | Bulky or visually cluttered items | Easy access |
| Vertical paper racks | Paper and cardstock | Protection from bending |
| Fabric drawers | Sewing materials | Moisture control |
| Project boxes | Unfinished work | Clear labeling |
| Modular shelving | Growing collections | Structural stability |
A combination of storage types usually works better than relying on one system for everything.
Beautiful Craft Room Color Palette Ideas
| Style | Main Colors | Suggested Materials |
|---|---|---|
| Soft Botanical | Sage green, cream, beige | Light wood, woven baskets |
| Warm Scandinavian | White, oak, taupe | Pale wood, cotton textiles |
| Creative Pastel | Blush, lavender, pale blue | Painted storage, soft fabrics |
| Modern Neutral | Warm gray, ivory, charcoal | Metal, wood, ceramic |
| Cottage-Inspired | Cream, dusty rose, muted green | Floral textiles, wood |
| Cheerful Colorful | Coral, teal, mustard | Bright accessories, neutral furniture |
| Earthy Artisan | Terracotta, olive, sand | Natural wood, linen |
| Minimalist Studio | White, beige, light gray | Smooth finishes, concealed storage |
Use these combinations as inspiration rather than strict decorating rules.
Budget-Friendly Craft Room Improvements
A functional craft room can be created gradually.
| Element | Affordable Approach | Optional Upgrade |
|---|---|---|
| Worktable | Existing sturdy desk | Adjustable craft table |
| Seating | Comfortable household chair | Ergonomic task chair |
| Storage | Reused boxes and jars | Modular drawer cabinets |
| Wall organization | Basic hooks and shelves | Full pegboard system |
| Lighting | Existing adjustable lamp | High-quality task lighting |
| Project organization | Labeled containers | Dedicated project drawers |
| Supply transport | Portable tote | Rolling craft cart |
| Decoration | Handmade artwork | Coordinated gallery wall |
| Surface protection | Appropriate craft mat | Specialized work surface |
| Display | Simple shelves | Custom display cabinets |
Spend first on improvements that make your favorite hobbies easier and safer.
A Practical Craft Room Organization System
A simple organization system can keep your workspace functional even as your supply collection grows.
Zone 1: Everyday Essentials
Store frequently used tools within easy reach.
Examples include scissors, pencils, rulers, and basic adhesives.
Zone 2: Current Projects
Keep unfinished projects in labeled boxes or trays.
Include all necessary materials whenever practical.
Zone 3: Extra Supplies
Store additional paper, fabric, yarn, or paint in suitable containers.
Avoid overcrowding your main work surface.
Zone 4: Specialized Equipment
Keep occasional-use equipment in secure, accessible storage.
Follow manufacturer instructions for heavy, sharp, heated, or electrical tools.
Zone 5: Finished Projects
Designate a shelf, cabinet, or portfolio for completed work.
Protect delicate items from damage.
Zone 6: Cleanup and Waste
Provide appropriate containers for ordinary scraps and material-specific waste.
Follow disposal guidance for paints, solvents, resins, and other potentially hazardous materials.
A Simple 15-Minute Craft Room Reset
A short organization routine can help keep your workspace ready for future projects.
| Time | Activity | Purpose |
|---|---|---|
| Minutes 1–3 | Return tools to storage | Clear the work surface |
| Minutes 4–6 | Sort leftover materials | Reduce clutter |
| Minutes 7–9 | Store unfinished projects | Protect ongoing work |
| Minutes 10–12 | Clean surfaces appropriately | Maintain workspace usability |
| Minutes 13–15 | Prepare supplies for next time | Make future crafting easier |
Some materials require immediate or more extensive cleanup.
Always follow appropriate safety procedures rather than limiting necessary cleanup to a fixed schedule.
Craft Room Design and Organization Checklist
Workspace Planning
- The layout supports favorite hobbies.
- The main work surface is stable.
- Seating is comfortable.
- Lighting is suitable for detailed work.
- Walking paths remain clear.
Storage
- Frequently used tools are accessible.
- Small supplies have designated containers.
- Unfinished projects are organized.
- Heavy materials are stored securely.
- Storage can adapt to future needs.
Decorating
- The color palette feels cohesive.
- Personal artwork is displayed.
- Decorative details do not overcrowd surfaces.
- Natural or soft textures add warmth.
- The room reflects individual creative interests.
Safety
- Sharp tools are stored safely.
- Electrical cords are organized.
- Ventilation suits the materials used.
- Appropriate protective equipment is available.
- Chemicals and hazardous supplies are secured.
- Shelves and cabinets are stable.
- Children and pets cannot access dangerous materials.
Long-Term Maintenance
- Work surfaces are easy to clean.
- Supplies are protected from moisture.
- Waste can be disposed of appropriately.
- Current projects have designated storage.
- The space remains comfortable and enjoyable.
Common Craft Room Design Mistakes to Avoid
1. Choosing Appearance Over Functionality
A beautiful desk may be unsuitable if it is too small or unstable for your projects.
Prioritize practical requirements first.
2. Buying Too Many Storage Containers
Purchasing organizers before sorting supplies can lead to wasted space.
Understand your storage needs before buying.
3. Ignoring Vertical Space
Unused wall space can be valuable in small rooms.
Use secure shelves and organizers where appropriate.
4. Overcrowding the Worktable
Too many decorations and supplies reduce available working space.
Keep the main surface clear enough for actual projects.
5. Using Inadequate Lighting
Detailed crafts require suitable illumination.
Combine general lighting with adjustable task lighting.
6. Forgetting About Cleanup
Choose surfaces and storage that suit the materials you use.
Plan for scraps, spills, and waste.
7. Ignoring Ventilation and Safety
Certain crafts involve fumes, dust, heat, sharp tools, or electrical equipment.
Follow material and equipment safety requirements.
8. Making the Layout Too Permanent
Your hobbies may evolve.
Flexible furniture and modular storage can make future adjustments easier.
9. Storing Everything in Open Shelves
Open storage can become dusty and visually overwhelming.
Combine display shelves with closed cabinets.
10. Expecting the Room to Stay Perfect
A working craft room will sometimes look busy.
The goal is manageable organization, not maintaining a showroom appearance during every project.
Frequently Asked Questions About Craft Room Design
1. How can I create a beautiful craft room at home?
Start with a functional work surface, comfortable seating, suitable lighting, and organized storage.
Choose a cohesive color palette and add personal artwork or handmade decorations.
Prioritize everyday usability before decorative details.
2. Can I create a craft room in a small space?
Yes.
A small desk, wall-mounted storage, and portable supply cart can create a functional craft corner.
You can also use a closet, spare alcove, or multipurpose room.
3. What furniture is essential for a craft room?
Most craft spaces benefit from a stable table, comfortable chair, suitable lighting, and practical storage.
Specialized equipment depends on the hobbies you enjoy.
4. How do I organize a small craft room?
Use vertical storage, drawer dividers, labeled containers, and compact furniture.
Keep frequently used supplies nearby and store occasional materials separately.
5. What is the best color for a craft room?
There is no single best color.
Warm white, cream, sage green, and light wood are popular for calm spaces.
Brighter colors may suit people who prefer a cheerful, energetic atmosphere.
6. How can I make my craft room look cozy?
Add warm lighting, natural textures, comfortable seating, and meaningful decorations.
Keep the workspace organized and avoid excessive clutter.
7. Are pegboards useful in craft rooms?
Yes.
Pegboards can keep lightweight tools visible and accessible.
Install them securely and respect weight limits.
8. How can I organize a large craft room?
Divide the space into activity zones.
Consider separate areas for crafting, cutting, storage, drying, and displaying finished projects.
Arrange related activities near one another.
9. What lighting is best for arts and crafts?
Adjustable task lighting is useful for detailed work.
Consistent illumination with good color rendering can help with painting, sewing, and color matching.
Reduce glare and shadows.
10. How can I create a craft room on a budget?
Reuse existing furniture and containers.
Add labels, reorganize supplies, and improve lighting before purchasing decorative accessories.
Expand gradually as your needs become clearer.
11. Can a craft room double as a home office?
Yes.
Use separate storage for office and craft supplies.
Protect electronics from liquids, dust, adhesives, and cutting tools.
Choose a layout that makes switching between activities convenient.
12. How do I store unfinished craft projects?
Use labeled boxes, trays, drawers, or project bags.
Keep related materials together and protect delicate work from moisture and damage.
13. What makes a craft room comfortable for long creative sessions?
Supportive seating, appropriate work height, good lighting, and convenient tool placement all contribute to comfort.
Take movement breaks and adjust your posture during extended activities.
14. How can I keep my craft room organized over time?
Give supplies designated storage locations.
Sort leftover materials after projects and review your collection periodically.
Choose flexible systems that can change with your creative interests.
Final Thoughts: Create a Beautiful Craft Room That Grows with Your Creativity
A beautiful craft room is not defined by its size, expensive furniture, or perfectly coordinated storage containers.
It is a space that makes creativity easier to enjoy.
A small corner with a comfortable chair, a practical desk, and organized supplies can be just as meaningful as a spacious studio with multiple workstations.
The most successful craft rooms balance visual inspiration with everyday functionality.
They provide enough space for projects, keep tools accessible, support comfortable working conditions, and make organization manageable.
Thoughtful colors, natural textures, personal artwork, and creative displays can make the room feel welcoming, but the foundation should always be practical.
Start with the hobbies you love most.
Choose furniture and storage that support those activities, then introduce decorative details that reflect your personality.
As your skills develop and your interests change, allow your craft space to evolve.
You may eventually need more storage, a different table, or a dedicated station for a new creative activity. Flexible design makes those changes easier.
Whether you are transforming a tiny apartment corner, organizing a spare bedroom, or designing a spacious craft studio, the goal remains the same: creating an environment where making things feels convenient, comfortable, and enjoyable.
The most beautiful craft room is not necessarily the largest or most elaborate. It is the one that welcomes your ideas, supports your favorite hobbies, and gives your creativity a place to flourish every day.