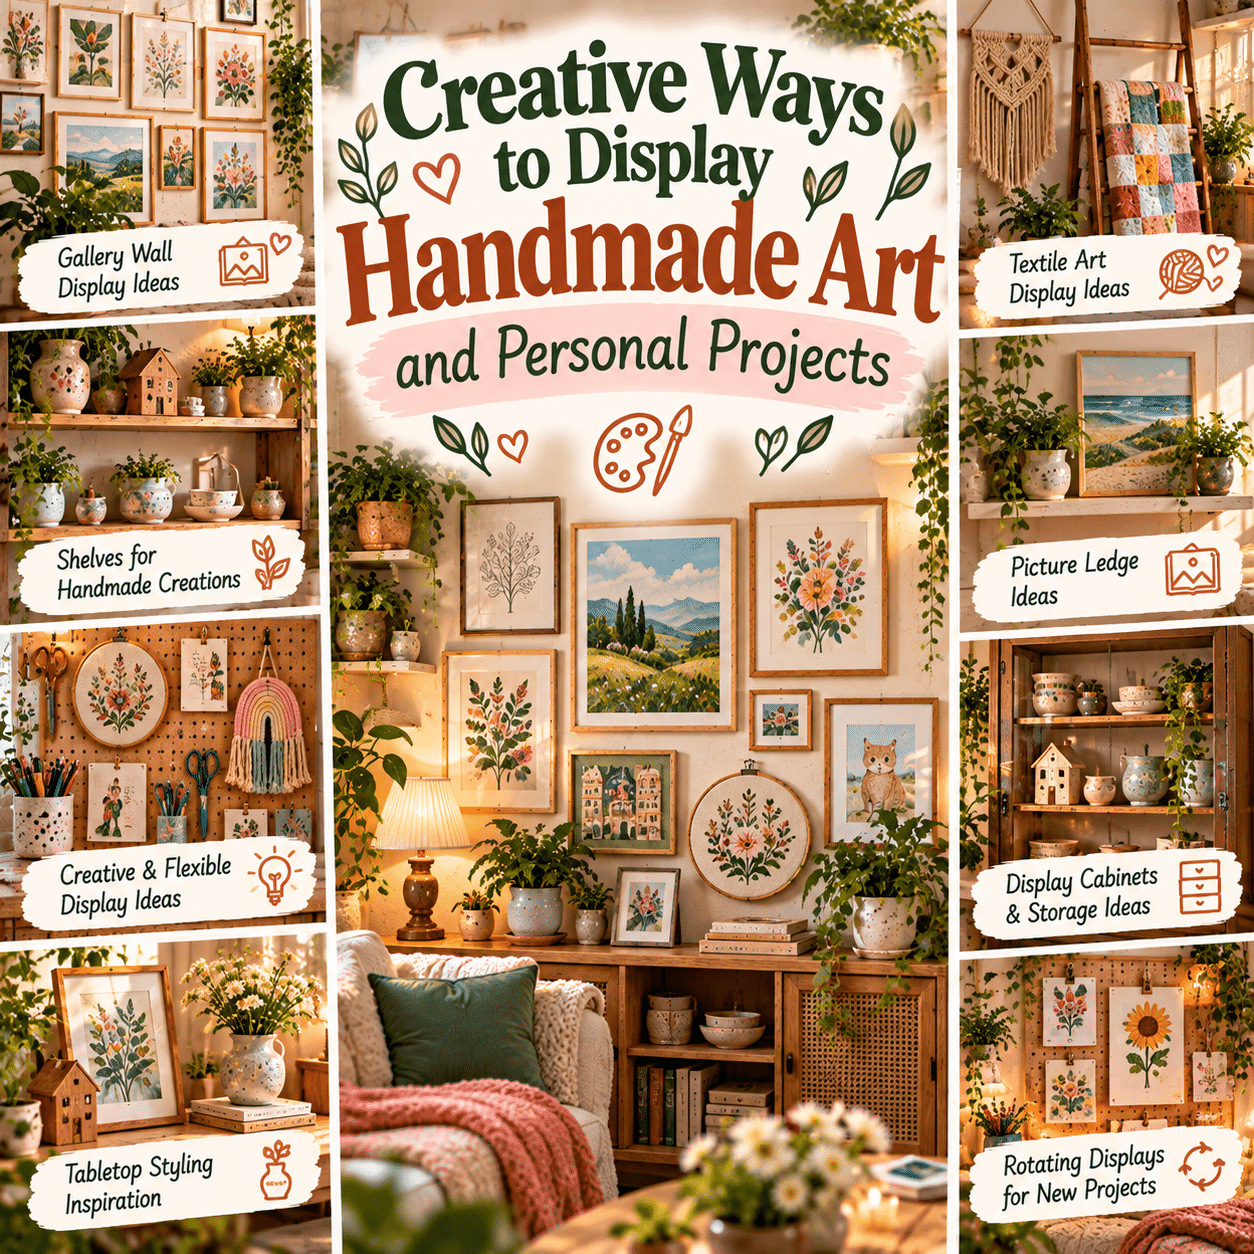
Handmade art and personal creative projects deserve more than a temporary place on a desk or a forgotten corner of a storage box. Whether you enjoy painting, drawing, embroidery, pottery, photography, paper crafts, woodworking, or DIY home decoration, displaying your creations can bring personality, warmth, and meaning into your living space.
Unlike mass-produced decorations, handmade pieces often carry personal stories. A watercolor painting may remind you of a peaceful afternoon. A knitted blanket may represent weeks of patient work. A collection of travel sketches may preserve memories of places you have visited, while a handmade ceramic bowl can become part of your everyday routine.
Displaying these creations allows you to enjoy them long after the creative process is complete.
The good news is that showcasing handmade artwork does not require a large home, expensive frames, or a dedicated gallery room. A small wall, an open shelf, a picture ledge, or a carefully arranged tabletop can become a beautiful display.
The key is finding a balance between creativity, visual harmony, practical organization, and proper care.
Some projects look best framed on a wall. Others are more attractive when displayed on shelves, placed inside shadow boxes, arranged in decorative baskets, or incorporated into everyday home furnishings.
A thoughtful display can also evolve over time, making room for new creations without overwhelming your home.
This guide explores creative ways to display handmade art and personal projects, including gallery walls, floating shelves, craft displays, textile arrangements, seasonal rotations, small-space solutions, and practical methods for protecting treasured handmade pieces.
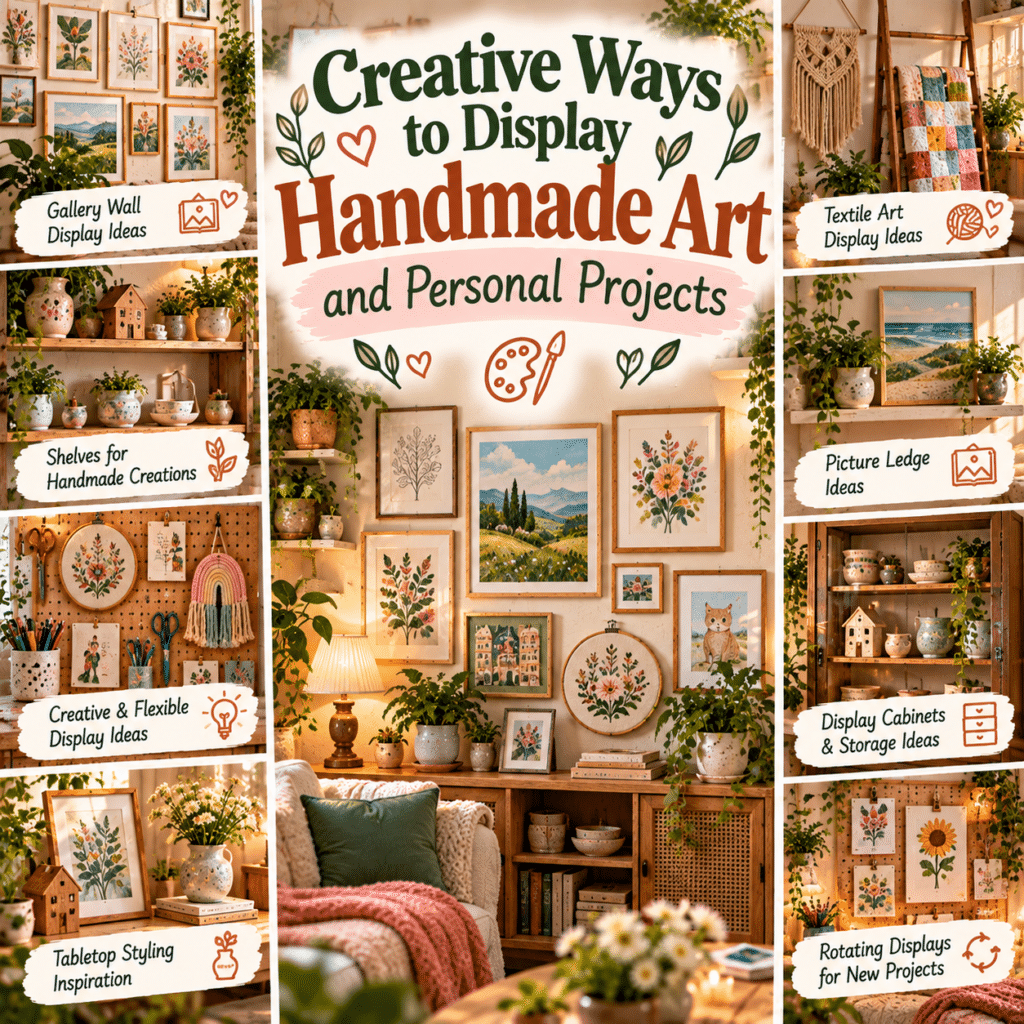
1. Turn a Blank Wall into a Personal Art Gallery
A blank wall offers one of the simplest opportunities to display handmade artwork.
Instead of filling the space with generic decorations, create a gallery featuring your own paintings, sketches, photographs, or mixed-media projects.
A personal gallery wall can become a meaningful focal point in a living room, bedroom, hallway, or creative workspace.
Choose a Consistent Visual Theme
A gallery wall does not require identical artwork.
However, a shared element can help the arrangement feel cohesive.
Consider connecting pieces through:
- Similar frame colors.
- A coordinated color palette.
- A common artistic theme.
- Related subject matter.
- Consistent spacing.
- Complementary materials.
For example, a collection of botanical watercolor paintings can create a gentle, nature-inspired display.
Alternatively, a mixture of colorful abstract artwork and personal sketches can produce a playful, expressive arrangement.
Plan the Layout Before Hanging
Arrange the pieces on the floor or use paper templates to test different compositions.
This helps you evaluate spacing and proportions before installing wall hardware.
Choose mounting methods appropriate for the wall material and the weight of each frame.
2. Create a Beautiful Gallery Wall with Mixed Frame Sizes
Using frames of different sizes can make a handmade art display feel dynamic.
Combine one or two larger pieces with smaller complementary artworks.
Establish a Visual Anchor
Start with the largest or most important piece.
Position smaller works around it.
The central artwork does not have to be perfectly centered, but the overall composition should feel balanced.
Keep Spacing Intentional
Consistent gaps between frames can create a more organized appearance.
For an informal gallery wall, slightly varied spacing may also work.
Avoid placing frames so close together that individual artworks become difficult to appreciate.
3. Use Matching Frames for a Clean, Coordinated Look
Matching frames are particularly effective when displaying artwork with different colors or styles.
A consistent frame design helps connect individual pieces.
Popular options include:
- Natural wood frames.
- White frames.
- Black frames.
- Light oak finishes.
- Simple metallic frames.
Let the Artwork Stand Out
Choose frames that complement rather than overpower the work.
For delicate watercolor paintings, a simple frame with a generous mat may create a refined appearance.
Bold illustrations may work well with narrow frames and minimal surrounding decoration.
4. Display Handmade Art Without Traditional Frames
Not every creative project needs a conventional frame.
Unframed displays can feel relaxed, artistic, and flexible.
Consider:
- Wooden poster hangers.
- Magnetic print hangers.
- Display clips.
- Decorative clipboards.
- Picture ledges.
- Suitable hanging rails.
Protect Delicate Artwork
Unframed pieces are more exposed to dust, moisture, handling, and light.
Use this approach primarily for replaceable artwork or materials that tolerate open display.
For valuable originals, protective framing may be more appropriate.
5. Create a Rotating Art Display with Picture Ledges
Picture ledges are narrow shelves designed to support framed artwork and decorative objects.
They allow you to rearrange pieces without repeatedly creating new holes in the wall.
Layer Different Sizes
Place larger frames toward the back and smaller frames in front.
Avoid covering important details.
Add a small decorative object if the shelf has sufficient depth and load capacity.
Refresh the Arrangement
A rotating display is ideal for people who create artwork regularly.
You can replace older pieces with new projects while keeping the room visually organized.
Use ledges with appropriate retaining lips and secure mounting, especially in homes with children or pets.
6. Display Handmade Art on Floating Shelves
Floating shelves can showcase artwork alongside books, plants, and decorative objects.
They are particularly useful for small framed illustrations, handmade ceramics, and miniature sculptures.
Create Visual Variety
Combine objects of different heights and shapes.
For example:
- A framed botanical print.
- A small ceramic vase.
- A stack of art books.
- A handmade wooden ornament.
- A decorative bowl.
Avoid Overcrowding
Leave space between objects.
Negative space helps individual handmade pieces remain noticeable.
Make sure shelves are securely installed and appropriate for the weight of the objects displayed.
7. Build a Dedicated Handmade Art Display Shelf
If you create regularly, consider reserving one shelf or bookcase specifically for finished projects.
This creates a personal collection that can evolve over time.
Organize by Creative Medium
You might dedicate different shelves to:
- Pottery and ceramics.
- Handmade sculptures.
- Framed artwork.
- Paper crafts.
- Textile projects.
- Small woodworking creations.
Choose a Balanced Arrangement
Place heavier objects on lower shelves.
Use bookends or stable display stands when necessary.
Avoid stacking fragile handmade pieces in ways that could cause damage.
8. Create a Personal Art Corner in the Living Room
A living room art corner can showcase your creativity while contributing to the home’s overall design.
Choose a small wall, sideboard, console table, or shelving unit.
Combine Artwork with Everyday Decor
A handmade painting can sit above a wooden cabinet.
A ceramic vase can complement a framed sketch.
A woven wall hanging can introduce texture to a neutral wall.
The goal is to integrate handmade creations naturally rather than making every object compete for attention.
9. Turn a Hallway into a Creative Gallery
Hallways are often overlooked as display areas.
A series of handmade artworks can make a narrow passage feel more personal.
Create a Visual Sequence
Arrange pieces in a line or a carefully balanced gallery composition.
Consider displaying:
- Travel sketches.
- Family artwork.
- Nature illustrations.
- Small paintings.
- Personal photography.
Keep the Passage Clear
Avoid shelves or objects that protrude into narrow walking areas.
Use secure mounting hardware.
Choose artwork sizes that suit the wall without overwhelming the space.
10. Create a Staircase Art Gallery
A staircase wall can accommodate a collection of artwork arranged along the direction of the stairs.
This creates a sense of movement through the display.
Follow the Staircase Rhythm
Position frames so the arrangement visually follows the slope.
Use paper templates to plan the layout.
Prioritize Safe Installation
Staircases can be difficult places to reach safely.
Avoid standing on unstable furniture or leaning ladders improperly on steps.
Use suitable equipment or professional installation assistance when necessary.
11. Display Small Artwork in a Bedroom
A bedroom is a natural place for meaningful personal creations.
Consider displaying handmade art above a dresser, beside a reading chair, or on a small shelf.
Choose a Relaxed Composition
A few carefully selected pieces may feel more restful than a crowded wall.
Soft landscapes, botanical drawings, abstract paintings, and personal photographs can all work beautifully.
Avoid placing heavy or poorly secured objects above the bed.
12. Decorate a Home Office with Personal Artwork
A home office can become more welcoming when it includes handmade creations.
Display a favorite illustration, photograph, or small sculpture near the desk.
Create an Inspiration Zone
Use a corkboard, framed display, or picture ledge for:
- Finished sketches.
- Color studies.
- Creative experiments.
- Personal photographs.
- Meaningful design references.
Keep important work surfaces clear.
Artwork should complement productivity rather than interfere with daily tasks.
13. Create an Inspiring Craft Room Display
A craft room is an ideal location for displaying finished projects.
Your creations can serve as decoration and inspiration for future work.
Separate Finished and Unfinished Projects
Use different storage areas for completed artwork and projects still in progress.
For example:
- Display finished paintings on the wall.
- Keep unfinished canvases on a protected rack.
- Showcase completed embroidery in frames.
- Store ongoing needlework in labeled project bags.
This helps maintain organization and prevents accidental damage.
14. Use a Corkboard for a Flexible Creative Display
A corkboard can hold lightweight artwork, sketches, photographs, and creative notes.
It is especially useful for pieces you enjoy changing frequently.
Build a Creative Mood Board
Combine:
- Small illustrations.
- Color palettes.
- Photographs.
- Fabric samples.
- Handwritten notes.
- Project inspiration.
Protect Important Originals
Pins can damage paper and photographs.
Use clips, sleeves, or copies when preserving the original matters.
A corkboard works best for informal, replaceable materials.
15. Display Artwork on a Magnetic Board
A magnetic display board provides a flexible alternative to pinboards.
It can hold lightweight artwork without puncturing the paper.
Use Suitable Magnets
Choose magnets strong enough to support the artwork without damaging it.
Keep small magnets away from young children and pets because swallowed magnets can cause serious injury.
For valuable paper artwork, use protective sleeves or suitable mounting methods.
16. Create a Clip Rail for Changing Artwork
A clip rail allows you to display multiple lightweight creations along a wall.
This can work well for sketches, illustrations, postcards, and children’s artwork.
Make Rotation Easy
Arrange pieces in a row or at varied heights.
Replace artwork whenever you finish something new.
Avoid clips that leave marks on delicate originals.
A clip rail is particularly useful when you want a casual, creative appearance.
17. Use a Decorative Ladder for Handmade Displays
A decorative ladder can display suitable lightweight textile projects.
Consider using it for:
- Knitted blankets.
- Handmade throws.
- Woven textiles.
- Decorative fabric pieces.
Choose a Stable Design
Use a ladder specifically intended for decorative display.
Position it securely and follow its load limitations.
Do not use an unstable leaning ladder in areas where children or pets may pull on it.
18. Showcase Embroidery in Decorative Hoops
Embroidery hoops can become attractive wall decorations.
Finished embroidery pieces may be displayed individually or arranged into a gallery.
Create a Hoop Collection
Mix different hoop sizes while maintaining a consistent theme.
For example, combine floral embroidery, botanical patterns, and simple lettering.
Protect the Fabric
Avoid excessive tension that could distort delicate stitching.
Keep finished embroidery away from moisture and prolonged direct sunlight.
For valuable textile work, conservation-quality framing may offer better protection.
19. Frame Cross-Stitch and Needlework Projects
Cross-stitch, needlepoint, and other stitched projects can look beautiful when professionally or carefully framed.
Choose Suitable Mounting Materials
Use appropriate backing and avoid adhesives that could permanently damage the fabric.
Acid-free or conservation-quality materials may be beneficial for pieces intended for long-term preservation.
Allow the Texture to Show
A frame with suitable depth can prevent the glass or glazing from pressing directly against raised stitches.
A mat or spacer may help create the necessary separation.
20. Turn Handmade Quilts into Wall Art
A handmade quilt can be both a functional textile and a decorative artwork.
Displaying a quilt allows its patterns, colors, and stitching to become part of the room’s design.
Choose a Supportive Hanging Method
Use a suitable quilt sleeve, textile hanging system, or another method that distributes weight evenly.
Avoid placing excessive stress on a few points of the fabric.
Rotate Delicate Textiles
Long-term hanging can strain some textiles.
Consider rotating valuable quilts and storing them properly between displays.
Protect them from sunlight, dust, and moisture.
21. Display Macramé and Woven Wall Hangings
Macramé and woven projects add texture to a room.
They can complement natural wood, neutral walls, and botanical decorations.
Choose the Right Location
A wall hanging may work well:
- Above a console table.
- Beside a reading chair.
- In a bedroom corner.
- Near a craft desk.
- Along a spacious hallway.
Keep textiles away from open flames, excessive heat, and damp areas.
22. Showcase Handmade Ceramics on Open Shelves
Handmade pottery can become beautiful everyday decoration.
Bowls, vases, mugs, and sculptural pieces often look attractive when grouped thoughtfully.
Create Balanced Groupings
Combine objects of different heights.
For example, display a tall vase beside a low bowl and a smaller ceramic ornament.
Consider Stability
Use secure shelves and avoid placing fragile ceramics near edges.
Museum putty or other appropriate display supports may help stabilize certain objects, but test compatibility with the surface and finish.
Do not assume handmade ceramics are food-safe unless their materials and firing are suitable for food contact.
23. Create a Small Pottery Display Cabinet
A display cabinet can protect delicate ceramic pieces while keeping them visible.
Glass-front cabinets may reduce dust exposure.
Arrange Pieces by Size
Place larger and heavier objects on stable lower shelves.
Keep smaller decorative pieces at comfortable viewing heights.
Avoid overcrowding.
If the cabinet is tall or top-heavy, secure it according to the manufacturer’s anti-tip instructions.
24. Display Handmade Wooden Projects
Woodworking projects can add natural warmth to home interiors.
Possible creations include:
- Small wooden sculptures.
- Decorative boxes.
- Picture frames.
- Carved ornaments.
- Handmade trays.
- Miniature shelves.
Highlight Natural Materials
Pair wooden creations with neutral backgrounds, ceramic objects, or soft textiles.
Avoid placing unfinished or moisture-sensitive wood in damp environments.
Use appropriate finishes for items intended for everyday use.
25. Create a Shadow Box for Three-Dimensional Projects
Shadow boxes are useful for displaying objects that do not fit comfortably inside flat frames.
They can showcase:
- Paper sculptures.
- Small textile pieces.
- Miniature artwork.
- Handmade ornaments.
- Memory keepsakes.
- Decorative craft collections.
Arrange Objects with Depth
Place items at different positions to create visual interest.
Use secure mounting methods that suit the materials.
For valuable keepsakes, avoid permanent adhesives and choose preservation-friendly supports.
26. Display Handmade Paper Crafts
Paper crafts can include intricate cut-paper artwork, origami, greeting cards, and decorative collages.
Use Protective Framing
Paper is vulnerable to light, humidity, dust, and handling.
Framing behind suitable glazing can provide protection.
For valuable artwork, consider UV-filtering glazing and archival-quality mounting materials.
Preserve Three-Dimensional Shapes
Origami and layered paper sculptures may work better in shadow boxes or covered display cases.
Avoid compressing delicate forms.
27. Turn Handmade Greeting Cards into Art
Beautiful handmade cards do not need to disappear into drawers after an occasion has passed.
They can become meaningful decorations.
Create a Card Gallery
Display selected cards on:
- Picture ledges.
- Clip rails.
- Decorative stands.
- Framed arrangements.
- Small shelves.
Rotate by Occasion
You might display birthday cards, holiday cards, or other meaningful creations at different times of the year.
Store the remaining cards in labeled boxes or folders.
28. Display Travel Sketches and Personal Memories
Travel sketches, handmade postcards, and creative travel journals can become part of a meaningful display.
Create a Destination-Themed Wall
Group artwork from the same trip or location.
Combine sketches with selected photographs or maps.
Protect Irreplaceable Keepsakes
Consider displaying reproductions of valuable originals.
Store original tickets, photographs, and delicate papers in suitable archival materials.
A personal display can preserve the emotional character of travel without exposing every original item to damage.
29. Create a Seasonal Handmade Art Display
Seasonal displays allow you to enjoy different projects throughout the year.
You might rotate artwork according to:
- Spring botanical themes.
- Summer landscapes.
- Autumn-inspired colors.
- Winter crafts.
- Personal celebrations.
- Family traditions.
Keep the Display Adaptable
Use picture ledges, shelves, or reusable display stands.
This reduces the need for frequent wall changes.
Store off-season pieces in labeled protective containers.
30. Use Handmade Art as Functional Home Decor
Some handmade projects can become part of everyday living.
Examples include:
- Knitted cushion covers.
- Handmade baskets.
- Decorative wooden trays.
- Sewn table runners.
- Ceramic planters.
- Woven wall organizers.
- Handmade coasters.
Match Function to Material
A decorative object is not automatically suitable for food contact, heat, moisture, or heavy use.
Check that the materials and construction are appropriate for the intended function.
Functional display works best when beauty and durability are considered together.
31. Style a Coffee Table with Handmade Creations
A coffee table offers an opportunity to showcase small personal projects.
Consider a handmade ceramic bowl, a decorative wooden object, or a small sculpture.
Use a Simple Arrangement
Group a few complementary pieces on a tray.
Leave enough space for everyday use.
Avoid fragile or sharp-edged objects in locations where they may be knocked over.
32. Decorate a Console Table with Personal Art
A console table can provide a stylish foundation for handmade displays.
Combine a framed painting with a small sculpture or ceramic vase.
Create Height Variation
Position a larger artwork behind smaller decorative pieces.
Use books or appropriate stands to introduce different levels.
Avoid unstable stacks or objects that could fall.
33. Display Miniature Handmade Projects
Small creations deserve thoughtful presentation.
Miniature paintings, tiny sculptures, model crafts, and delicate ornaments can be difficult to appreciate when scattered among larger objects.
Create a Miniature Gallery
Use:
- Small display boxes.
- Narrow shelves.
- Shadow boxes.
- Covered cases.
- Miniature easels.
Provide Adequate Visibility
Place small pieces where viewers can see their details comfortably.
Use gentle, suitable lighting when necessary.
Protect delicate miniatures from dust and accidental handling.
34. Use a Bookshelf as a Personal Creative Gallery
Bookshelves can display more than books.
Handmade artwork can add visual variety and personal character.
Mix Books and Creative Objects
Try arranging:
- A stack of books.
- A framed sketch.
- A small ceramic vase.
- A handmade sculpture.
- A decorative storage box.
Maintain Visual Balance
Avoid filling every shelf completely.
Leave some open space so individual objects stand out.
Secure tall bookcases against tipping where appropriate.
35. Create a Dedicated Display for Children’s Artwork
Children’s artwork can bring color, imagination, and personality into family spaces.
A dedicated display encourages appreciation of their creative efforts without requiring every piece to remain visible.
Use a Rotating System
Consider:
- Clip rails.
- Magnetic boards.
- Picture ledges.
- Front-opening artwork frames.
- Display folders.
Preserve Favorite Pieces
Select meaningful projects for long-term storage.
Photograph larger or fragile creations when physical storage is impractical.
Avoid displaying artwork containing loose small components within reach of younger children.
36. Build a Creative Family Memory Wall
A family memory wall can combine handmade projects, photographs, and personal keepsakes.
The arrangement might include:
- Family drawings.
- Handmade cards.
- Travel photographs.
- Small embroidery pieces.
- Creative milestones.
- Meaningful written notes.
Tell a Visual Story
Group related items together.
You might organize the display chronologically or by theme.
Keep private information out of areas visible to visitors if confidentiality matters.
37. Create a Minimalist Handmade Art Display
A minimalist display focuses attention on a limited number of carefully chosen pieces.
Instead of covering an entire wall, select one artwork or a small coordinated group.
Emphasize Negative Space
Allow the surrounding wall or shelf to remain uncluttered.
Choose simple frames and neutral backgrounds.
A single handmade ceramic sculpture on a shelf can be just as visually meaningful as a large collection.
38. Design a Colorful Eclectic Art Display
If you enjoy expressive interiors, combine handmade pieces with different colors, textures, and styles.
An eclectic display might include:
- Bright paintings.
- Embroidered artwork.
- Decorative ceramics.
- Mixed-media collages.
- Colorful photographs.
- Small handmade sculptures.
Find a Common Connection
Use recurring colors, similar frame finishes, or a consistent arrangement to create cohesion.
Eclectic does not have to mean disorganized.
39. Create a Botanical-Inspired Handmade Gallery
Botanical artwork can bring a nature-inspired character into a home.
Display:
- Watercolor leaves.
- Floral illustrations.
- Pressed-flower artwork.
- Botanical embroidery.
- Nature photography.
- Handmade ceramic planters.
Consider Preservation
Pressed plants and botanical papers may be sensitive to light and humidity.
Use suitable framing materials and keep delicate pieces away from direct sunlight.
Avoid collecting protected plants or damaging natural habitats for decorative projects.
40. Create a Display That Evolves with Your Creativity
A personal art collection naturally grows as you explore new techniques and complete more projects.
Rather than displaying everything permanently, create a flexible system.
Use a Rotation Strategy
Keep a selection of favorite pieces on display.
Store the rest safely.
Introduce new projects periodically.
Review the Collection
Consider which pieces:
- Still feel meaningful.
- Suit the current space.
- Need repair or cleaning.
- Would benefit from protective storage.
- Could be displayed in another room.
A changing display allows your home to reflect your ongoing creative journey.
How to Create a Handmade Art Display Step by Step
A beautiful display begins with thoughtful selection and planning.
Step 1: Gather Your Finished Projects
Collect the pieces you would like to showcase.
Include paintings, drawings, textiles, ceramics, and other suitable creations.
Step 2: Evaluate Their Condition
Check for fragile materials, loose components, fading, or damage.
Decide whether each piece is suitable for open display or needs protective framing.
Step 3: Choose the Display Location
Consider:
- Wall space.
- Shelf dimensions.
- Natural light.
- Humidity.
- Household movement.
- Children and pets.
- Available mounting surfaces.
Step 4: Select a Visual Theme
Choose a coordinated color palette, frame style, or subject theme if desired.
An eclectic arrangement can also work when thoughtfully balanced.
Step 5: Plan the Composition
Arrange pieces on the floor or use templates before mounting.
Consider size, spacing, and visual weight.
Step 6: Choose Suitable Display Materials
Select frames, shelves, stands, clips, or cabinets according to the artwork.
Use protective materials for delicate or valuable pieces.
Step 7: Install Everything Securely
Follow hardware instructions and weight limits.
Use appropriate anchors for the wall construction.
Keep fragile or heavy objects away from unstable locations.
Step 8: Adjust the Lighting
Use existing room lighting or suitable accent lighting.
Avoid exposing sensitive materials to excessive light or heat.
Step 9: Add Complementary Decorations
Consider books, plants, or simple decorative accessories.
Avoid overcrowding.
Step 10: Maintain and Refresh the Display
Dust and inspect pieces appropriately.
Rotate artwork periodically.
Store off-display projects carefully.
Handmade Art Display Ideas by Creative Medium
| Creative Medium | Recommended Display | Important Considerations |
|---|---|---|
| Watercolor paintings | Framed gallery wall | Protect from light and moisture |
| Pencil drawings | Frames or portfolios | Avoid smudging and handling |
| Acrylic paintings | Wall display or picture ledge | Ensure secure mounting |
| Embroidery | Frames or hoop displays | Avoid fabric strain |
| Cross-stitch | Protective framing | Use suitable mounting materials |
| Quilts | Textile hanging system | Support weight evenly |
| Knitting and crochet | Decorative ladder or shelf | Protect from dust and stretching |
| Ceramics | Stable shelves or cabinets | Prevent tipping and impact |
| Paper crafts | Shadow boxes or frames | Protect delicate paper |
| Jewelry creations | Covered displays or stands | Avoid tangling and tarnish |
| Woodworking projects | Shelves or console tables | Consider weight and finish |
| Miniature crafts | Display cases | Protect small details |
| Travel sketches | Themed gallery wall | Preserve important originals |
| Handmade cards | Clip rails or picture ledges | Rotate and store carefully |
Different materials benefit from different display methods.
Choose presentation techniques that complement the artwork while respecting its physical requirements.
Handmade Art Display Ideas for Different Rooms
| Room | Display Approach | Visual Effect |
|---|---|---|
| Living room | Gallery wall or console arrangement | Personal focal point |
| Bedroom | Small framed collection | Calm and meaningful |
| Hallway | Linear artwork gallery | Visual interest |
| Home office | Inspiration wall or picture ledge | Creative atmosphere |
| Craft room | Rotating project gallery | Personal inspiration |
| Dining room | Ceramic display or framed art | Warm decorative detail |
| Reading corner | Small artwork and bookshelf display | Cozy personality |
| Entryway | Selected framed pieces | Welcoming first impression |
| Children’s room | Rotating art rail | Playful creativity |
| Sheltered balcony | Weather-suitable handmade objects | Outdoor character |
Always consider the environmental conditions of each location.
Bathrooms, kitchens, and outdoor spaces may expose artwork to moisture, temperature changes, or contaminants.
Creative Display Ideas for Small and Large Spaces
| Available Space | Display Solution | Why It Works |
|---|---|---|
| Tiny apartment | One picture ledge | Minimal floor space |
| Small bedroom | Compact gallery wall | Personal decoration |
| Narrow hallway | Framed artwork sequence | Uses wall space |
| Home office corner | Corkboard or clip rail | Flexible display |
| Living room | Mixed-media gallery wall | Strong focal point |
| Spacious hallway | Multiple coordinated collections | Visual continuity |
| Large craft room | Dedicated display shelves | Room for varied projects |
| Open-plan home | Artwork zones | Defines different areas |
| Large living room | Statement art wall and display cabinet | Supports multiple media |
The best solution depends on your available space and the size, weight, and fragility of your creations.
Budget-Friendly Ways to Display Handmade Art
You do not need expensive gallery systems to create an attractive display.
| Display Element | Budget-Friendly Option | Optional Upgrade |
|---|---|---|
| Frames | Reused matching frames | Conservation-quality framing |
| Wall display | Simple clip rail | Professional gallery hanging system |
| Shelves | Existing bookcase | Custom display shelving |
| Paper art | Basic protective sleeves | Archival framing |
| Small sculptures | Stable household shelf | Covered display case |
| Textile art | Suitable decorative hanger | Conservation textile mount |
| Inspiration wall | Corkboard | Modular magnetic system |
| Miniature projects | Small display boxes | Glass-front cabinet |
| Artwork rotation | Picture ledge | Adjustable hanging rail |
| Storage | Labeled protective boxes | Archival storage system |
Prioritize secure installation and material protection before decorative upgrades.
How to Arrange Handmade Artwork for Visual Balance
A successful display does not require formal design training.
A few simple principles can make arrangements feel more intentional.
Establish a Focal Point
Choose one piece to attract attention first.
This may be the largest artwork, the most colorful object, or a particularly meaningful creation.
Vary Scale
Combine larger and smaller pieces.
Avoid placing every object at exactly the same height unless you want a formal grid arrangement.
Repeat Selected Elements
A recurring frame finish, color, or material can connect different projects.
Use Negative Space
Leave enough empty space around artwork.
This allows viewers to appreciate individual pieces.
Consider Visual Weight
Dark, colorful, or visually detailed objects may attract more attention than pale, simple ones.
Distribute these elements thoughtfully.
Avoid Excessive Symmetry When It Feels Restrictive
Symmetry can create a calm, formal appearance.
Asymmetrical arrangements can feel relaxed and creative.
Choose the approach that suits your home and personal style.
How to Protect Handmade Art on Display
Handmade projects often involve materials that respond differently to their environment.
Thoughtful care helps preserve their appearance.
Protect Against Excessive Light
Sunlight and some artificial lighting can contribute to fading or material deterioration.
Place sensitive artwork away from prolonged direct sunlight.
UV-filtering glazing may reduce certain types of light exposure, but it does not eliminate all light-related damage.
Control Moisture Exposure
Paper, fabric, wood, and some other materials can be damaged by high humidity.
Avoid damp locations and direct contact with water.
Reduce Dust
Use appropriate protective frames or display cases when necessary.
Clean surrounding surfaces regularly.
Do not use harsh cleaning products directly on delicate artwork.
Handle Objects Carefully
Support fragile objects when moving them.
Avoid touching sensitive surfaces unnecessarily.
Choose Appropriate Mounting Materials
For valuable pieces, use conservation-friendly materials and reversible methods when practical.
Permanent adhesives, ordinary tapes, and unsuitable backing boards may cause long-term damage.
Store Off-Display Artwork Properly
Use suitable protective folders, boxes, or supports.
Avoid crushing textiles, bending paper, or stacking fragile sculptures.
For particularly valuable or irreplaceable pieces, consult a qualified conservator.
A Simple Monthly Handmade Art Display Refresh
A regular refresh can keep your home visually interesting without requiring major redecorating.
| Stage | Activity | Purpose |
|---|---|---|
| 1 | Review the current display | Identify pieces to rotate |
| 2 | Select new handmade projects | Introduce fresh creativity |
| 3 | Inspect artwork condition | Detect potential damage |
| 4 | Clean shelves and frames appropriately | Maintain presentation |
| 5 | Rearrange the composition | Improve visual balance |
| 6 | Store removed pieces safely | Protect the collection |
| 7 | Enjoy the updated display | Celebrate creative progress |
You do not need to replace artwork every month.
Refresh the arrangement whenever it feels enjoyable or useful.
Handmade Art Display Checklist
Planning
- The selected artwork suits the available space.
- The display location is appropriate for the materials.
- Frames, shelves, or stands fit the objects.
- The composition has a clear visual balance.
- The arrangement reflects personal style.
Installation
- Wall hardware is appropriate.
- Shelves are securely mounted.
- Heavy objects are positioned safely.
- Fragile pieces are protected from accidental contact.
- Walking paths remain unobstructed.
Preservation
- Sensitive artwork is protected from excessive light.
- Moisture exposure is minimized.
- Delicate paper and textiles have suitable support.
- Dust can be managed appropriately.
- Off-display pieces have protective storage.
Decoration
- Artwork remains the main focus.
- Complementary decorations are balanced.
- Colors and textures work together.
- The display is not overcrowded.
- Personal meaning remains central.
Long-Term Enjoyment
- New projects can be added.
- Artwork can be rotated easily.
- The display is manageable to maintain.
- Fragile pieces are checked periodically.
- The arrangement continues to feel inspiring.
Common Handmade Art Display Mistakes to Avoid
1. Displaying Too Many Pieces at Once
A crowded display can make individual projects difficult to appreciate.
Choose a curated selection and store the remaining pieces safely.
2. Ignoring Artwork Size
A very small piece may look isolated on a large wall.
An oversized collection may overwhelm a narrow area.
Consider proportions before installation.
3. Using Inappropriate Mounting Hardware
Heavy frames and objects require suitable supports.
Do not rely on decorative adhesive strips beyond their stated capabilities.
4. Placing Delicate Artwork in Direct Sunlight
Prolonged light exposure can cause fading or deterioration.
Choose locations and protective materials carefully.
5. Using Ordinary Tape on Valuable Artwork
Some tapes and adhesives can discolor, stain, or damage paper and textiles.
Use preservation-friendly methods when long-term protection matters.
6. Overcrowding Shelves
Too many objects can create visual clutter and increase the risk of accidental damage.
Leave adequate spacing.
7. Forgetting About Children and Pets
Fragile objects, sharp edges, and small detachable components may create hazards.
Choose secure, appropriate display locations.
8. Mixing Incompatible Materials Without Protection
Some objects may scratch, stain, or otherwise damage neighboring pieces.
Use appropriate supports and separators.
9. Never Rotating the Collection
A permanent display is not inherently wrong, but rotation can make room for new work.
Consider changing selected pieces occasionally.
10. Prioritizing Appearance Over Preservation
A beautiful arrangement should not expose meaningful projects to unnecessary damage.
Balance aesthetics with appropriate care.
Frequently Asked Questions About Displaying Handmade Art
1. How can I display handmade artwork at home?
You can use gallery walls, picture ledges, floating shelves, shadow boxes, display cabinets, or decorative stands.
Choose the method according to the artwork’s size, material, and fragility.
2. How do I display artwork without drilling holes?
Consider freestanding display stands, existing shelves, easels, or picture ledges that are already securely installed.
Certain removable hanging systems may work for lightweight items on suitable surfaces, but always follow their instructions and weight limits.
3. What is the best way to display small handmade projects?
Small shelves, shadow boxes, covered display cases, and miniature easels can help showcase delicate creations.
Group related pieces without overcrowding them.
4. How can I make a gallery wall look cohesive?
Use consistent spacing, related frame finishes, recurring colors, or a shared theme.
Plan the arrangement before hanging.
5. Can I mix paintings, photographs, and handmade crafts?
Yes.
Mixed-media displays can feel personal and visually interesting.
Use common colors, complementary frames, or thoughtful spacing to connect the pieces.
6. How should I display handmade embroidery?
Embroidery can be displayed in hoops, frames, or suitable textile mounts.
Protect delicate stitching from excessive light, moisture, and physical strain.
7. What is the best way to display handmade ceramics?
Use stable shelves, cabinets, or appropriate display stands.
Keep fragile pieces away from edges and areas where they may be knocked over.
8. How can I display handmade art in a small apartment?
Use compact gallery walls, narrow picture ledges, existing bookshelves, or a rotating display.
Vertical arrangements can reduce the need for additional floor space.
9. Should handmade artwork be framed?
Not always.
Framing is particularly useful for delicate paper and textile artwork.
Sculptures, ceramics, and certain other projects may be better suited to shelves or display cases.
10. How do I protect handmade artwork from fading?
Limit prolonged exposure to direct sunlight and other strong light sources.
Use suitable protective framing when appropriate.
Remember that UV protection does not prevent every form of light-related deterioration.
11. Can I display children’s artwork in the living room?
Absolutely.
A rotating gallery wall, picture ledge, or clip rail can showcase children’s creativity.
Use secure, age-appropriate display methods.
12. How often should I change my handmade art display?
There is no fixed schedule.
You might rotate pieces seasonally, after completing new projects, or whenever you want a fresh arrangement.
13. How can I display handmade art on a budget?
Reuse existing frames, shelves, and display stands.
Start with a small collection and expand gradually.
Prioritize secure installation and suitable protection.
14. What makes a handmade art display feel personal?
Personal meaning is often the most important element.
Choose projects that reflect your interests, memories, creative achievements, and individual style.
A thoughtfully arranged collection can tell a story that ordinary decoration cannot.
Final Thoughts: Celebrate Creativity Through Meaningful Displays
Handmade art and personal creative projects have a special ability to make a home feel individual, welcoming, and full of character.
A painting created during a quiet afternoon, an embroidered design completed over several evenings, or a ceramic object shaped by hand can carry meaning beyond its appearance.
Displaying these pieces allows them to become part of everyday life.
You do not need a dedicated gallery, a large home, or an expensive collection of frames to create something beautiful.
A single picture ledge, a carefully arranged bookshelf, or a small gallery wall can provide a meaningful place for your work.
The most successful displays combine visual harmony with practical care.
They highlight the personality of handmade pieces while considering their materials, weight, fragility, and preservation needs.
Start by selecting a few favorite creations.
Choose a suitable location, arrange the pieces thoughtfully, and allow enough space for each one to be appreciated.
As you complete new projects, refresh the display and give older pieces appropriate storage.
Your collection can continue to evolve alongside your creative interests.
Most importantly, remember that handmade artwork does not have to be technically perfect or professionally produced to deserve a place in your home.
Its value may come from the memories it represents, the skills you practiced, or the simple enjoyment of creating something yourself.
A home filled with thoughtfully displayed handmade creations becomes more than a beautifully decorated space. It becomes a personal gallery of imagination, memories, and the everyday joy of making something meaningful.