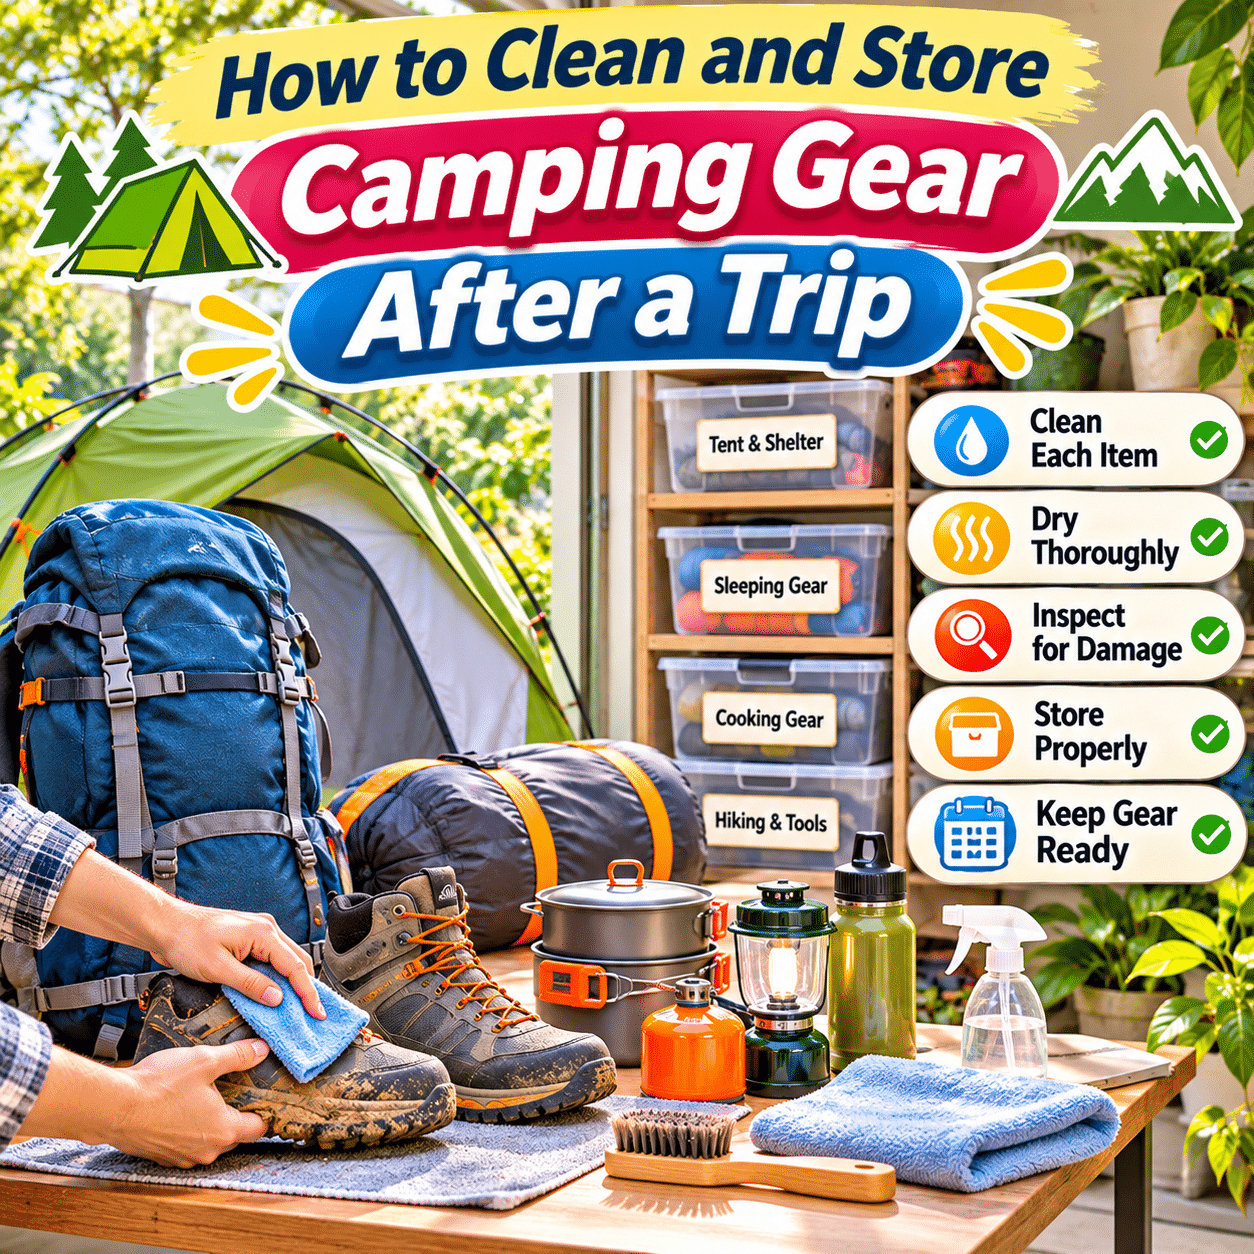
Returning home from a camping trip often brings a satisfying feeling of accomplishment. After spending time outdoors, exploring new surroundings, and enjoying a change of scenery, it can be tempting to leave your backpack, tent, sleeping bag, and other equipment packed away until the next adventure.
However, taking care of camping gear after a trip is an important part of keeping outdoor equipment clean, functional, and ready for future use.
Camping equipment is regularly exposed to dirt, moisture, sweat, food residue, sunlight, and changing weather conditions. Even when everything appears reasonably clean, hidden moisture or debris can gradually affect fabrics, zippers, coatings, insulation, and other components.
A tent packed while damp may develop unpleasant odors or microbial growth. A sleeping bag stored tightly compressed for long periods may lose some of its insulating loft. Dirty cooking equipment can attract pests, while neglected batteries and damaged accessories may create problems when you need them again.
Fortunately, maintaining camping gear does not have to be complicated.
With a practical cleaning routine, appropriate drying methods, and a well-organized storage system, you can help extend the useful life of your equipment and reduce unnecessary preparation before your next trip.
The key is understanding that different types of camping gear require different care.
Tents, sleeping bags, backpacks, cookware, clothing, and electronic equipment should be cleaned and stored according to their materials and manufacturer instructions.
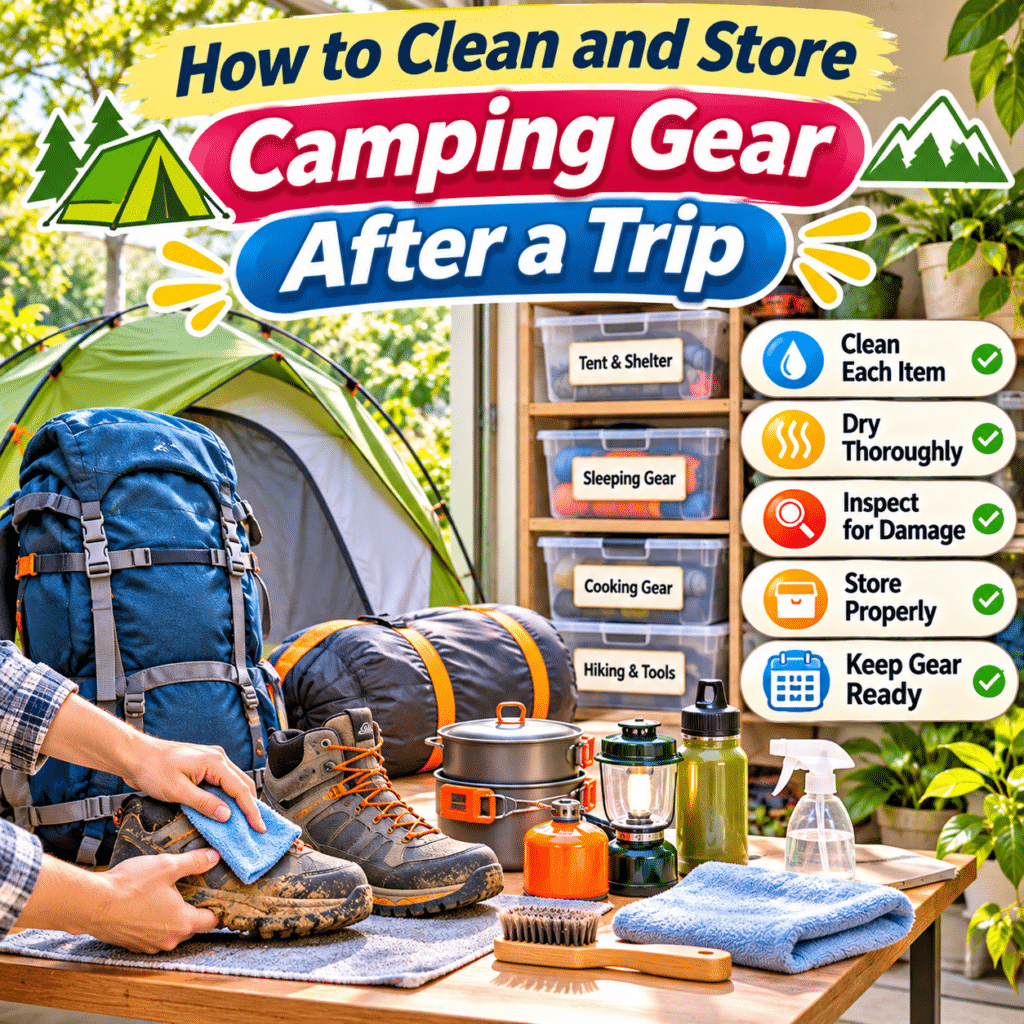
This comprehensive guide explains how to clean and store camping gear after a trip, inspect equipment for damage, prevent moisture-related problems, organize outdoor supplies, maintain essential accessories, and develop a simple post-camping routine that works for both occasional campers and regular outdoor enthusiasts.
1. Why Cleaning Camping Gear After Every Trip Matters
Proper maintenance helps preserve the performance, condition, and reliability of outdoor equipment.
Although cleaning may seem like an additional chore after returning home, it can prevent larger problems later.
Prevent Dirt and Debris From Accumulating
Camping equipment frequently collects:
- Soil and mud.
- Sand.
- Leaves and grass.
- Dust.
- Food crumbs.
- Sweat.
- Tree sap.
- Insect residue.
- Moisture.
Removing these materials helps prevent unnecessary wear and keeps equipment more pleasant to use.
Reduce Moisture-Related Damage
Moisture is one of the most important concerns when storing camping gear.
Damp conditions may encourage mildew, mold, unpleasant odors, and deterioration of certain materials.
Thorough drying is especially important for tents, sleeping bags, clothing, and backpacks.
Protect Equipment Performance
Outdoor equipment often includes specialized materials such as waterproof coatings, insulating fibers, breathable membranes, and technical fabrics.
Improper cleaning or storage may reduce their effectiveness.
Identify Damage Before the Next Trip
Cleaning provides an opportunity to inspect equipment for:
- Tears.
- Loose stitching.
- Broken zippers.
- Damaged buckles.
- Worn straps.
- Leaking containers.
- Corrosion.
- Deteriorating coatings.
Discovering these problems at home is generally more convenient than finding them during a camping trip.
Avoid Unnecessary Replacement Costs
Well-maintained equipment may remain useful longer, reducing the need for premature replacement.
Make Future Packing Easier
Clean, organized gear is easier to inspect, locate, and pack when planning another outdoor adventure.
2. Start With a Post-Camping Gear Inspection
Before cleaning individual items, unpack everything and assess its condition.
This first step helps you understand which equipment needs attention.
Unpack as Soon as Practical
Avoid leaving damp camping gear inside a tightly closed backpack, vehicle, or storage bag.
If immediate cleaning is not possible, prioritize removing wet items and spreading them out to dry in a suitable location.
Create Separate Equipment Groups
Organize your belongings into categories:
| Category | Common Equipment | Initial Priority |
|---|---|---|
| Shelter | Tent, rainfly, footprint, stakes | Inspect and dry |
| Sleeping equipment | Sleeping bag, sleeping pad, pillow | Air out and inspect |
| Backpacks and bags | Hiking backpack, duffel, stuff sacks | Empty and remove debris |
| Cooking equipment | Pots, pans, utensils, stove | Clean food residue |
| Clothing | Jackets, socks, base layers | Wash or air out |
| Footwear | Hiking boots, sandals | Remove dirt and dry |
| Water equipment | Bottles, reservoirs, filters | Clean and dry appropriately |
| Lighting and electronics | Headlamps, lanterns, power banks | Inspect and recharge or store safely |
| Small accessories | Poles, ropes, tools, repair kits | Clean and check condition |
Check for Missing Items
Compare your equipment with your usual packing list.
Look for missing stakes, cords, utensils, charging cables, and other small accessories.
Identify Damaged Equipment
Set aside items requiring repair.
Avoid returning damaged safety-critical equipment to storage without evaluating whether it remains suitable for use.
Separate Clean and Dirty Items
Keep food-contaminated equipment away from clean clothing and sleeping materials.
3. Prepare a Suitable Camping Gear Cleaning Area
A dedicated cleaning area can make the process easier and reduce unnecessary mess inside the home.
Choose an Appropriate Location
Depending on your living situation, useful areas may include:
- A balcony.
- A patio.
- A garage.
- A laundry area.
- A bathroom.
- A utility space.
- A clean outdoor area.
Make sure the location provides suitable drainage and ventilation.
Gather Basic Cleaning Supplies
You may need:
- Soft brushes.
- Clean cloths.
- Sponges.
- Mild cleaning products approved for the equipment.
- Buckets.
- Water.
- Towels.
- Drying racks.
- A suitable clothesline.
- Small containers for accessories.
Avoid assuming that one cleaning product is suitable for every type of camping equipment.
Check Manufacturer Care Instructions
Technical outdoor materials can require specialized cleaning methods.
Read product labels or official care instructions before washing.
Avoid Harsh Cleaning Methods
Unless specifically approved, avoid:
- Bleach.
- Strong solvents.
- Abrasive scrubbers.
- High-pressure washing.
- Excessive heat.
- Aggressive machine washing.
- Unnecessary chemical treatments.
These methods may damage coatings, fabrics, adhesives, or other components.
4. How to Clean a Camping Tent After a Trip
A tent is one of the most important pieces of camping equipment to maintain.
It protects you from outdoor conditions and often contains materials that require careful handling.
Step 1: Remove Loose Dirt
Set up the tent or spread it across a clean surface.
Shake out:
- Sand.
- Leaves.
- Grass.
- Dust.
- Small debris.
Use a soft brush or cloth for remaining dirt.
Step 2: Spot-Clean Dirty Areas
Use a damp cloth or soft sponge with a cleaning product suitable for the tent material.
Pay attention to:
- Floor corners.
- Door openings.
- Muddy sections.
- Areas around zippers.
- The rainfly.
Avoid aggressive scrubbing that may damage coatings.
Step 3: Clean the Tent Floor
The floor often collects the most dirt.
Wipe away debris and residue using an appropriate cleaning method.
Avoid soaking the tent unnecessarily.
Step 4: Inspect Zippers and Seams
Check for:
- Dirt inside zipper teeth.
- Damaged zipper sliders.
- Loose stitching.
- Peeling seam tape.
- Worn waterproof coatings.
Use manufacturer-approved maintenance products when necessary.
Step 5: Dry the Tent Thoroughly
Allow the tent body, rainfly, floor, and related components to dry completely.
Use a shaded, well-ventilated location when possible.
Avoid prolonged direct sunlight, which may accelerate deterioration of some tent fabrics and coatings.
Step 6: Inspect Before Storage
Confirm that no damp areas remain, especially around seams, folds, and corners.
Do not store a damp tent in a tightly closed bag.
5. How to Store a Camping Tent Properly
Once the tent is clean and completely dry, choose a storage method that protects its materials.
Use a Cool, Dry Storage Location
Avoid damp basements, excessively hot attics, and other environments with unsuitable temperature or humidity.
Avoid Long-Term Tight Compression
If space allows, store the tent loosely in a larger breathable storage bag rather than keeping it tightly compressed for extended periods.
Follow the manufacturer’s storage recommendations.
Store Tent Poles Carefully
Clean and dry poles before storage.
Inspect joints, shock cords, and locking mechanisms.
Store poles where they will not be bent or crushed.
Organize Stakes and Guy Lines
Remove dirt from stakes and allow them to dry.
Store sharp stakes in a protective pouch.
Keep guy lines organized to reduce tangling.
Keep Components Together
A labeled storage container can hold:
- Tent body.
- Rainfly.
- Footprint.
- Poles.
- Stakes.
- Guy lines.
- Repair supplies.
If components require separate storage conditions, prioritize the manufacturer’s instructions.
6. How to Clean a Sleeping Bag
Sleeping bags collect body oils, sweat, dust, and other residue during use.
However, they generally do not need a complete wash after every short trip.
Excessive washing may create unnecessary wear.
Air Out the Sleeping Bag
After returning home, unzip the bag and allow it to air out.
Choose a clean, dry, well-ventilated location.
Inspect for Dirt and Odors
Check:
- Collar areas.
- Hood.
- Foot section.
- Interior lining.
- Exterior fabric.
Spot-Clean When Appropriate
Small marks may be removed with a suitable cleaning product and soft cloth.
Follow the sleeping bag manufacturer’s instructions.
Wash Only When Necessary
When a complete wash is required, check whether the sleeping bag is machine washable or requires another method.
Down-filled and synthetic sleeping bags may have different care requirements.
Use Appropriate Cleaning Products
Some sleeping bags require specialized cleaners.
Ordinary detergents, fabric softeners, and harsh chemicals may be unsuitable.
Dry Completely
Drying is particularly important for insulated sleeping equipment.
Follow the recommended drying method and temperature limits.
Down insulation may require careful drying to restore loft and prevent moisture from remaining inside the fill.
Never store a sleeping bag while damp.
7. How to Store Sleeping Bags Without Damaging Insulation
Long-term storage can affect the performance of insulated equipment.
Avoid Leaving Sleeping Bags Compressed
Sleeping bags are often packed tightly during travel.
However, long-term compression may reduce the loft of some insulation materials.
Use a Large Storage Sack
Many sleeping bags include a larger storage sack designed for loose storage.
Consider Hanging When Appropriate
Some sleeping bags can be stored hanging in a suitable closet.
Follow manufacturer guidance and ensure the bag is supported appropriately.
Choose a Dry Environment
Avoid humid storage areas.
Protect Against Dust and Pests
Use suitable breathable storage arrangements that protect the bag without trapping moisture.
Check Periodically
Inspect stored sleeping bags occasionally for moisture, odors, pests, or deterioration.
8. How to Clean and Store Sleeping Pads
Sleeping pads may collect dirt, moisture, and body oils.
Their maintenance depends on whether they are foam, self-inflating, or inflatable.
Remove Surface Dirt
Wipe the pad with a damp cloth and suitable cleaner.
Clean Valves Carefully
For inflatable and self-inflating pads, inspect valves for dirt or damage.
Avoid forcing water into areas that are difficult to dry.
Check for Leaks
Inflate the pad according to its instructions and inspect for air loss.
If a leak is suspected, follow the manufacturer’s recommended testing and repair procedure.
Dry Completely
Allow the pad to dry before storage.
Store According to Pad Type
| Sleeping Pad Type | General Storage Consideration |
|---|---|
| Closed-cell foam | Store clean and dry, away from excessive heat |
| Self-inflating | Often stored unrolled with the valve open, if recommended |
| Inflatable air pad | Store clean, dry, and loosely packed according to instructions |
Do not assume the same storage method applies to every sleeping pad.
Protect Against Sharp Objects
Keep pads away from exposed blades, nails, and other objects that could puncture them.
9. How to Clean a Hiking or Camping Backpack
Backpacks accumulate dust, sweat, mud, and food crumbs.
A regular cleaning routine helps maintain fabric, straps, buckles, and zippers.
Step 1: Empty Every Pocket
Remove all contents.
Check small compartments for forgotten food, batteries, tissues, or other items.
Step 2: Shake Out Debris
Turn the backpack upside down when appropriate.
Use a soft brush or suitable vacuum attachment to remove crumbs and dust.
Step 3: Spot-Clean the Fabric
Use a damp cloth and a cleaner compatible with the backpack material.
Step 4: Clean High-Contact Areas
Pay attention to:
- Shoulder straps.
- Hip belt.
- Back panel.
- Handles.
- Frequently touched pockets.
These areas may accumulate sweat and body oils.
Step 5: Inspect Hardware
Check:
- Zippers.
- Buckles.
- Adjustment straps.
- Stitching.
- Frame components.
- Hydration sleeves.
Step 6: Air-Dry Thoroughly
Open compartments and allow the backpack to dry in a well-ventilated area.
Avoid excessive heat.
Step 7: Store Without Heavy Compression
Keep the backpack in a dry location where straps and structural components will not be crushed.
Machine washing should only be used if explicitly permitted by the manufacturer.
10. How to Clean Camping Cookware and Eating Utensils
Camping cookware requires careful cleaning because it comes into contact with food.
Remove Food Residue
Empty pots, pans, plates, and utensils.
Dispose of food waste appropriately.
Wash With Suitable Dishwashing Products
Use warm water and an appropriate dishwashing detergent when compatible with the equipment.
Pay Attention to Hard-to-Reach Areas
Clean:
- Pot handles.
- Lids.
- Folding joints.
- Utensil connections.
- Container seals.
Rinse Thoroughly
Remove detergent residue according to product instructions.
Dry Completely
Allow cookware to dry before stacking or closing storage containers.
Inspect Nonstick Surfaces
Check for scratches, peeling, or other damage.
Follow the manufacturer’s guidance on continued use or replacement.
Store in a Clean Container
Keep cookware protected from dust and pests.
Avoid storing damp cloths or food residue inside cooking equipment.
11. How to Clean and Store a Camping Stove
Camping stoves require particular attention because they may involve fuel, heat, and pressurized components.
Allow the Stove to Cool
Never clean or pack a hot stove.
Remove Food Residue
Use cleaning methods recommended by the manufacturer.
Inspect Components
Check for:
- Damaged supports.
- Blocked burner openings.
- Loose connections.
- Worn seals.
- Corrosion.
- Visible damage.
Avoid Unauthorized Repairs
Do not disassemble fuel systems or modify stove components unless the manufacturer specifically permits the procedure and you are qualified to perform it.
Store Fuel Separately and Safely
Fuel canisters and liquid fuels require storage conditions appropriate to their type.
Follow manufacturer instructions, local regulations, and fire-safety requirements.
Never store fuel near heat sources or in unsuitable enclosed spaces.
Check for Fuel Leaks
If you suspect a leak, do not operate the stove.
Follow the manufacturer’s safety guidance and seek qualified assistance when necessary.
Keep the Stove Clean and Dry
Store the stove in a suitable protective container after it has cooled and been cleaned.
12. How to Clean Water Bottles and Hydration Reservoirs
Reusable water containers should be cleaned after use to reduce residue and microbial growth.
Empty Remaining Water
Do not leave old water sitting inside containers for extended periods.
Wash Bottles Thoroughly
Use an appropriate bottle brush and cleaning method.
Pay attention to:
- Bottle openings.
- Caps.
- Threads.
- Seals.
- Drinking spouts.
Clean Hydration Reservoirs
Follow the reservoir manufacturer’s instructions.
Some reservoirs have specialized cleaning kits or compatible cleaning tablets.
Clean Drinking Tubes
Use appropriate tools or methods recommended for the hydration system.
Rinse Properly
Remove cleaning-product residue.
Dry All Components
Allow bottles, reservoirs, caps, and tubes to dry as thoroughly as possible.
Keep components open or separated during drying when appropriate.
Store Clean and Dry
Store in a suitable location that protects equipment from dust and contamination.
13. How to Maintain Camping Water Filters
Water filters require special care because incorrect cleaning or storage can affect their reliability.
Follow the Specific Filter Instructions
Different systems use different technologies.
Examples include:
- Hollow-fiber filters.
- Ceramic filters.
- Activated carbon systems.
- Chemical purification systems.
- Ultraviolet treatment devices.
Clean According to Manufacturer Guidance
Some filters can be backflushed.
Others require different maintenance methods.
Prevent Freezing Damage
Certain hollow-fiber filters can be permanently damaged if water inside the filter freezes.
Damage may not be visible.
Follow the manufacturer’s freeze-protection instructions and replace filters when required.
Avoid Improper Chemical Cleaning
Do not use bleach or other chemicals unless specifically instructed for that filter.
Dry or Store Wet Only as Directed
Some systems require special preparation for long-term storage.
Do not assume every filter should be completely dried in the same way.
Check Replacement Requirements
Replace cartridges or filter elements according to the manufacturer’s stated limits and conditions.
14. How to Clean Hiking Boots and Camping Footwear
Outdoor footwear often collects mud, sand, moisture, and plant debris.
Remove Loose Dirt
Use a soft brush to remove dried mud and debris.
Clean According to Material
Leather, synthetic fabric, suede, and waterproof footwear may require different cleaning products.
Remove Insoles When Appropriate
If removable, take out insoles and allow them to dry separately.
Dry Naturally
Avoid placing footwear directly against heaters, fires, or other intense heat sources.
Excessive heat can damage adhesives and materials.
Inspect Soles
Check for:
- Excessive wear.
- Loose sections.
- Embedded stones.
- Damage to traction surfaces.
Maintain Waterproof Treatments When Necessary
Use manufacturer-approved products if the footwear requires waterproofing maintenance.
Store in a Dry, Ventilated Location
Avoid tightly sealed storage while footwear is damp.
15. How to Wash and Store Camping Clothing
Camping clothing may include technical fabrics that require specialized care.
Separate Clothing by Material
Group items according to care labels.
Examples include:
- Base layers.
- Fleece.
- Insulated jackets.
- Rainwear.
- Hiking socks.
- Ordinary casual clothing.
Follow Washing Instructions
Technical clothing may require specific detergents, wash temperatures, or drying methods.
Avoid Unnecessary Fabric Softeners
Fabric softeners can interfere with the performance of some technical fabrics.
Check manufacturer recommendations.
Maintain Waterproof Clothing Properly
Waterproof-breathable garments may require appropriate cleaning and periodic renewal of their durable water-repellent treatment.
Follow product instructions.
Dry Completely
Do not store damp clothing.
Repair Minor Damage
Address loose stitching or small tears using suitable methods.
Store Clean Clothing Separately
Keep clean camping clothing away from dirty equipment and fuel-related supplies.
16. How to Clean and Maintain Tent Poles, Stakes, and Guy Lines
Small structural components are easy to overlook.
However, they are essential for safe tent setup.
Tent Poles
Wipe away dirt and moisture.
Inspect:
- Pole segments.
- Connectors.
- Shock cords.
- Locking mechanisms.
Replace or repair damaged components according to manufacturer guidance.
Tent Stakes
Remove soil and debris.
Dry metal stakes before storage.
Check for bending or sharp damage.
Guy Lines
Remove dirt and allow lines to dry.
Inspect for fraying or wear.
Coil or bundle lines to reduce tangling.
Store Components in Protective Bags
Use appropriate pouches to prevent sharp stakes from damaging tent fabric.
17. How to Maintain Headlamps, Lanterns, and Camping Electronics
Camping electronics may be exposed to rain, dust, impact, and temperature changes.
Clean Exterior Surfaces
Use a soft cloth and cleaning method appropriate for the device.
Inspect Charging Ports
Check for dirt, moisture, or corrosion.
Recharge Rechargeable Devices
Follow manufacturer recommendations for battery charging and long-term storage.
Remove Replaceable Batteries When Appropriate
For equipment stored for extended periods, removing certain replaceable batteries may reduce the risk of leakage.
Follow device instructions.
Store Lithium Batteries Safely
Avoid excessive heat, physical damage, and improper charging.
Damaged or swollen batteries should not be used.
Follow applicable disposal and recycling requirements.
Check Equipment Function
Test lights and other essential devices before storing them.
Protect Electronics From Moisture
Use suitable protective cases or dry storage.
18. How to Clean and Store Camping Furniture
Portable chairs, tables, and other camping furniture can accumulate dirt and moisture.
Remove Loose Debris
Brush away sand, soil, and leaves.
Wipe Surfaces
Use cleaning products appropriate for the frame and fabric.
Inspect Folding Mechanisms
Check hinges, joints, and locking components.
Dry Fabric Completely
Do not fold damp fabric into tightly closed storage bags.
Check for Corrosion
Inspect metal components for rust or other deterioration.
Store Without Excessive Pressure
Avoid stacking heavy objects on lightweight folding furniture.
19. How to Clean Coolers and Food Storage Containers
Coolers and food containers should be cleaned promptly after camping.
Empty All Contents
Remove leftover food, packaging, and ice.
Wash Interior Surfaces
Use a cleaning method appropriate for food-contact surfaces.
Clean Seals and Drainage Areas
Food residue and moisture may collect around lids, gaskets, and drains.
Rinse and Dry
Allow all components to dry thoroughly.
Address Persistent Odors
Use manufacturer-approved cleaning methods.
Avoid combining household cleaning chemicals.
Store With Appropriate Ventilation
Some coolers benefit from being stored with the lid slightly open to reduce trapped moisture.
Follow manufacturer recommendations.
20. How to Prevent Mold, Mildew, and Unpleasant Odors
Moisture control is central to camping gear maintenance.
Never Store Wet Gear in Closed Bags
Damp tents, sleeping bags, backpacks, and clothing should be dried before long-term storage.
Improve Air Circulation
Choose a storage area with suitable ventilation.
Avoid Damp Storage Locations
Basements, outdoor sheds, and garages may experience humidity or temperature changes.
Assess conditions before using them for sensitive equipment.
Use Appropriate Moisture Control
In humid environments, a dehumidifier or other suitable moisture-management method may help maintain better storage conditions.
Inspect Equipment Periodically
Look for:
- Musty odors.
- Visible mold.
- Damp patches.
- Discoloration.
- Material deterioration.
Handle Mold Carefully
If equipment develops visible mold, follow manufacturer guidance.
Some items may require specialized cleaning or replacement, particularly when contamination is extensive or materials cannot be cleaned effectively.
Avoid aggressively brushing mold indoors, which may spread spores.
21. Choose the Right Camping Gear Storage Location
A suitable storage environment helps protect equipment between trips.
Prioritize Dry Conditions
Choose an area without recurring moisture problems.
Avoid Excessive Heat
High temperatures can damage some adhesives, coatings, plastics, and batteries.
Limit Direct Sunlight
Long-term ultraviolet exposure may weaken or discolor certain materials.
Keep Equipment Away From Pests
Store food-related items clean and protect vulnerable materials.
Avoid Heavy Compression
Do not place heavy boxes on sleeping bags, inflatable pads, or other equipment that may be damaged by pressure.
Consider Accessibility
Frequently used gear should be reasonably easy to retrieve.
Separate Hazardous Materials
Fuel, chemicals, and batteries may require specialized storage and should not simply be placed inside general camping bins.
22. Organize Camping Gear by Category
A category-based system makes packing and unpacking more efficient.
Suggested Storage Categories
| Storage Category | Typical Contents | Storage Approach |
|---|---|---|
| Shelter | Tent, rainfly, footprint | Loose, dry storage |
| Tent accessories | Stakes, poles, guy lines | Protective pouches |
| Sleeping equipment | Sleeping bags, pads, pillows | Material-appropriate storage |
| Cooking equipment | Pots, utensils, stove | Clean, dry containers |
| Food storage | Coolers, food containers | Clean and ventilated as appropriate |
| Hydration | Bottles, reservoirs, filters | Product-specific storage |
| Clothing | Hiking layers, socks, rainwear | Clean drawers or bins |
| Lighting | Headlamps, lanterns | Protective storage |
| Tools and repairs | Multi-tools, repair kits | Secure organizers |
| Personal accessories | Maps, dry bags, small supplies | Labeled containers |
Use Clear Labels
Examples include:
- TENT
- SLEEPING GEAR
- CAMP KITCHEN
- HYDRATION
- LIGHTING
- REPAIR KIT
- HIKING ACCESSORIES
Keep Related Items Together
Grouping related supplies reduces preparation time.
Avoid Overfilling Containers
Leave enough room to access equipment without damaging it.
23. Store Camping Gear in a Small Apartment
Limited storage space does not prevent you from maintaining camping equipment properly.
Use Existing Cabinets
A dry, clean cabinet may be suitable for many items.
Choose Stackable Storage Boxes
Use sturdy containers for equipment that can safely be stored in enclosed bins.
Reserve Space for Bulky Items
Sleeping bags and other lofted insulation may need more room than tightly packed travel storage allows.
Use Shelving Carefully
Place heavier equipment on lower shelves.
Secure tall storage units when appropriate.
Store Small Accessories in Compartments
Use organizers for stakes, repair supplies, cords, and other small items.
Avoid Damp Balconies
Outdoor balconies may expose gear to rain, humidity, heat, and sunlight.
Keep Fuel Out of General Living Storage
Follow applicable fire-safety regulations and manufacturer instructions for fuel storage.
Do not store fuel in unsuitable indoor locations simply to save space.
24. Create a Simple Camping Gear Inventory
An inventory can help prevent missing equipment and unnecessary purchases.
Record Essential Information
Useful details include:
- Equipment name.
- Quantity.
- Storage location.
- Condition.
- Maintenance needs.
- Replacement priority.
Example Inventory
| Equipment | Quantity | Condition | Storage Location | Next Action |
|---|---|---|---|---|
| Camping tent | 1 | Good | Shelter shelf | Ready |
| Tent stakes | 10 | Good | Accessory pouch | Ready |
| Sleeping bag | 2 | Good | Storage sacks | Ready |
| Sleeping pad | 2 | Check | Gear cabinet | Inspect valves |
| Camping stove | 1 | Good | Kitchen bin | Check before use |
| Headlamp | 2 | Good | Electronics box | Check batteries |
| Water filter | 1 | Review | Hydration bin | Check service life |
| First-aid kit | 1 | Check | Safety pouch | Replenish supplies |
These quantities are examples.
Keep the System Simple
A notebook or spreadsheet is sufficient for most personal camping collections.
Update After Each Trip
Record damaged, missing, or consumed items.
Review Before Departure
Use the inventory to confirm that equipment is complete and ready.
25. Repair or Replace Damaged Camping Equipment
Not every damaged item requires immediate replacement, but safety should guide repair decisions.
Minor Fabric Damage
Some small tears can be repaired using manufacturer-approved patches or repair materials.
Damaged Tent Seams
Certain seam problems may be repairable with suitable products.
Check compatibility with the fabric and coating.
Broken Zippers
Some zipper problems can be repaired, while others require professional service or replacement.
Damaged Buckles
Replacement buckles may be available for certain backpacks and equipment.
Worn Sleeping Pads
Punctures may be repairable using appropriate kits.
Damaged Fuel Equipment
Fuel systems require special caution.
Do not use equipment with suspected leaks or unsafe components.
Compromised Safety Equipment
Replace equipment when its reliability cannot be established.
This is particularly important for products where failure could create serious danger.
26. Build a Practical Post-Camping Cleaning Routine
A consistent routine makes gear maintenance easier.
Immediately After Returning Home
- Unpack wet equipment.
- Separate dirty and clean items.
- Empty food containers.
- Remove leftover food.
- Identify damaged equipment.
- Begin drying tents and sleeping gear.
Within the Next Day or Two
- Clean the tent as needed.
- Wash cookware.
- Clean water bottles.
- Clean footwear.
- Wash clothing.
- Wipe backpacks.
- Inspect small accessories.
After Everything Is Dry
- Store sleeping bags loosely.
- Pack tent components appropriately.
- Organize cookware.
- Protect electronics.
- Store clothing.
- Return accessories to labeled containers.
Before Long-Term Storage
- Confirm that equipment is completely dry.
- Check for damage.
- Review battery requirements.
- Follow fuel storage rules.
- Update the inventory.
- Record outstanding repairs.
Before the Next Camping Trip
- Inspect equipment.
- Test essential devices.
- Check water filters.
- Confirm stove condition.
- Review first-aid supplies.
- Verify that all required components are present.
27. Common Camping Gear Cleaning and Storage Mistakes
Mistake 1: Leaving Gear Packed After Returning Home
Moisture and dirt may remain trapped inside bags.
Unpack equipment promptly.
Mistake 2: Storing a Damp Tent
Even small amounts of trapped moisture can create problems.
Dry every component thoroughly.
Mistake 3: Keeping Sleeping Bags Compressed
Long-term compression may affect insulation loft.
Use appropriate loose storage.
Mistake 4: Washing Technical Equipment Incorrectly
Harsh cleaning products or unsuitable machine washing may damage specialized materials.
Follow care instructions.
Mistake 5: Drying Gear With Excessive Heat
Direct heaters and high temperatures can damage fabrics, adhesives, and coatings.
Use approved drying methods.
Mistake 6: Forgetting Small Accessories
Missing stakes, cords, and repair tools can create problems on the next trip.
Use a checklist.
Mistake 7: Storing Dirty Cookware
Food residue can attract pests and create unpleasant odors.
Clean food-contact equipment thoroughly.
Mistake 8: Ignoring Water Filter Maintenance
Improper storage may compromise filter performance.
Follow product-specific instructions.
Mistake 9: Leaving Batteries Unchecked
Battery leakage, damage, or discharge may affect equipment.
Inspect and maintain devices appropriately.
Mistake 10: Storing Everything in One Large Container
Mixed equipment can become difficult to locate and may be damaged by pressure or contamination.
Organize by category.
28. Troubleshooting Common Camping Gear Storage Problems
| Problem | Possible Cause | Practical Solution |
|---|---|---|
| Tent smells musty | Trapped moisture | Inspect for mold and follow appropriate cleaning guidance |
| Sleeping bag feels flattened | Prolonged compression or damp insulation | Follow manufacturer loft-restoration and care instructions |
| Backpack has unpleasant odors | Sweat, dirt, or trapped moisture | Clean suitable areas and dry thoroughly |
| Cookware smells stale | Food residue or incomplete drying | Wash, rinse, and dry properly |
| Water bottle develops odors | Residue or microbial growth | Clean all components using approved methods |
| Tent poles become difficult to assemble | Dirt, corrosion, or damaged connections | Inspect and maintain according to instructions |
| Footwear remains damp | Inadequate drying conditions | Improve ventilation and dry appropriately |
| Clothing loses water repellency | Dirt, wear, or depleted treatment | Clean and renew treatment if recommended |
| Electronics do not work | Battery or equipment problems | Inspect and troubleshoot safely |
| Storage boxes develop condensation | Unsuitable temperature or humidity | Improve storage conditions |
| Gear is difficult to locate | Poor organization | Use categories and labels |
| Equipment deteriorates in storage | Heat, moisture, sunlight, or improper compression | Change storage methods and inspect affected items |
29. Frequently Asked Questions
1. Should I clean camping gear after every trip?
Yes. At minimum, inspect, dry, and remove dirt from equipment after each trip. Full washing is only necessary when appropriate for the item.
2. How soon should I unpack camping equipment?
Unpack as soon as practical, especially when gear is wet or dirty.
3. Can I store a tent immediately after camping?
Only if it is clean enough for storage and completely dry. Damp tents should be dried before being packed away.
4. What is the best way to clean a camping tent?
Remove loose dirt, spot-clean with suitable products, inspect components, and dry thoroughly according to manufacturer instructions.
5. Can I wash a tent in a washing machine?
Most tents should not be machine washed unless the manufacturer explicitly permits it.
6. How do I prevent mold on camping equipment?
Dry gear completely, store it in suitable conditions, and inspect it periodically.
7. Should I wash my sleeping bag after every trip?
Not necessarily. Airing out and spot-cleaning may be sufficient after many trips. Wash when needed according to the care instructions.
8. How should I store a sleeping bag long term?
Many sleeping bags are best stored loosely in a large storage sack or another manufacturer-approved arrangement.
9. Can I store a sleeping bag in its compression sack?
Compression sacks are useful for transport, but prolonged compression may reduce loft in some insulation materials.
10. How do I clean a sleeping pad?
Wipe it using an appropriate cleaning method, inspect for damage, and dry it before storage.
11. Should self-inflating sleeping pads be stored inflated?
Many manufacturers recommend storing them unrolled with the valve open, but you should follow the specific product instructions.
12. Can I machine wash a hiking backpack?
Only if the manufacturer permits it. Many backpacks are better cleaned by hand.
13. How do I clean camping cookware?
Wash with appropriate dishwashing products, rinse thoroughly, and dry before storage.
14. How should I store a camping stove?
Clean and dry the stove, inspect it, and store it according to manufacturer instructions. Handle fuel separately under appropriate safety rules.
15. Can I store camping fuel inside my apartment?
Fuel storage requirements depend on the fuel type, product instructions, building rules, and local fire regulations. Do not assume indoor storage is safe or permitted.
16. How do I clean a hydration reservoir?
Use the cleaning method recommended by the manufacturer, including appropriate treatment of the reservoir, tube, and mouthpiece.
17. Do camping water filters need special storage?
Yes. Filter technologies differ, and some require specific cleaning, disinfection, drying, or freeze-protection procedures.
18. How do I dry hiking boots safely?
Remove excess dirt, follow material-specific cleaning guidance, and dry naturally away from excessive heat.
19. How should I store waterproof jackets?
Clean and dry them according to the care label, then store them without unnecessary compression or exposure to unsuitable conditions.
20. What is the best place to store camping gear?
A clean, dry location with suitable temperature, ventilation, and protection from sunlight is generally preferable.
21. Can I store camping gear in a garage?
Possibly, if temperature, humidity, pests, and safety conditions are suitable. Some items may require more controlled indoor storage.
22. How do I organize camping gear in a small apartment?
Use labeled containers, shelves, and compact organizers while allowing adequate space for items that should not remain compressed.
23. Should I keep all camping equipment together?
Grouping related gear is useful, but certain materials, including fuel and some batteries, may require separate storage.
24. How often should I inspect stored camping gear?
Inspect equipment after trips, periodically during storage, and before every new outing.
25. When should camping equipment be replaced?
Replace items when damage, deterioration, age-related limitations, or manufacturer guidance indicates they are no longer reliable or safe.
30. Complete Post-Camping Cleaning and Storage Checklist
Use this checklist after returning from a camping trip.
Initial Unpacking
- Empty all backpacks and bags.
- Separate wet equipment.
- Remove leftover food.
- Sort dirty clothing.
- Identify damaged items.
- Check for missing accessories.
- Begin drying moisture-sensitive equipment.
Tent and Shelter
- Remove dirt and debris.
- Spot-clean tent fabric.
- Clean the tent floor.
- Inspect zippers.
- Check seams and coatings.
- Clean tent poles.
- Dry stakes and guy lines.
- Dry all tent components completely.
- Store the tent appropriately.
Sleeping Equipment
- Air out sleeping bags.
- Spot-clean when needed.
- Wash according to care instructions if necessary.
- Dry insulation thoroughly.
- Store sleeping bags loosely.
- Clean sleeping pads.
- Inspect pad valves.
- Check for leaks.
- Store pads according to manufacturer guidance.
Backpacks and Footwear
- Empty every backpack pocket.
- Remove dust and crumbs.
- Clean straps and back panels.
- Inspect buckles and zippers.
- Dry backpacks thoroughly.
- Brush dirt from footwear.
- Clean footwear appropriately.
- Dry insoles and shoes.
- Inspect soles and stitching.
Cooking and Hydration
- Wash pots and pans.
- Clean utensils.
- Clean food containers.
- Dry cookware completely.
- Inspect camping stove.
- Follow fuel safety requirements.
- Wash water bottles.
- Clean hydration reservoirs.
- Maintain water filters according to instructions.
- Store hydration equipment appropriately.
Clothing and Accessories
- Wash dirty clothing.
- Follow technical fabric care instructions.
- Dry all garments.
- Inspect rainwear.
- Clean camping furniture.
- Check repair tools.
- Organize ropes and accessories.
Electronics and Safety Equipment
- Clean headlamps and lanterns.
- Inspect battery compartments.
- Recharge devices when appropriate.
- Follow long-term battery storage guidance.
- Check first-aid supplies.
- Replace consumed items.
- Inspect emergency equipment.
- Secure sharp tools.
Long-Term Storage
- Confirm equipment is completely dry.
- Choose a suitable storage location.
- Protect gear from excessive heat.
- Limit direct sunlight.
- Avoid unnecessary compression.
- Use labeled storage containers.
- Separate hazardous materials.
- Update the equipment inventory.
- Record repairs or replacements needed.
- Schedule a pre-trip equipment check.
Final Thoughts
Cleaning and storing camping gear after a trip is one of the most practical ways to protect your outdoor equipment and prepare for future adventures.
Although unpacking, washing, drying, and organizing may require some time, these simple habits can help prevent avoidable damage, reduce unpleasant odors, and keep essential equipment in reliable condition.
The most important principle is to treat each type of camping gear according to its materials and intended use.
Tents should be cleaned gently and dried thoroughly. Sleeping bags need appropriate care to preserve their insulation. Backpacks, footwear, cookware, and hydration equipment should be cleaned using suitable methods, while stoves, batteries, and water filters require particular attention to manufacturer safety instructions.
Storage conditions matter just as much as cleaning.
A dry, well-organized environment can help protect fabrics, coatings, electronics, and other components from moisture, heat, and unnecessary wear.
You do not need an elaborate storage room or expensive organization system to maintain your equipment effectively.
A few suitable containers, clear labels, adequate drying space, and a simple inventory can make a meaningful difference.
As you develop a consistent post-camping routine, caring for your equipment becomes easier and more efficient.
You will become familiar with which items need immediate attention, which materials require specialized cleaning, and which accessories should be checked before the next outing.
Most importantly, regular maintenance allows you to approach future camping trips with greater confidence.
Instead of discovering dirty cookware, missing tent stakes, damp sleeping bags, or malfunctioning equipment at the last minute, you can begin each adventure with supplies that have already been cleaned, inspected, and organized.
With thoughtful care and practical storage habits, your camping gear can remain a dependable part of many enjoyable outdoor experiences for years to come.