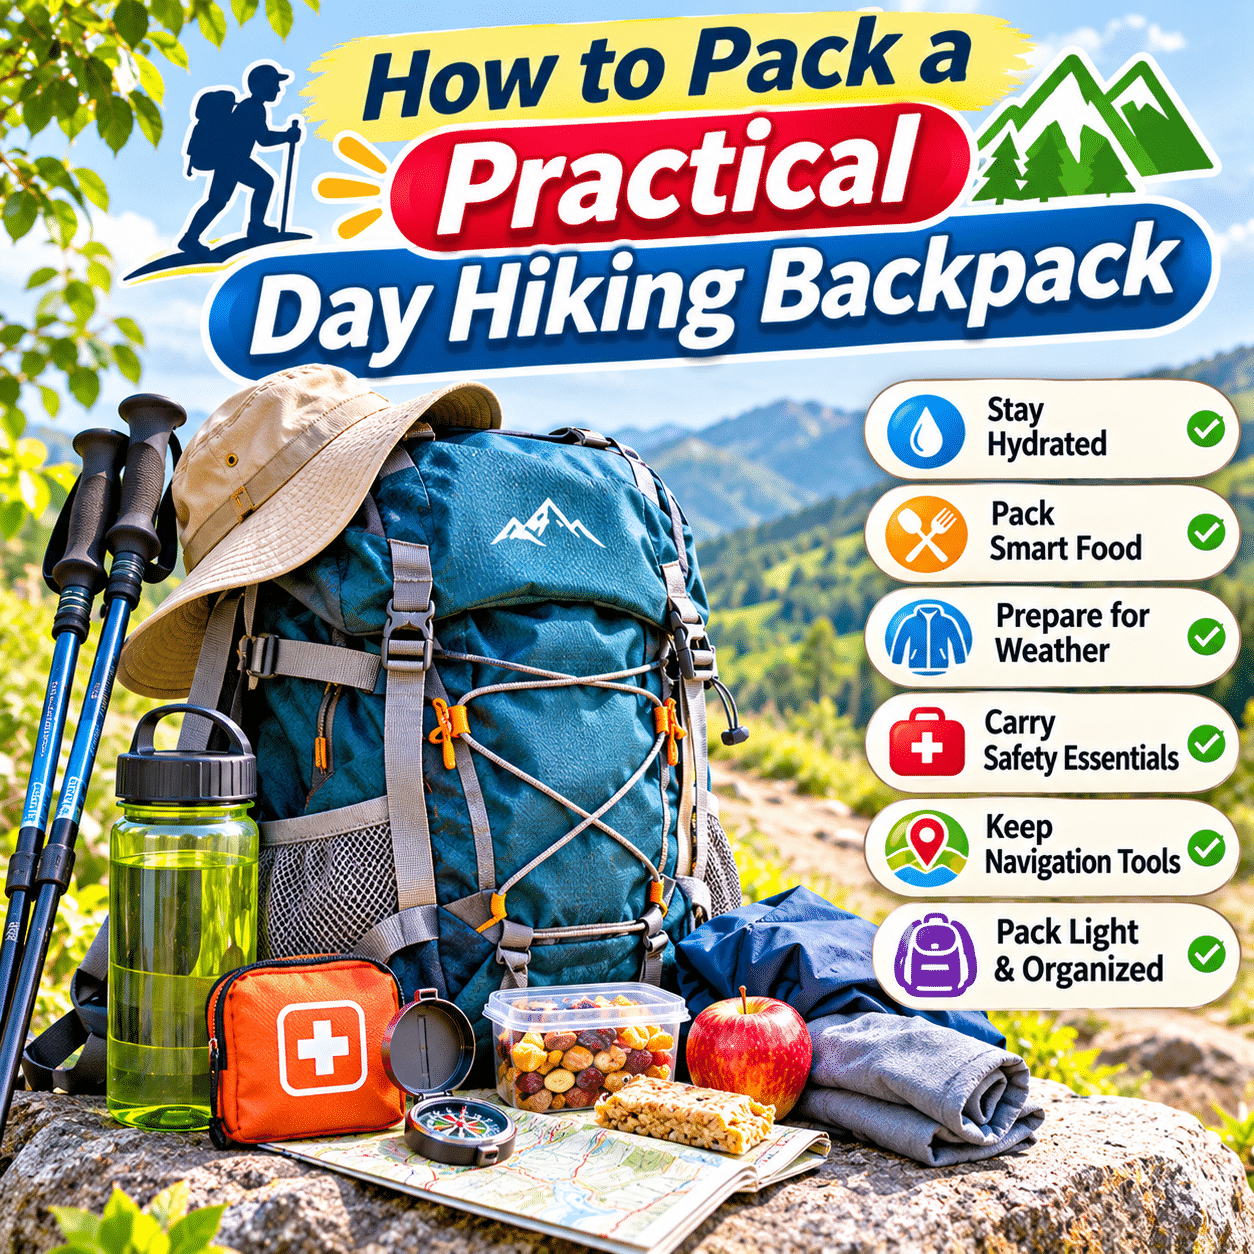
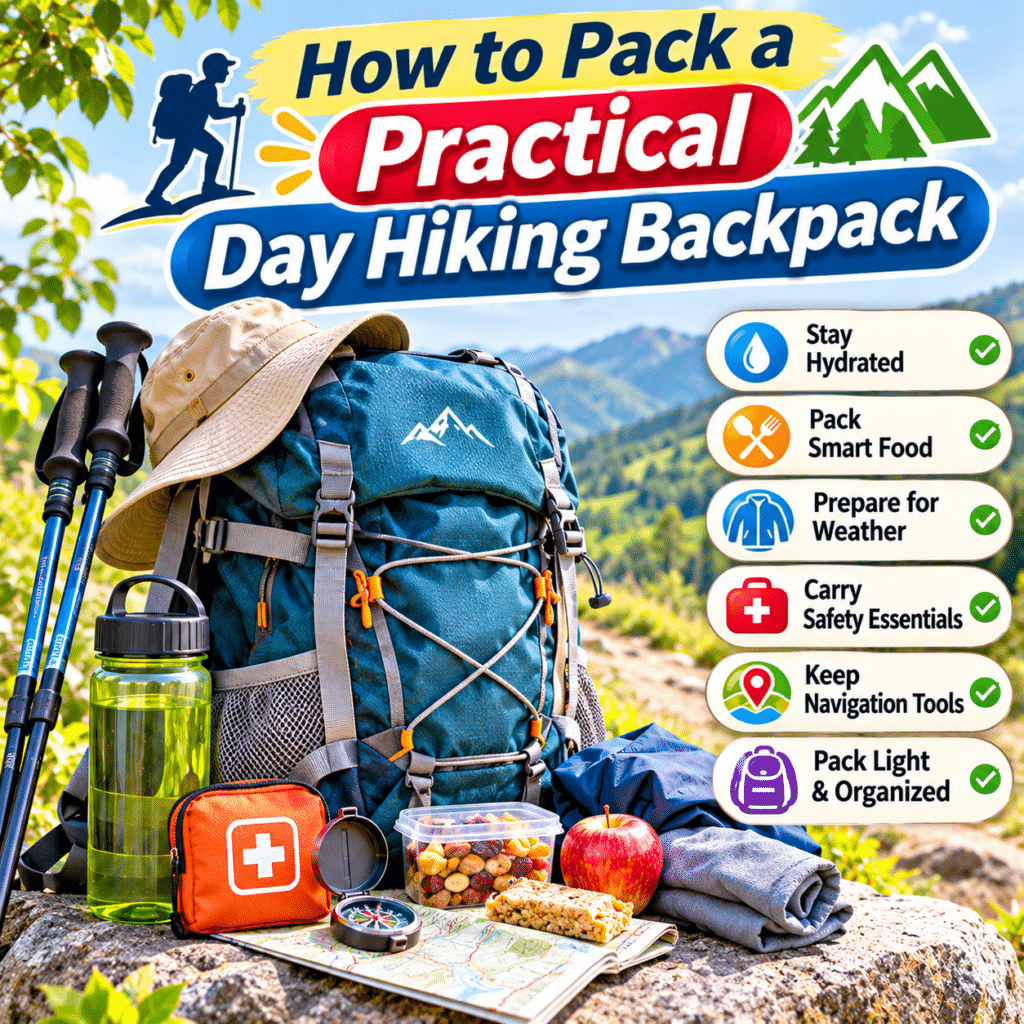
A well-packed day hiking backpack can make a significant difference in how comfortable, organized, and prepared you feel on the trail. Whether you are planning a short woodland walk, a scenic mountain hike, or a full-day outdoor adventure, carrying the right essentials helps you manage changing conditions and enjoy the experience with greater confidence.
However, packing for a day hike involves more than placing a water bottle, snacks, and a jacket inside a backpack.
Outdoor conditions can change unexpectedly. A familiar trail may become slippery after rain, temperatures may drop as elevation increases, and a simple navigation mistake can turn a short outing into a longer journey than planned.
At the same time, carrying too many unnecessary items can make your backpack uncomfortable and place additional strain on your shoulders and back.
The goal is to find a practical balance between preparation, comfort, and manageable weight.
A thoughtfully organized hiking backpack should provide enough space for essential supplies while keeping frequently used items easy to reach. Heavier belongings should be positioned carefully, delicate equipment should be protected, and emergency items should remain accessible when needed.
This comprehensive guide explains how to choose a suitable day hiking backpack, identify essential gear, organize supplies, pack efficiently, prepare for changing weather, adjust your load for different hiking conditions, and maintain a reliable packing routine for future outdoor adventures.
1. Why Packing Your Day Hiking Backpack Properly Matters
A backpack is more than a convenient way to carry belongings.
During a hike, it becomes your portable supply system, holding the items you may need for hydration, navigation, weather protection, comfort, and unexpected situations.
Improve Comfort While Walking
Poorly distributed weight can make a backpack feel heavier than it actually is.
When equipment is packed unevenly, the load may pull backward or shift while you move.
A balanced arrangement helps the backpack remain stable and comfortable.
Keep Important Items Accessible
Some supplies are needed frequently during a hike.
Examples include:
- Drinking water.
- Trail snacks.
- Navigation tools.
- Sun protection.
- Rain protection.
- First-aid supplies.
Organizing these items thoughtfully reduces unnecessary searching.
Protect Equipment From Damage
Electronic devices, food, clothing, and other belongings may be affected by moisture, pressure, or impact.
Appropriate packing helps protect them.
Prepare for Unexpected Conditions
Even a short hike can involve unexpected delays, changes in weather, or minor injuries.
Carrying appropriate essentials provides useful options when plans change.
Avoid Unnecessary Weight
A practical packing system helps distinguish essential supplies from items that add weight without providing meaningful value.
2. Understand Your Hiking Plans Before Packing
The right backpack contents depend on the specific hike.
There is no universal packing list that works perfectly for every trail, season, or individual.
Before preparing your bag, consider the following factors.
Trail Distance
A short, well-marked trail near developed facilities may require a different load from a long route through remote terrain.
Distance matters, but it should not be the only consideration.
Expected Hiking Duration
Estimate how long the hike may take, including:
- Walking time.
- Rest breaks.
- Photography stops.
- Meals.
- Possible delays.
Plan conservatively rather than assuming everything will proceed at the fastest possible pace.
Terrain
Consider whether the route includes:
- Rocky surfaces.
- Steep climbs.
- Muddy sections.
- Stream crossings.
- Exposed ridges.
- Dense vegetation.
- Uneven trails.
Terrain affects footwear, equipment, and the amount of time required.
Weather Conditions
Review the forecast and consider the possibility of changing conditions.
Pay attention to temperature, precipitation, wind, thunderstorms, and heat.
Trail Remoteness
A popular trail near a town may have easier access to assistance than an isolated route without reliable mobile coverage.
Remote hiking requires more conservative preparation.
Personal Needs
Your packing list should also reflect:
- Fitness and experience.
- Medical requirements.
- Dietary needs.
- Sensitivity to temperature.
- Physical limitations.
- Equipment familiarity.
If a hike exceeds your experience or preparation, choose a more suitable route.
3. Choose the Right Day Hiking Backpack
A comfortable backpack is the foundation of an effective packing system.
Consider Backpack Capacity
Day hiking backpacks are available in different sizes.
The following ranges are general starting points rather than strict rules.
| Backpack Capacity | Common Use | Practical Considerations |
|---|---|---|
| 10–15 liters | Minimal gear on short, low-risk outings | Limited space for extra layers and emergency supplies |
| 15–20 liters | Many shorter day hikes | Compact and manageable |
| 20–30 liters | General day hiking | Room for water, food, layers, and safety essentials |
| 30–40 liters | Longer hikes or bulkier equipment | Useful for cold-weather layers or additional gear |
Actual capacity needs depend on your equipment, climate, and personal requirements.
Do not choose a smaller bag if doing so means leaving essential safety supplies behind.
Look for Comfortable Shoulder Straps
Padded, adjustable straps can help distribute pressure.
They should fit comfortably without digging into your shoulders.
Consider a Hip Belt
A properly fitted hip belt can transfer some backpack weight toward the hips.
This may be particularly useful for heavier loads.
Look for a Stable Back Panel
A supportive back panel can improve comfort and reduce unwanted movement.
Some designs include ventilation features.
Choose Practical Compartments
Useful features may include:
- Main storage compartment.
- Exterior water bottle pockets.
- Small accessory pockets.
- Internal organization.
- Hydration reservoir compatibility.
- Secure attachment points.
More compartments are not always better.
Choose a design that makes sense for your belongings.
Check Weather Resistance
Some backpacks use water-resistant materials, but that does not necessarily make them waterproof.
A pack liner, dry bags, or other protective measures may still be necessary.
4. Understand the Essential Day Hiking Gear Categories
A reliable packing list should cover important needs rather than focusing only on convenience.
A widely used outdoor preparation framework is the Ten Essentials, which groups equipment into ten safety-related categories.
The Ten Essentials
- Navigation.
- Sun protection.
- Insulation.
- Illumination.
- First-aid supplies.
- Fire-starting equipment.
- Repair tools.
- Nutrition.
- Hydration.
- Emergency shelter.
The specific items within these categories depend on the hike, environment, local regulations, and your ability to use them safely.
For example, fire-starting equipment may be inappropriate or restricted in areas with wildfire danger. It should never be used contrary to local rules or conditions.
Emergency shelter may be especially important on remote routes where an unexpected overnight delay is possible.
A mobile phone is useful but should not be treated as a complete substitute for navigation, lighting, communication planning, or other essential equipment.
5. Pack Enough Water for the Hike
Hydration is one of the most important considerations when preparing a day hiking backpack.
Estimate Water Needs Carefully
Water requirements vary according to:
- Temperature.
- Humidity.
- Physical exertion.
- Elevation.
- Individual physiology.
- Hiking duration.
- Availability of reliable water sources.
Some hikers use approximately 0.5 liter per hour in moderate conditions as a rough planning reference, but actual needs may be substantially higher or lower.
This is not a universal hydration prescription.
Plan according to conditions and personal needs, and avoid both dehydration and excessive fluid consumption.
Choose a Suitable Water Container
Common options include:
- Reusable water bottles.
- Hydration reservoirs.
- Collapsible bottles.
- Insulated bottles.
Make Water Easy to Reach
Place bottles in secure exterior pockets when appropriate.
Hydration reservoirs can allow convenient drinking without removing the backpack.
Consider Water Treatment
For longer routes where you may need to refill from natural sources, carry a suitable treatment method and know how to use it.
Natural water can contain harmful microorganisms even when it looks clear.
Filters and chemical or ultraviolet treatments differ in what they remove or inactivate. Choose an appropriate method for the local water risks.
Do Not Assume Water Will Be Available
Verify reliable water access before the hike.
Seasonal streams and remote water sources may be dry or unsafe.
6. Pack Practical Hiking Food and Snacks
Food helps support energy needs during physical activity.
Choose items that are convenient to carry, suitable for the expected conditions, and easy to eat.
Useful Hiking Snack Options
Examples include:
- Trail mix.
- Nuts.
- Dried fruit.
- Energy bars.
- Crackers.
- Sandwiches.
- Whole fruit.
- Other portable foods.
Consider allergies, dietary requirements, and personal preferences.
Choose Foods That Travel Well
Avoid items that spoil easily when appropriate temperature control is unavailable.
Perishable foods should be kept within safe temperature conditions.
Pack Food in Secure Containers
Use resealable bags or suitable food containers.
Protect food from moisture and crushing.
Keep Frequently Used Snacks Accessible
Store a small portion in an easy-to-reach pocket.
Keep the remaining food in the main compartment.
Plan for Unexpected Delays
Carrying some additional food can be useful if the hike takes longer than expected.
Follow Wildlife Food Storage Rules
In areas with wildlife, food storage requirements may be specific and mandatory.
Follow local guidance for protecting both people and animals.
Never feed wildlife.
7. Bring Appropriate Clothing Layers
Weather conditions can change during a hike, especially at higher elevations or in exposed areas.
Packing suitable layers allows you to adjust clothing as conditions change.
Base Layer
A base layer helps manage moisture near the skin.
Choose a material appropriate for the weather and activity.
Insulating Layer
A fleece or other insulating garment can provide warmth during rest breaks or temperature changes.
Outer Layer
A wind-resistant or waterproof jacket may be necessary depending on conditions.
Extra Socks
A spare pair of suitable socks can be useful if your feet become wet.
Hat and Gloves
These may be appropriate for cold, windy, or exposed environments.
Avoid Unnecessary Clothing
Choose versatile layers rather than packing multiple outfits without a clear purpose.
However, do not reduce essential weather protection merely to save weight.
8. Prepare for Rain and Wet Conditions
Rain can affect comfort, visibility, traction, and equipment.
Carry Suitable Rain Protection
Depending on the conditions, consider:
- Waterproof jacket.
- Rain pants.
- Pack cover.
- Waterproof liner.
- Dry bags.
Protect Important Belongings
Keep electronics, spare clothing, and other moisture-sensitive items in appropriate waterproof protection.
Understand Pack Cover Limitations
A rain cover may protect much of the backpack exterior, but water can still enter through seams, straps, or openings.
An internal waterproof liner provides additional protection.
Keep Rain Gear Accessible
Do not bury your rain jacket beneath everything else.
Reassess the Hike When Necessary
Heavy rain, thunderstorms, flooding, or other hazardous conditions may make a route unsuitable.
Packing rain gear does not make every weather situation safe.
9. Pack Navigation Tools and Route Information
Reliable navigation is essential, especially when trails are unfamiliar or remote.
Carry a Map
Use a suitable map that covers the intended route and surrounding area.
A paper map can provide a backup when electronic devices fail.
Consider a Compass
A compass can be useful when paired with appropriate navigation skills.
Carrying one is not enough if you do not know how to use it.
Download Offline Maps
If using a phone or GPS device, download relevant maps before departure.
Do not assume mobile data will be available.
Save Important Route Details
Record:
- Trail name.
- Trailhead location.
- Planned route.
- Estimated distance.
- Expected return time.
- Emergency contact information.
Share Your Hiking Plan
Tell a trusted person where you are going and when you expect to return.
Arrange an appropriate response plan if you do not check in as expected.
Check Trail Conditions
Consult relevant park authorities or trail managers for closures, restrictions, and current conditions before setting out.
10. Prepare a Compact Hiking First-Aid Kit
A first-aid kit should be appropriate for your hiking activities and personal needs.
Common First-Aid Supplies
Depending on the situation, a kit may include:
- Adhesive bandages.
- Sterile dressings.
- Medical tape.
- Blister-care supplies.
- Disposable gloves.
- Antiseptic wipes appropriate for skin.
- Personal medications.
- Emergency contact information.
- Other supplies you are trained to use.
Include Personal Medical Requirements
Carry necessary prescribed medications according to medical advice and storage requirements.
Do not rely on another hiker to carry your essential medication.
Protect Supplies From Moisture
Use a suitable water-resistant or waterproof container.
Check Expiration Dates
Review medication and supply condition periodically.
Learn Basic First Aid
A kit is most useful when you understand how to respond appropriately.
Consider basic wilderness first-aid training for more remote adventures.
Know When to Seek Emergency Help
Serious injuries, severe allergic reactions, chest pain, altered consciousness, or other emergencies require prompt professional assistance.
Do not allow a first-aid kit to create false confidence about handling conditions beyond your training.
11. Carry Sun Protection Essentials
Sun exposure can be significant even when temperatures feel cool.
Sunscreen
Choose an appropriate broad-spectrum sunscreen and use it according to the product instructions.
Reapply as directed, especially after sweating or other activities that reduce protection.
Sunglasses
Suitable sunglasses can help protect your eyes from ultraviolet exposure and glare.
Sun Hat
A brimmed hat can provide additional shade.
Protective Clothing
Long sleeves and other suitable clothing can help reduce sun exposure.
Consider Trail Exposure
Open ridges, high elevations, and reflective environments may increase exposure.
Plan accordingly.
12. Pack Emergency and Safety Equipment
Unexpected situations can occur even on familiar trails.
A compact emergency kit can provide important options.
Headlamp
A headlamp is useful if a hike continues after sunset.
Carry spare batteries or an appropriate backup power source when needed.
Do not rely solely on a phone flashlight.
Whistle
A whistle can help attract attention in an emergency.
Emergency Shelter
Depending on the hike, consider a lightweight emergency bivy, suitable emergency blanket, or other compact shelter.
Know the limitations of the equipment.
Repair Supplies
A small repair kit may include:
- Appropriate tape.
- Cordage.
- Spare buckles or straps.
- Multi-tool.
- Other items suited to your equipment.
Store cutting tools securely.
Communication Equipment
A charged phone is useful where coverage exists.
For remote areas without reliable cellular service, a satellite communication or emergency beacon device may be appropriate.
Learn how to operate it before departure.
Fire-Starting Equipment
Where lawful and appropriate, suitable fire-starting equipment may form part of an emergency kit.
Observe fire restrictions and never assume an open fire is safe or permitted.
13. Organize Your Backpack by Weight and Accessibility
Packing arrangement affects how the backpack feels during movement.
A practical general principle is to keep heavier items close to your back and avoid unnecessary weight at the outermost edge.
<text></text>
Bottom Section: Lightweight Items Used Less Frequently
Examples may include:
- Spare clothing.
- Extra insulating layers.
- Lightweight emergency shelter.
Pack these in a way that keeps them protected and accessible when needed.
Middle Section: Heavier Items
Position denser belongings near the back panel.
Examples may include:
- Water reservoir.
- Dense food supplies.
- Heavier equipment.
This helps keep the load closer to your body.
Top Section: Frequently Needed Items
Consider placing:
- Rain jacket.
- First-aid kit.
- Additional layer.
- Main food container.
The exact arrangement depends on the backpack design.
Exterior Pockets: Quick-Access Essentials
Suitable items may include:
- Water bottle.
- Snacks.
- Sunscreen.
- Map.
- Sunglasses.
- Small personal accessories.
Avoid placing valuable or easily lost items in unsecured pockets.
14. Visualize a Practical Backpack Packing Layout
A simple packing arrangement can help you remember where supplies belong.
| Backpack Area | Suggested Contents | Main Purpose |
|---|---|---|
| Top pocket | Map, sunglasses, small essentials | Quick access |
| Upper main compartment | Rain jacket, first-aid kit, snacks | Easy retrieval |
| Middle near back panel | Water reservoir, dense food | Balanced weight |
| Lower main compartment | Spare clothing, light shelter | Protected storage |
| Side pockets | Secure water bottles | Convenient hydration |
| Small internal pocket | Keys, identification, emergency details | Organization |
| Exterior attachment points | Only suitable secured equipment | Additional carrying flexibility |
Avoid attaching excessive items to the outside of the backpack.
Loose equipment can swing, snag on vegetation, or fall off.
15. Distribute Backpack Weight for Comfortable Carrying
Even a well-equipped backpack can become uncomfortable if the load is poorly balanced.
Keep Heavy Items Close to Your Back
This generally helps reduce the backward pull of the load.
Balance the Left and Right Sides
Avoid placing all dense items on one side.
Secure Loose Equipment
Use appropriate internal organization and compression features to reduce shifting.
Adjust Shoulder Straps
Tighten straps enough to keep the backpack stable without creating excessive pressure.
Use the Hip Belt Properly
If the backpack includes a supportive hip belt, position and adjust it according to the manufacturer’s fitting instructions.
Check the Fit While Walking
Take a short walk with the loaded backpack.
Adjust the fit before beginning the hike.
Avoid Arbitrary Weight Targets
Some general advice suggests carrying a fixed percentage of body weight, but an appropriate load varies considerably.
Terrain, fitness, health, backpack design, and trip requirements all matter.
Reduce unnecessary weight without sacrificing essential preparation.
16. Keep Frequently Used Items Easy to Reach
Good organization minimizes the need to unpack your entire bag during short stops.
Water
Choose a hydration system that you can use comfortably.
Snacks
Keep a small amount of food accessible.
Rain Jacket
Store it near the top when rain is possible.
Navigation
Keep maps or navigation devices secure but easy to retrieve.
Sun Protection
Use a small pocket for sunscreen and other frequently needed accessories.
First Aid
Ensure you can locate the first-aid kit quickly.
Emergency Equipment
Do not bury critical emergency items beneath unnecessary belongings.
Accessibility should be considered alongside weight distribution.
17. Use Packing Pouches and Dry Bags Wisely
Small organizers can help separate belongings.
However, too many pouches can add weight and make packing unnecessarily complicated.
Clothing Pouch
Use a lightweight bag for spare layers.
First-Aid Pouch
Keep medical supplies together.
Electronics Pouch
Protect cables, power banks, and other small electronics.
Food Bag
Separate food from equipment that could damage or contaminate it.
Waterproof Storage
Use suitable dry bags or liners for moisture-sensitive belongings.
Avoid Over-Organization
You do not need a separate pouch for every item.
Choose a simple system that makes sense during actual use.
18. Pack Electronics and Personal Items Safely
Electronic devices can be useful during hiking, but they require appropriate protection.
Mobile Phone
Charge your phone before leaving.
Download maps and relevant information.
Power Bank
A suitable power bank can provide backup charging.
Protect it from moisture, physical damage, and unsuitable temperatures.
Camera
Use a protective case when appropriate.
Keys and Identification
Keep important personal items in secure pockets.
Emergency Contact Details
Carry essential contact information in a form that can be accessed when needed.
Protect Against Water
Use appropriate waterproof storage for electronics.
Avoid Relying Entirely on Devices
Battery failure, damage, or lack of signal can affect electronic equipment.
Maintain suitable backups and navigation skills.
19. Adjust Your Backpack for Different Hiking Conditions
The same packing list may not be appropriate for every environment.
Warm-Weather Hiking
Prioritize:
- Adequate water.
- Sun protection.
- Suitable clothing.
- Appropriate food.
- Weather monitoring.
Avoid strenuous hiking during dangerous heat conditions.
Cool-Weather Hiking
Consider:
- Additional insulating layers.
- Gloves.
- Warm hat.
- Wind protection.
- Emergency shelter.
Rainy-Weather Hiking
Prioritize:
- Waterproof outerwear.
- Dry storage.
- Suitable footwear.
- Extra dry layers.
- Trail condition assessment.
Mountain Hiking
Consider:
- Rapid weather changes.
- Navigation complexity.
- Exposure.
- Elevation-related conditions.
- Appropriate emergency equipment.
Forest Hiking
Consider:
- Navigation.
- Insects.
- Muddy terrain.
- Wildlife guidance.
- Limited visibility.
Remote Hiking
Prepare more conservatively for:
- Limited communication.
- Delayed assistance.
- Water availability.
- Navigation challenges.
- Unexpected overnight exposure.
Remote hiking may require additional skills and equipment beyond a basic day hiking setup.
20. Pack for Short Hikes vs. Full-Day Hikes
Hike duration influences supplies, but safety essentials remain important.
| Packing Category | Short Day Hike | Longer Day Hike |
|---|---|---|
| Water | Appropriate amount for conditions | Greater capacity or verified refill plan |
| Food | Snacks and appropriate reserve | Meals, snacks, additional reserve |
| Clothing | Weather-appropriate layers | Additional layers as needed |
| Navigation | Reliable route information | Detailed route and backup navigation |
| First aid | Suitable compact kit | Kit appropriate to route and group |
| Lighting | Appropriate emergency lighting | Headlamp and backup power |
| Emergency shelter | Based on exposure and risk | More important on remote or exposed routes |
| Electronics | Charged phone | Additional power or communication options |
| Repair supplies | Appropriate basic items | Additional supplies for equipment |
| Backpack size | Capacity based on actual gear | Capacity for additional essentials |
A short hike in remote or severe conditions can require more preparation than a longer walk in a developed park.
21. Prepare a Hiking Backpack for Beginners
If you are new to hiking, start with manageable trails and a simple but complete packing system.
Choose an Appropriate Route
Select a well-marked trail suited to your fitness and experience.
Check Local Conditions
Review weather, trail access, closures, and relevant safety guidance.
Use Familiar Equipment
Avoid relying on unfamiliar gear during an important outing.
Practice Packing at Home
Place your equipment in the backpack and check the arrangement.
Test the Loaded Backpack
Walk around with the bag before leaving.
Learn Essential Skills
Basic navigation, weather awareness, and first aid are valuable.
Hike With Appropriate Support
For unfamiliar or remote routes, consider an experienced companion or organized group.
Know When to Turn Back
Changing weather, fatigue, navigation uncertainty, or other safety concerns may justify ending a hike early.
Reaching the destination is never more important than returning safely.
22. Common Day Hiking Backpack Packing Mistakes
Mistake 1: Packing Only for Ideal Weather
Conditions can change.
Carry appropriate protection for reasonably foreseeable conditions.
Mistake 2: Carrying Too Little Water
Underestimating water needs can create serious problems.
Plan according to the route, environment, and individual requirements.
Mistake 3: Carrying Too Much Unnecessary Gear
Excess weight can reduce comfort.
Review each item’s purpose.
Mistake 4: Placing Heavy Items Far From Your Back
This can make the load feel less stable.
Keep dense items closer to your body when practical.
Mistake 5: Burying Frequently Used Items
Repeatedly unpacking the bag wastes time.
Organize according to accessibility.
Mistake 6: Relying Only on a Phone
Phones can lose battery power, signal, or functionality.
Prepare suitable backups.
Mistake 7: Forgetting Emergency Lighting
A delayed hike can continue after sunset.
Carry an appropriate headlamp or other reliable light.
Mistake 8: Ignoring Backpack Fit
Poor adjustment can create discomfort.
Test the loaded pack before departure.
Mistake 9: Failing to Protect Electronics
Rain and accidental spills can damage devices.
Use suitable waterproof protection.
Mistake 10: Skipping a Final Gear Check
Missing essential equipment may not become obvious until you are already on the trail.
Use a checklist before leaving.
23. Troubleshooting Common Backpack Packing Problems
| Problem | Possible Cause | Practical Solution |
|---|---|---|
| Backpack feels too heavy | Excess equipment or unsuitable load | Remove unnecessary items without sacrificing essentials |
| Shoulder discomfort | Poor fit or weight distribution | Adjust straps and hip belt |
| Backpack pulls backward | Heavy items packed too far outward | Move dense items closer to the back |
| Gear shifts while walking | Loose packing | Secure contents and use compression features |
| Water bottle is difficult to reach | Poor pocket placement | Adjust hydration arrangement |
| Rain gear is buried | Poor accessibility planning | Move it near the top |
| Items become wet | Inadequate waterproof protection | Use a suitable liner or dry bags |
| Snacks get crushed | Poor food placement | Use a protective container |
| Small items disappear | No designated storage | Use secure internal pockets |
| Backpack feels unbalanced | Uneven weight distribution | Repack the left and right sides |
| Gear is difficult to find | Too many compartments or pouches | Simplify organization |
| Backpack becomes uncomfortable over time | Fit, weight, or physical fatigue | Adjust the load, rest, and reassess suitability |
24. A Practical Step-by-Step Day Hiking Backpack Packing Method
Follow this sequence when preparing for a hike.
Step 1: Review the Hike
Confirm:
- Route.
- Distance.
- Expected duration.
- Terrain.
- Weather.
- Water availability.
- Local restrictions.
- Emergency considerations.
Step 2: Lay Out All Equipment
Place everything on a clean surface.
This makes it easier to identify missing or unnecessary items.
Step 3: Check Essential Categories
Review navigation, water, food, clothing, lighting, first aid, and other relevant emergency supplies.
Step 4: Inspect Equipment
Check for damage, empty batteries, leaking containers, or missing components.
Step 5: Protect Moisture-Sensitive Items
Use suitable waterproof storage.
Step 6: Pack Lightweight Items in the Lower Section
Place less frequently needed, lightweight belongings near the bottom when appropriate.
Step 7: Position Dense Items Near Your Back
Keep heavier equipment balanced and secure.
Step 8: Add Frequently Needed Supplies
Place rain gear, first aid, and other useful items where they can be accessed quickly.
Step 9: Fill Exterior Pockets Carefully
Secure water bottles and other appropriate accessories.
Step 10: Adjust the Backpack
Put it on and check the fit.
Step 11: Walk With the Loaded Pack
Test stability and comfort.
Step 12: Complete a Final Safety Check
Confirm that essential equipment is present and the hiking plan has been shared appropriately.
25. Day Hiking Backpack Packing Checklist
Use this checklist before heading outdoors.
Navigation and Planning
- Trail route reviewed.
- Current trail conditions checked.
- Weather forecast reviewed.
- Suitable map available.
- Compass or navigation backup considered.
- Offline maps downloaded if needed.
- Emergency contact plan prepared.
- Hiking itinerary shared with a trusted person.
Hydration and Food
- Sufficient drinking water planned.
- Water bottles or reservoir filled.
- Reliable refill sources verified if applicable.
- Appropriate water treatment packed if needed.
- Trail snacks packed.
- Meals included if necessary.
- Extra food considered for delays.
- Food stored securely.
Clothing and Weather Protection
- Suitable clothing worn.
- Insulating layer packed.
- Rain jacket available.
- Additional weather protection packed as needed.
- Spare socks considered.
- Hat and gloves included when appropriate.
- Moisture-sensitive items protected.
Sun Protection
- Sunscreen packed.
- Sunglasses available.
- Sun hat considered.
- Protective clothing appropriate for conditions.
First Aid and Emergency Supplies
- First-aid kit packed.
- Personal medications included.
- Blister-care supplies available.
- Headlamp packed.
- Backup batteries or power available.
- Whistle included.
- Emergency shelter considered.
- Appropriate repair supplies included.
- Emergency communication options reviewed.
- Fire restrictions checked if carrying fire-starting equipment.
Electronics and Personal Items
- Phone charged.
- Power bank charged if needed.
- Electronics protected from moisture.
- Identification secured.
- Keys stored safely.
- Emergency contact details available.
Backpack Organization
- Heavy items positioned close to the back.
- Weight balanced between sides.
- Loose equipment secured.
- Frequently used items accessible.
- Water easy to reach.
- Rain protection easy to retrieve.
- First-aid supplies easy to locate.
- Exterior attachments secured.
- Backpack straps adjusted.
- Loaded backpack tested for comfort.
26. Maintain Your Day Hiking Backpack After Every Trip
A practical packing routine continues after the hike ends.
Empty the Backpack
Remove all equipment, food, and waste.
Clean Food Containers
Wash reusable bottles and food containers according to their care instructions.
Allow them to dry thoroughly.
Dry Wet Equipment
Remove damp clothing and other wet items promptly.
Dry the backpack according to manufacturer instructions.
Inspect for Damage
Check:
- Zippers.
- Buckles.
- Shoulder straps.
- Hip belt.
- Seams.
- Attachment points.
- Hydration equipment.
Replenish Used Supplies
Replace consumed first-aid items, snacks, and other essentials.
Recharge Electronics
Recharge appropriate devices before the next outing.
Review Your Packing Choices
Consider:
- Which items were useful?
- Which items were difficult to reach?
- Was the backpack comfortable?
- Did anything become wet or damaged?
- Were any important supplies missing?
- Was the load appropriate?
Use these observations to improve future packing.
27. Frequently Asked Questions
1. What should I pack in a day hiking backpack?
Pack appropriate navigation tools, water, food, weather protection, sun protection, first aid, emergency lighting, and other essential safety equipment suited to the route.
2. What size backpack is best for day hiking?
Many hikers find a 20–30-liter backpack useful for general day hikes, but the appropriate size depends on equipment, conditions, and personal needs.
3. Is a 15-liter backpack enough for a day hike?
It may be sufficient for some short, low-risk outings with compact equipment. However, it may not accommodate necessary layers or emergency supplies for more demanding conditions.
4. How much water should I carry on a day hike?
Water needs vary with duration, temperature, exertion, and individual factors. Plan conservatively and verify refill opportunities before departure.
5. Where should heavy items go in a hiking backpack?
Heavier items generally belong close to the back panel, with weight distributed evenly.
6. What should I put at the bottom of my hiking backpack?
Lightweight items that are not needed frequently, such as suitable spare clothing or compact shelter equipment, may fit well in the lower section.
7. What should I keep in the top pocket?
Small, frequently used items such as a map, sunglasses, or other secure essentials can be stored there.
8. Do I need a rain cover for my hiking backpack?
A rain cover may be useful, but it does not guarantee waterproof protection. Internal liners or dry bags can provide additional protection.
9. Should I bring a first-aid kit on a short hike?
Yes. An appropriate first-aid kit is a sensible part of hiking preparation, even on relatively short routes.
10. Do I need a headlamp for day hiking?
A headlamp is an important emergency item because unexpected delays can extend a hike into darkness.
11. Can I rely on my phone for hiking navigation?
A phone can be useful, but battery failure, damage, and lack of coverage can create problems. Carry appropriate backups and know how to navigate.
12. What food is best for a day hike?
Choose portable foods that meet your energy and dietary needs and remain safe under the expected conditions.
13. Should I bring extra clothing?
Appropriate spare layers can be important when temperatures change or clothing becomes wet.
14. How can I make my hiking backpack lighter?
Remove unnecessary duplicates, choose suitable compact equipment, and organize efficiently without sacrificing essential safety supplies.
15. How do I prevent shoulder pain from a hiking backpack?
Choose a properly fitted pack, distribute weight carefully, adjust straps, and avoid carrying an unsuitable load.
16. Are hydration reservoirs better than water bottles?
Both have advantages. Reservoirs can make drinking convenient, while bottles may be easier to inspect, refill, and clean. Choose according to your preferences and route.
17. Should I carry an emergency blanket?
A suitable emergency shelter or blanket can be useful, particularly on remote routes. Understand its limitations and choose equipment appropriate to the environment.
18. Do I need trekking poles?
Trekking poles are optional for many hikes but may provide useful support on certain terrain. Their suitability depends on individual needs and conditions.
19. How do I waterproof my hiking backpack?
Use a suitable waterproof liner or dry bags for important contents. A pack cover can provide additional exterior protection.
20. How should I clean my backpack after hiking?
Follow manufacturer instructions. Remove debris, clean suitable surfaces, and allow the backpack to dry thoroughly before storage.
21. What should I do if my backpack feels unbalanced?
Reposition dense items, balance weight between sides, and secure loose equipment.
22. Should I pack differently for mountain hiking?
Yes. Mountain conditions may require additional layers, navigation preparation, emergency equipment, and specialized skills.
23. Can beginners use a regular backpack for hiking?
A regular backpack may be adequate for some simple outings if it fits comfortably and safely carries essential gear. A purpose-designed hiking backpack may offer better support for longer or more demanding routes.
24. How do I keep snacks accessible while hiking?
Store a small portion in a secure, easy-to-reach pocket and keep additional food protected in the main compartment.
25. What is the most important rule when packing for a day hike?
Prepare for the actual route and conditions, carry appropriate essentials, and organize the load so it remains comfortable and accessible.
Final Thoughts
Packing a practical day hiking backpack is an essential part of preparing for a comfortable and enjoyable outdoor adventure.
The goal is not to carry the largest amount of equipment or to make your backpack as light as possible at any cost.
Instead, aim for a thoughtful balance between safety, comfort, organization, and the specific needs of your hike.
Begin by reviewing the route, expected duration, terrain, weather, and availability of assistance. These factors determine which supplies are necessary and how much preparation is appropriate.
Choose a backpack that fits comfortably and provides enough space for essential equipment.
Pack heavier items close to your back, distribute weight evenly, and keep frequently used supplies within easy reach.
Pay particular attention to hydration, food, weather protection, navigation, first aid, and emergency equipment.
Even familiar trails can present unexpected challenges, so preparation should never depend entirely on ideal conditions.
As you gain hiking experience, your packing system will become more efficient.
You may discover that certain pockets work better for particular items, that some accessories are unnecessary, or that different seasons require adjustments to your usual equipment.
Use these observations to refine your approach.
A well-organized day hiking backpack should feel like a dependable companion rather than an unnecessary burden.
With careful planning, sensible packing habits, and regular equipment checks, you can spend less time worrying about your belongings and more time enjoying the scenery, fresh air, and rewarding experience of exploring the outdoors.