Art and craft supplies have a way of accumulating over time. A few colored pencils, paintbrushes, and sheets of decorative paper can gradually become a collection of paints, fabrics, ribbons, adhesives, cutting tools, beads, and unfinished projects.
While having a variety of creative materials can make crafting more enjoyable, keeping everything organized can become challenging.
Small accessories disappear into drawers, paper becomes bent or damaged, paint containers get buried behind other supplies, and unfinished projects spread across available surfaces. Eventually, finding the right tool may take longer than the creative activity itself.
Fortunately, organizing art and craft supplies does not require an elaborate studio, expensive storage furniture, or a complicated labeling system.
With a thoughtful approach, even a modest desk, cabinet, or shared household table can become a practical and welcoming creative space.
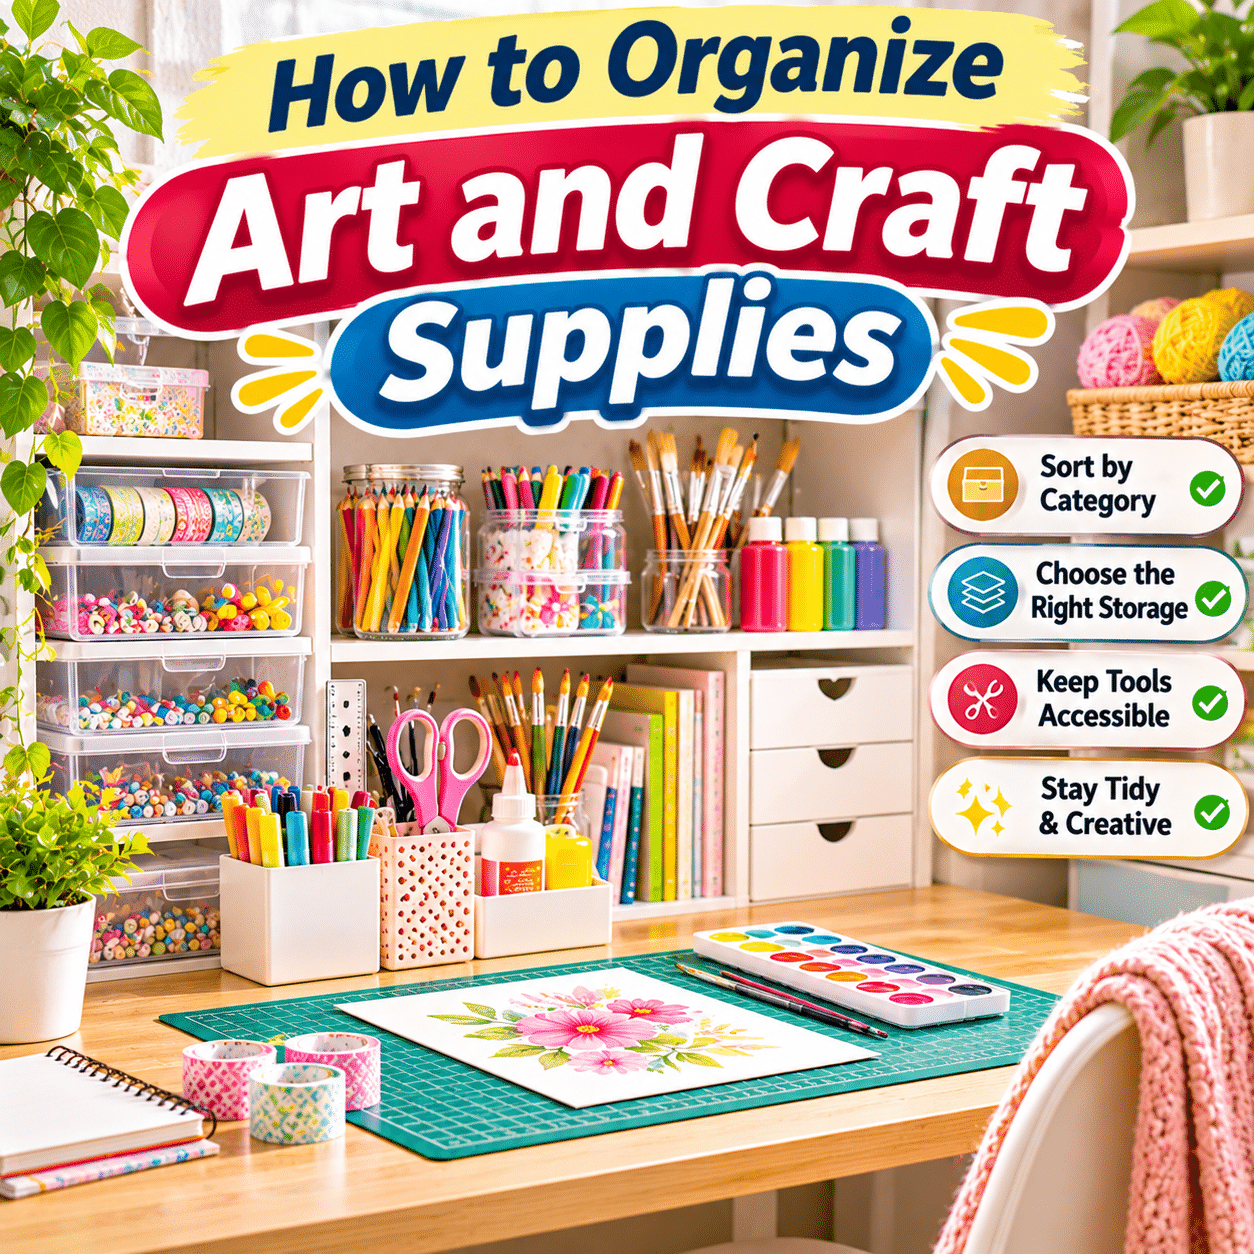
The key is to organize supplies according to how you actually use them.
Frequently used materials should be easy to reach, delicate items should be protected, hazardous tools should be stored securely, and unfinished projects should have designated places where they can remain undisturbed.
This comprehensive guide explains how to sort art and craft materials, choose appropriate storage solutions, organize different supply categories, maximize limited space, protect materials from damage, manage unfinished projects, and establish simple habits that keep your creative area organized over time.
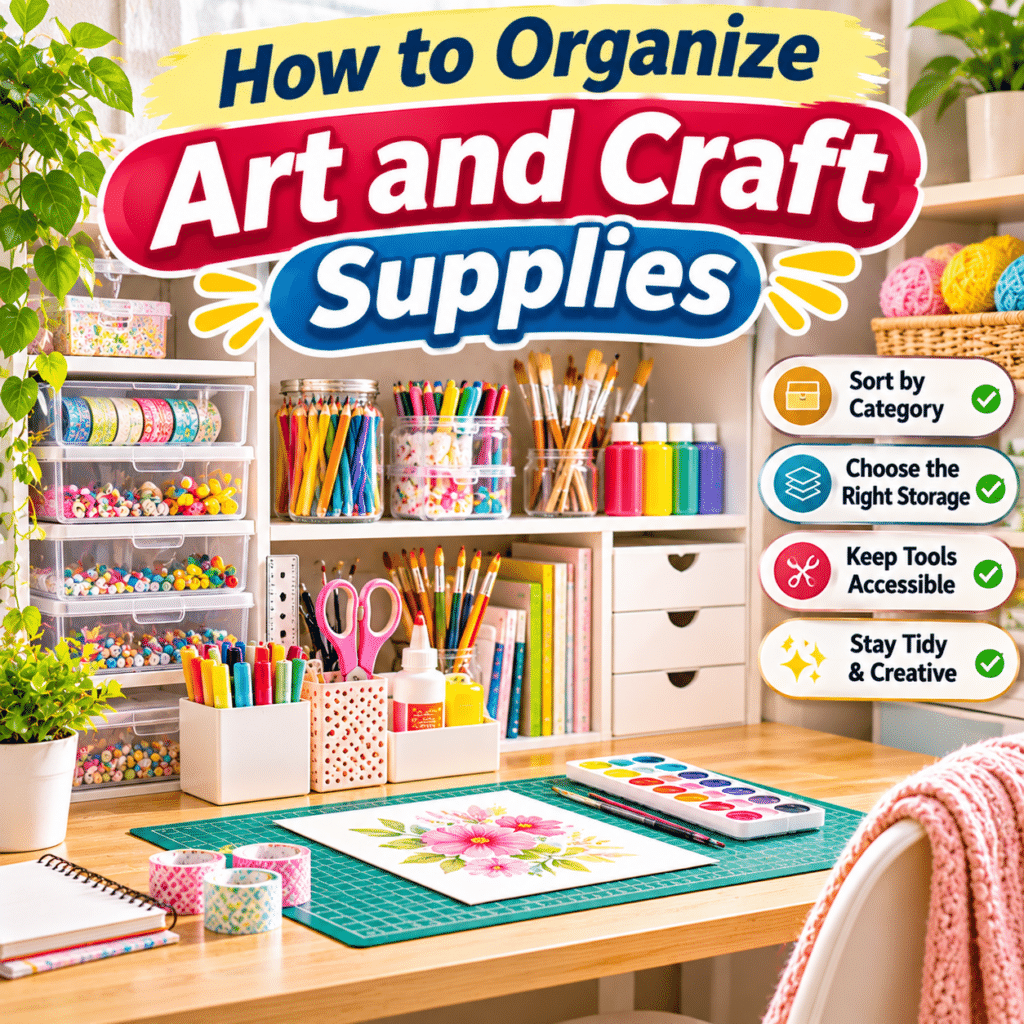
1. Why Organizing Art and Craft Supplies Matters
An organized craft collection supports creativity by making materials easier to find, use, and maintain.
The benefits extend beyond having a tidy-looking workspace.
Save Time During Creative Projects
When tools and materials have designated locations, you spend less time searching for them.
Instead of opening several drawers to find a particular paintbrush or adhesive, you can retrieve what you need and begin working.
Protect Materials From Damage
Different supplies have different storage requirements.
Paper can bend or absorb moisture. Paints may dry out or deteriorate. Fabric can collect dust, and delicate tools may become damaged when stored carelessly.
Appropriate storage helps maintain their condition.
Avoid Unnecessary Purchases
Disorganized collections make it easy to forget what you already own.
A clear storage system allows you to check existing supplies before purchasing replacements.
Make Cleanup Easier
When every category has a designated home, returning supplies after a project becomes more straightforward.
Improve Workspace Safety
Craft materials may include sharp blades, needles, small components, adhesives, solvents, and heat-producing equipment.
Organizing these items appropriately helps reduce accidental access, spills, and other preventable hazards.
Make Creative Activities More Enjoyable
A clear working surface and accessible materials can make the creative process feel less complicated.
You can focus more attention on making something rather than managing clutter.
2. Start by Assessing Your Current Craft Supply Collection
Before buying organizers, examine what you already have.
This helps you understand the amount of storage required and identify which materials deserve the most accessible locations.
Gather Supplies From Different Areas
Craft materials may be scattered across:
- Desk drawers.
- Bookshelves.
- Storage cabinets.
- Closets.
- Portable craft bags.
- Decorative baskets.
- Unfinished project boxes.
- Household storage areas.
Bring items together where practical so you can assess the collection.
For large collections, work through one category at a time instead of emptying everything at once.
Identify Your Main Craft Activities
Consider whether you primarily enjoy:
- Drawing and sketching.
- Painting.
- Paper crafting.
- Scrapbooking.
- Sewing.
- Embroidery.
- Jewelry making.
- Knitting or crochet.
- Clay crafting.
- General DIY projects.
Your storage system should reflect these activities.
Someone who paints regularly will need a different arrangement from someone who primarily works with fabric or decorative paper.
Identify Frequently Used Supplies
Think about which materials you reach for during most sessions.
These items should be stored near your main workspace.
Evaluate Available Storage
Look at existing drawers, shelves, cabinets, and containers.
You may already have enough storage capacity once everything is sorted.
3. Sort Art and Craft Supplies Into Practical Categories
Categorizing supplies is the foundation of an effective organization system.
The goal is to create groups that are easy to understand and maintain.
Suggested Supply Categories
| Category | Common Items | Suitable Storage |
|---|---|---|
| Drawing tools | Pencils, pens, markers, erasers | Cups, cases, drawers |
| Painting supplies | Paints, brushes, palettes | Bins, drawers, shelves |
| Paper materials | Sketchbooks, cardstock, decorative paper | Flat trays, folders |
| Cutting tools | Scissors, craft knives, cutters | Secure drawers, tool cases |
| Adhesives | Glue sticks, craft glue, tape | Labeled containers |
| Sewing supplies | Needles, thread, pins, measuring tools | Compartment organizers |
| Fabric and felt | Fabric pieces, felt sheets, scraps | Folded bins, drawers |
| Yarn and fiber | Yarn, crochet hooks, knitting needles | Baskets, boxes |
| Decorative materials | Ribbons, stickers, buttons, beads | Small compartment boxes |
| Craft equipment | Cutting machines, sewing machines, specialty tools | Stable shelves, cabinets |
| Works in progress | Unfinished projects and materials | Project boxes, trays |
| Cleaning supplies | Cloths, appropriate cleaners | Separate secure storage |
Avoid Excessive Subcategories
Beginners do not need dozens of labels.
For example, a single container labeled “Markers and Pens” may be sufficient.
As your collection grows, you can separate items by type, purpose, or color.
Keep Similar Items Together
Store materials according to how they are used.
If scissors, rulers, and cutting mats are frequently used together, keeping them near one another may be more practical than storing them in distant locations.
Separate Hazardous Materials
Sharp tools, chemicals, and other potentially dangerous items should be stored according to their specific safety requirements.
Convenience should never take priority over safe storage.
4. Declutter Before Creating a Permanent Storage System
Organizing becomes easier when you remove items that no longer serve a useful purpose.
Inspect Every Category
Review supplies for:
- Damage.
- Deterioration.
- Missing components.
- Dried-out materials.
- Duplicate items.
- Unsuitable products.
- Supplies you no longer use.
Keep Functional Essentials
Retain materials that are safe, usable, and relevant to your interests.
Set Aside Usable Extras
Unneeded supplies in good condition may be suitable for donation, sharing, or another appropriate use.
Check that materials are safe and complete before passing them along.
Dispose of Unusable Materials Properly
Do not assume every craft material belongs in ordinary household waste.
Paints, solvents, resins, aerosols, batteries, and other chemical products may require special disposal.
Follow manufacturer instructions and local waste-management requirements.
Avoid Keeping Every Scrap
Small pieces of paper, fabric, and ribbon can be useful, but saving every leftover fragment may overwhelm your storage.
Choose a reasonable amount of reusable scrap material and establish limits.
5. Choose the Right Storage Containers
Effective storage containers should protect supplies while making them easy to access.
Different materials benefit from different container designs.
Clear Plastic Boxes
Transparent boxes allow you to identify contents without opening every container.
They are useful for many dry, nonhazardous supplies.
Choose sturdy containers that close properly.
Drawer Organizers
Dividers help separate small tools and accessories.
They work well for pencils, erasers, measuring tools, and similar items.
Compartment Boxes
Small compartments are particularly useful for:
- Beads.
- Buttons.
- Decorative findings.
- Small embellishments.
- Sewing accessories.
Choose secure closures that prevent contents from mixing when moved.
Baskets
Baskets are useful for larger lightweight supplies such as yarn, fabric bundles, and suitable craft accessories.
Flat Storage Trays
Flat trays help protect paper, cardstock, and unfinished artwork.
Portable Craft Organizers
Portable boxes or cases work well when you craft in different rooms.
They can hold the essentials for a particular activity.
Closed Cabinets
Cabinets help protect materials from dust and accidental access.
Lockable storage may be necessary for certain tools and hazardous supplies.
6. Organize Drawing and Sketching Supplies
Drawing materials are often small, frequently used, and easy to misplace.
A simple arrangement can make them more accessible.
Store Pencils by Type
Separate graphite pencils, colored pencils, charcoal, and other drawing tools when useful.
Use cases or compartments to protect delicate tips.
Organize Pens and Markers
Group pens and markers according to their function.
Examples include:
- Fineliners.
- Brush pens.
- Alcohol markers.
- Water-based markers.
- Technical pens.
- Highlighters.
Follow manufacturer recommendations for storage orientation.
Some products should be stored horizontally, while others may have different requirements.
Keep Erasers and Sharpeners Together
Small accessories are easier to locate when placed in a dedicated compartment.
Protect Sketchbooks
Store sketchbooks on a suitable shelf or flat surface.
Keep them away from moisture and excessive sunlight.
Create a Daily Drawing Kit
If you draw frequently, prepare a small case containing your most-used tools.
This allows you to begin a session without searching through your entire collection.
7. Organize Paints and Painting Accessories
Painting supplies require attention to storage conditions, container closures, and cleaning.
Separate Paints by Type
Create distinct groups for:
- Watercolors.
- Acrylic paints.
- Gouache.
- Oil paints.
- Other specialty paints.
Different paint types may require different handling and storage precautions.
Keep Paint Containers Closed
Ensure lids and caps are properly secured after use.
This helps reduce leaks, drying, and contamination.
Store According to Product Instructions
Protect paints from unsuitable temperatures, moisture, and direct sunlight as specified by the manufacturer.
Certain materials may require additional precautions because of flammability or chemical hazards.
Organize Brushes by Size or Purpose
Brushes can be grouped into:
- Fine detail brushes.
- Flat brushes.
- Round brushes.
- Large background brushes.
- Specialty brushes.
Clean and dry brushes according to the materials used.
Protect Brush Bristles
Avoid crushing bristles inside crowded containers.
Store brushes in a way that preserves their shape.
Keep Palettes and Accessories Together
Place palettes, mixing tools, and appropriate cleaning supplies near the painting materials.
8. Store Paper, Cardstock, and Decorative Sheets Properly
Paper is vulnerable to bending, moisture, dust, and fading.
Store Paper Flat When Practical
Flat storage can help prevent curling and creasing.
Use document trays, folders, or suitable shelves.
Separate Paper by Size
Common categories include:
- Small decorative sheets.
- Standard printer-size paper.
- Scrapbooking paper.
- Large drawing sheets.
- Specialty cardstock.
Organize by Type
You may also group paper according to:
- Drawing paper.
- Watercolor paper.
- Colored cardstock.
- Patterned paper.
- Handmade paper.
- Printable craft paper.
Protect Against Moisture
Choose a clean, dry storage location.
Avoid placing paper directly on damp floors or near water sources.
Keep Paper Scraps in a Separate Container
Store reusable scraps in a folder or small box.
Periodically review the collection to prevent unnecessary accumulation.
9. Organize Fabric, Felt, and Sewing Materials
Fabric-based crafts involve both large materials and small accessories.
Fold Fabric Neatly
Fold larger pieces into consistent shapes so they fit comfortably in drawers or bins.
Group Fabric by Practical Criteria
Possible categories include:
- Fabric type.
- Project purpose.
- Color.
- Size.
- Seasonal use.
Choose the method that best matches your projects.
Store Felt Sheets Flat
Flat storage can help preserve the shape of felt sheets.
Organize Thread
Use thread organizers, drawers, or suitable racks.
Protect thread from dust, moisture, and prolonged direct sunlight.
Keep Needles and Pins Secure
Store sharp sewing accessories in designated containers.
Use needle cases, pin cushions, or other appropriate holders.
Separate Sewing Tools
Keep measuring tapes, seam rippers, scissors, and other tools organized.
Avoid mixing sharp equipment loosely with fabric.
10. Organize Yarn, Knitting, and Crochet Supplies
Yarn can take up considerable storage space and become tangled when stored carelessly.
Group Yarn by Type
Possible categories include:
- Fiber composition.
- Yarn weight.
- Color.
- Project.
- Brand or collection.
Protect Yarn From Dust and Moisture
Use clean containers appropriate for the material.
Avoid storage conditions that encourage moisture buildup.
Prevent Tangling
Keep yarn balls or skeins organized rather than loosely piled.
Organize Hooks and Needles
Store crochet hooks and knitting needles in cases or compartments.
Group them by size when useful.
Keep Project Materials Together
Place the yarn, tools, and pattern for an active project in a dedicated project bag or box.
This reduces the need to gather supplies before each session.
11. Organize Beads, Buttons, and Small Decorative Items
Tiny craft components can be difficult to manage because they are easily spilled or mixed together.
Use Compartment Organizers
Choose boxes with secure dividers and closures.
Sort by Type or Size
For example, separate:
- Beads.
- Buttons.
- Jewelry findings.
- Decorative charms.
- Sequins.
- Small fasteners.
Label Similar Compartments
Labels can help distinguish items that look alike.
Avoid Overfilling
Leave enough room for compartments to close securely.
Keep Small Parts Away From Children and Pets
Many decorative craft components can create choking or ingestion hazards.
Use secure storage and clean up dropped items promptly.
12. Store Scissors, Cutting Tools, and Sharp Equipment Safely
Cutting tools should be accessible to authorized users but protected from accidental contact.
Use Dedicated Storage
Suitable options include:
- Secure drawers.
- Tool cases.
- Protective sheaths.
- Lockable cabinets.
- Purpose-designed organizers.
Keep Blades Covered
Use blade guards when provided.
Separate Sharp Tools From Loose Materials
Avoid placing exposed blades among paper, fabric, or other supplies.
Store Replacement Blades Securely
Keep spare blades in appropriate protective packaging.
Dispose of used blades according to applicable safety and waste requirements.
Inspect Tools Regularly
Check for damaged handles, loose components, or other defects.
Do not continue using equipment that is unsafe.
13. Organize Adhesives, Tapes, and Specialty Craft Chemicals
Adhesives vary widely in composition and storage requirements.
Group Similar Products
Separate ordinary glue sticks, craft glue, tapes, and specialty adhesives when useful.
Keep Containers Properly Closed
Secure lids and caps to reduce leaks and drying.
Follow Storage Instructions
Some adhesives are sensitive to temperature, humidity, or light.
Others may be flammable or require specialized handling.
Avoid Unlabeled Containers
Keep products in their original labeled packaging whenever practical.
Do not transfer hazardous chemicals into food or beverage containers.
Separate Chemicals From Food and Personal Items
Store chemical craft supplies in appropriate locations away from food, children, and pets.
Review Expiration and Condition
Some products deteriorate over time.
Discard unsuitable materials according to their disposal requirements.
14. Make Better Use of Vertical Storage
When desk or floor space is limited, vertical storage can provide additional capacity.
Install Shelves
Shelves can hold suitable bins, sketchbooks, and lightweight supplies.
Use appropriate wall anchors and observe load limits.
Use Pegboards
Pegboards can organize frequently used lightweight tools.
Secure hooks and accessories properly.
Consider Wall-Mounted Containers
Small wall organizers can hold suitable nonhazardous items.
Use Tall Storage Units Carefully
Place heavier supplies on lower shelves.
Secure tall furniture against tipping when appropriate.
Keep Frequently Used Items Within Reach
Avoid storing everyday tools so high that you need to climb or stretch unsafely to retrieve them.
15. Organize Craft Supplies in a Small Apartment or Shared Space
A dedicated craft room is not necessary.
The goal is to create a system that can be used and maintained within your available space.
Use a Portable Craft Cart
A rolling cart can hold supplies for different activities.
Choose one with stable wheels and suitable load capacity.
Create a Craft Cabinet
A compact cabinet can keep supplies contained when they are not in use.
Use Under-Desk Storage
Small drawers or suitable containers can fit beneath a desk without obstructing legroom.
Choose Stackable Boxes
Stackable containers can make better use of limited shelf space.
Avoid unstable stacks.
Keep a Portable Project Kit
A compact organizer can hold supplies for your current project.
This works particularly well when using a dining table or shared desk.
Avoid Filling Every Available Surface
Leave enough open space for comfortable movement and creative work.
16. Create an Easy-to-Use Labeling System
Labels help maintain consistency, especially when supplies are stored in opaque containers.
Use Clear Category Names
Examples include:
- DRAWING
- PAINTS
- BRUSHES
- PAPER
- FABRIC
- YARN
- THREAD
- ADHESIVES
- CUTTING TOOLS
- DECORATIONS
- CURRENT PROJECTS
Keep Labels Short
A label should be understandable at a glance.
Consider Color Coding
Different colors can identify broad categories.
For example, you might use one color for painting supplies and another for sewing materials.
Color coding is optional and should remain simple.
Update Labels When Contents Change
An inaccurate label can be more confusing than no label at all.
Review labels whenever you reorganize storage.
17. Organize Supplies According to Frequency of Use
Not every item needs the same level of accessibility.
A practical system considers how often you use each material.
Daily or Frequently Used Items
Keep these closest to your main workspace.
Examples may include:
- Favorite pens.
- Scissors.
- Ruler.
- Frequently used brushes.
- Current sketchbook.
Occasionally Used Items
Store these in nearby drawers or shelves.
Rarely Used Items
Place them in less accessible storage, provided conditions remain suitable.
Seasonal or Special-Project Materials
Keep these in clearly labeled containers.
Hazardous Supplies
Store according to safety requirements, even if that makes them less convenient to access.
18. Create a Dedicated System for Unfinished Projects
Unfinished projects are a common source of craft-room clutter.
A dedicated system prevents project materials from becoming mixed with general supplies.
Use Individual Project Boxes
Keep the materials for each active project together.
Include a Project Note
A short note can identify:
- Project name.
- Current stage.
- Remaining tasks.
- Required materials.
- Relevant instructions.
Protect Delicate Work
Use folders, sleeves, or appropriate containers for fragile pieces.
Limit the Number of Active Projects
Choose a manageable number based on your available space and time.
Review Projects Periodically
Decide whether each project should be continued, stored, repurposed, or discontinued.
This helps prevent abandoned projects from occupying valuable storage indefinitely.
19. Organize Finished Artwork and Handmade Projects
Completed projects also need suitable storage.
Store Flat Artwork Carefully
Use appropriate folders, portfolios, or protective sleeves.
For valuable or delicate artwork, consider archival-quality materials suited to the medium.
Protect Paintings
Allow artwork to dry or cure according to the materials used before handling or storage.
Avoid stacking surfaces that may stick together or become damaged.
Store Handmade Decorations
Use suitable boxes or padded containers for fragile items.
Organize Finished Sewing Projects
Fold or hang completed fabric items according to their materials and shape.
Display Selected Pieces
A few completed projects can make the workspace feel personal and inspiring.
Avoid overcrowding shelves or work surfaces.
20. Create a Simple Craft Supply Inventory
An inventory can help you understand what you own and what needs replenishing.
It does not need to be complicated.
Start With Broad Categories
Record frequently used or expensive materials first.
Example Inventory Table
| Category | Item | Quantity | Storage Location | Status |
|---|---|---|---|---|
| Drawing | Graphite pencils | 12 | Desk drawer | Good |
| Painting | Watercolor set | 1 | Painting shelf | Good |
| Paper | White cardstock | 25 sheets | Paper tray | Low |
| Sewing | Thread spools | 18 | Sewing box | Good |
| Adhesives | Glue sticks | 2 | Adhesive bin | Check condition |
| Fabric | Cotton fabric | 5 pieces | Fabric drawer | Good |
These quantities are illustrative.
Use a Notebook or Spreadsheet
A handwritten list may be sufficient for a small collection.
A spreadsheet can be useful for larger inventories.
Track Important Details
Depending on the material, useful information may include:
- Item name.
- Quantity.
- Storage location.
- Condition.
- Purchase date.
- Expiration information.
- Replacement priority.
Avoid Excessive Tracking
An inventory should make crafting easier, not create unnecessary administrative work.
Track only the information you find useful.
21. Maintain Proper Storage Conditions
Organization is not only about where supplies are placed.
Environmental conditions also affect material quality.
Control Moisture
Damp conditions can damage paper, fabric, and some other materials.
Choose dry storage areas appropriate for each product.
Limit Excessive Sunlight
Prolonged direct sunlight can fade certain colors and affect material condition.
Avoid Extreme Temperatures
Paints, adhesives, and other materials may deteriorate when exposed to unsuitable temperatures.
Follow product-specific instructions.
Protect Against Dust
Closed containers and cabinets can help protect infrequently used supplies.
Monitor for Pests
Some natural fibers, paper products, and other materials may be vulnerable to pest damage.
Inspect storage areas periodically.
Avoid Unsafe Chemical Storage
Flammable, reactive, or otherwise hazardous products may require specific storage arrangements.
Follow safety labels and applicable requirements.
22. Build a Simple Craft Supply Maintenance Routine
A good organization system should be easy to maintain.
After Each Craft Session
- Return tools to their designated places.
- Close paint and adhesive containers.
- Remove scraps and waste.
- Clean suitable work surfaces.
- Store sharp tools securely.
- Place unfinished projects in their containers.
Weekly
- Review frequently used supplies.
- Empty waste containers.
- Organize loose materials.
- Check for damaged tools.
- Clean appropriate storage surfaces.
Monthly
- Review supply quantities.
- Check materials for deterioration.
- Reorganize crowded containers.
- Review unfinished projects.
- Identify unnecessary duplicates.
Occasionally
- Deep-clean suitable storage areas.
- Review unused materials.
- Update inventory information.
- Adjust categories as your hobbies change.
- Reassess storage safety.
23. Common Craft Supply Organization Mistakes
Mistake 1: Buying Storage Before Sorting Supplies
Containers may not fit your actual collection.
Sort first, then choose storage.
Mistake 2: Using Too Many Categories
An overly complicated system becomes difficult to maintain.
Start with broad, practical groups.
Mistake 3: Keeping Everything on the Desk
A crowded desk leaves little room for creative work.
Store occasional supplies elsewhere.
Mistake 4: Mixing Sharp Tools With Loose Materials
Exposed blades and needles create avoidable hazards.
Use secure storage.
Mistake 5: Storing Paper Carelessly
Bent, damp, or sun-damaged paper may become unsuitable for projects.
Use appropriate flat storage.
Mistake 6: Ignoring Manufacturer Instructions
Different paints, adhesives, and specialty materials have different requirements.
Follow product guidance.
Mistake 7: Saving Every Leftover Scrap
An unlimited scrap collection can overwhelm storage.
Keep useful pieces within reasonable limits.
Mistake 8: Forgetting Unfinished Projects
Loose project materials can spread throughout the workspace.
Use dedicated project containers.
Mistake 9: Overfilling Storage Boxes
Overfilled containers are difficult to close, move, and search.
Leave sufficient room for safe access.
Mistake 10: Failing to Maintain the System
Even a well-organized collection becomes cluttered without regular cleanup.
Build simple maintenance habits.
24. Troubleshooting Common Craft Storage Problems
| Problem | Possible Cause | Practical Solution |
|---|---|---|
| Supplies are difficult to find | Inconsistent categories | Group and label materials |
| Drawers become cluttered | Too many loose items | Add suitable dividers |
| Paper becomes bent | Improper storage | Use flat trays or folders |
| Paint containers dry out | Poor closure or storage conditions | Close properly and follow product instructions |
| Yarn becomes tangled | Loose storage | Separate skeins or project bundles |
| Small beads spill | Insecure compartments | Use boxes with reliable closures |
| Fabric collects dust | Open or unsuitable storage | Use clean protective containers |
| Desk becomes overcrowded | Excessive visible supplies | Move occasional items into storage |
| Unfinished projects get mixed together | No project system | Use individual project boxes |
| Supplies are repeatedly purchased | Poor visibility or inventory | Review existing stock before shopping |
| Storage containers overflow | Excess materials or poor allocation | Declutter and reassess capacity |
| Tools become damaged | Inadequate protection | Use suitable cases and organizers |
25. Frequently Asked Questions
1. What is the best way to organize art and craft supplies?
Start by sorting supplies into practical categories, removing unusable items, and storing materials according to how frequently you use them.
2. How do I organize craft supplies in a small space?
Use compact drawers, secure vertical storage, stackable containers, and portable organizers. Keep the main working surface clear.
3. Should I organize craft supplies by color or type?
For most collections, organizing by type is a useful starting point. Color organization may help with materials such as fabric, yarn, paper, or beads.
4. What containers are best for craft supplies?
Choose containers according to the materials. Clear boxes, drawer dividers, flat trays, and compartment organizers work well for many common supplies.
5. How do I organize colored pencils and markers?
Use cases, drawers, or suitable holders. Follow manufacturer guidance for marker storage orientation.
6. How should I store paintbrushes?
Clean and dry brushes appropriately, then store them without crushing the bristles.
7. What is the best way to organize acrylic paints?
Keep containers properly closed, group them by type or color, and follow manufacturer storage instructions.
8. How do I store watercolor supplies?
Keep paints, brushes, palettes, and appropriate paper together. Allow wet materials to dry properly before storage.
9. How do I prevent craft paper from bending?
Store paper flat in suitable folders, trays, or shelves and protect it from moisture.
10. How should I organize fabric scraps?
Group usable scraps by size, type, or color. Keep them in labeled containers and review the collection periodically.
11. What is the easiest way to organize sewing supplies?
Use compartment boxes for needles, pins, and small accessories, and separate storage for thread, fabric, and larger tools.
12. How do I keep yarn from tangling?
Store yarn in suitable containers and keep project materials grouped together.
13. How should I organize beads and buttons?
Use secure compartment organizers with labels when needed. Keep small components inaccessible to children and pets.
14. Where should I store scissors and craft knives?
Use secure drawers, cases, or protective holders. Keep sharp tools away from unauthorized access.
15. Can I store all craft supplies in plastic containers?
Many supplies can be stored in suitable plastic containers, but some materials require specific ventilation, temperature control, chemical compatibility, or other conditions.
16. How can I organize craft supplies without spending much money?
Reuse appropriate containers, create simple labels, and organize existing furniture before purchasing additional storage.
17. Should I keep an inventory of craft supplies?
An inventory can be helpful for larger collections or expensive materials, but it is optional for small collections.
18. How do I organize unfinished craft projects?
Keep each active project in a separate tray, folder, bag, or box with its related materials and instructions.
19. How often should I reorganize craft supplies?
Tidy up after each session and review storage periodically. Major reorganization is only necessary when your needs change.
20. How do I prevent my craft workspace from becoming cluttered again?
Maintain clear categories, return supplies after use, avoid unnecessary purchases, and review the collection regularly.
26. Complete Art and Craft Supply Organization Checklist
Use this checklist to create a storage system that is practical, safe, and easy to maintain.
Initial Sorting
- Gather supplies from different storage areas.
- Identify the main craft activities.
- Sort materials into broad categories.
- Separate frequently used supplies.
- Inspect tools and materials for damage.
- Remove unusable items.
- Set aside suitable extras for sharing or donation.
- Dispose of hazardous waste appropriately.
Storage Planning
- Measure available storage space.
- Review existing drawers and shelves.
- Choose suitable containers.
- Reserve space for active projects.
- Keep heavy items in safe locations.
- Protect delicate materials.
- Store hazardous supplies according to instructions.
Drawing and Painting Supplies
- Pencils and pens are grouped logically.
- Markers are stored appropriately.
- Paints are separated by type.
- Paint containers are properly closed.
- Brushes are cleaned and protected.
- Palettes and accessories have designated locations.
Paper and Fabric
- Paper is stored flat where appropriate.
- Cardstock is protected from moisture.
- Decorative sheets are organized.
- Fabric is folded or stored suitably.
- Fabric scraps have a designated container.
- Yarn is protected from tangling and dust.
Small Accessories
- Beads and buttons are separated.
- Decorative materials have secure containers.
- Needles and pins are stored safely.
- Small items are inaccessible to children and pets.
- Compartments are labeled where useful.
Tools and Safety
- Scissors have designated storage.
- Craft knives and blades are protected.
- Electrical equipment is stored safely.
- Adhesives are properly closed.
- Chemical products remain appropriately labeled.
- Storage areas meet material safety requirements.
Project Management
- Active projects have individual containers.
- Instructions are stored with relevant materials.
- Delicate unfinished work is protected.
- Completed projects have suitable storage.
- Old unfinished projects are reviewed periodically.
Maintenance
- Supplies are returned after use.
- Work surfaces are cleaned appropriately.
- Waste is removed regularly.
- Storage containers are not overfilled.
- Materials are checked for deterioration.
- Inventory information is updated when useful.
- Unnecessary purchases are avoided.
- Storage categories are adjusted as needed.
Final Thoughts
Organizing art and craft supplies is an important part of creating a comfortable and enjoyable creative environment.
A thoughtful storage system helps protect materials, reduce clutter, improve safety, and make everyday crafting more convenient.
Whether you have a dedicated craft room, a small desk, a shared household table, or a portable collection of supplies, the same basic principles apply.
Begin by understanding what you own, grouping similar materials together, and choosing storage that matches your activities.
Keep frequently used tools accessible, protect delicate supplies from unsuitable conditions, and store hazardous equipment securely.
Remember that an effective organization system does not need to be expensive or complicated.
Simple drawer dividers, labeled containers, flat folders, and project boxes can provide everything you need to manage many common craft materials.
As your interests develop, your collection and storage arrangements may change.
A system that works well for drawing may need adjustments when you begin sewing, painting, or exploring other creative hobbies.
Allow your organization method to evolve naturally rather than trying to create a perfect arrangement from the beginning.
Most importantly, make cleanup and maintenance easy enough to become part of your regular routine.
When every tool and material has a practical place, you can spend less time searching, sorting, and reorganizing—and more time enjoying the creative process.
With a little planning and consistent care, even a small collection of art and craft supplies can become a well-organized resource that supports creativity, experimentation, and the satisfaction of making something by hand.