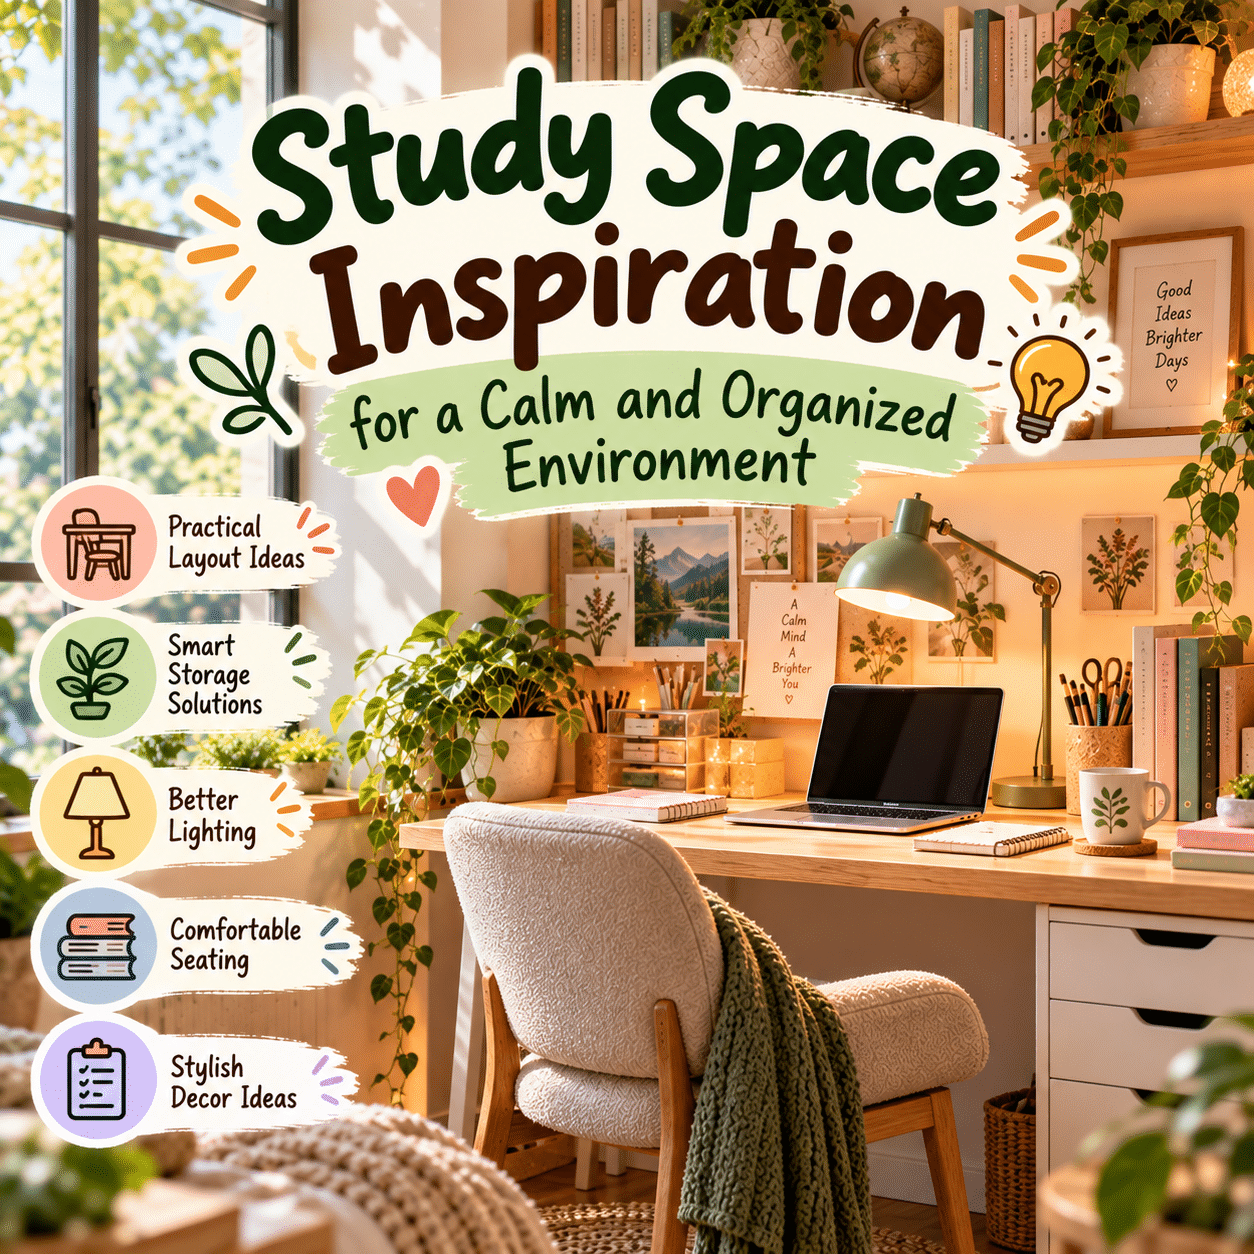
A thoughtfully designed study space can make everyday learning feel more comfortable, organized, and enjoyable. Whether you are preparing for exams, studying a new language, taking online courses, working on academic projects, or simply exploring a personal interest, your surroundings play an important role in how easily you can settle into a productive routine.
A good study environment does not need to be large, expensive, or filled with specialized equipment. A compact desk beside a window, a quiet bedroom corner, or a small workstation in a shared living area can become an effective place for learning when arranged with care.
The most inviting study spaces balance several essential qualities: physical comfort, appropriate lighting, practical organization, manageable distractions, and personal inspiration.
While a beautifully decorated desk can make studying more appealing, appearance alone is not enough. A functional study area should provide sufficient room for books and equipment, support comfortable posture, and make frequently used materials easy to find.
At the same time, a study space does not have to feel overly formal or restrictive. Natural textures, soft colors, meaningful artwork, and a few personal accessories can create a welcoming atmosphere without interfering with concentration.
This guide explores practical study space inspiration for different homes, learning styles, and available spaces. From selecting a suitable desk and improving lighting to organizing study supplies, creating comfortable routines, and designing a calm visual environment, these ideas can help you build a workspace that supports learning over time.
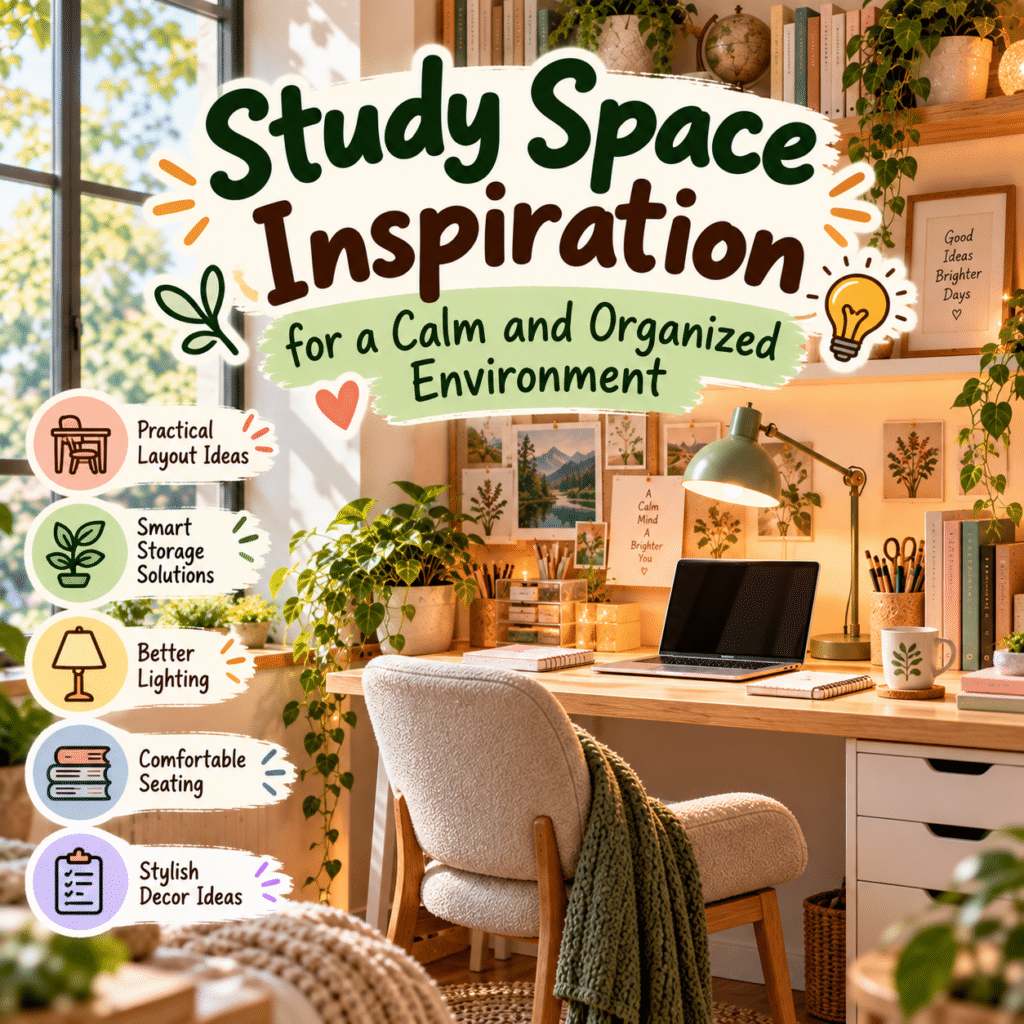
1. Begin With the Purpose of Your Study Space
Before choosing furniture, colors, or accessories, consider how you plan to use the space.
Different learning activities require different arrangements.
A student who regularly works with textbooks and handwritten notes may need more desk space than someone who primarily watches online lessons. A person studying art or design may require additional storage for creative materials, while someone learning computer programming may prioritize monitor positioning and keyboard comfort.
Identify Your Main Learning Activities
Think about the tasks you perform most often.
Common examples include:
- Reading textbooks and reference materials.
- Taking handwritten notes.
- Completing assignments.
- Attending online classes.
- Using educational software.
- Practicing a new language.
- Reviewing flashcards.
- Preparing presentations.
- Drawing diagrams or creating visual projects.
- Organizing research materials.
Make a list of the equipment and supplies needed for these activities.
This helps distinguish essential items from decorative accessories that can be added later.
Consider Your Study Habits
Do you prefer long, uninterrupted sessions or shorter periods with frequent breaks?
Do you work primarily with printed materials or digital resources?
Do you need space for multiple books, or is a laptop your main learning tool?
Your answers can influence desk dimensions, storage arrangements, and the overall layout.
Define Your Ideal Atmosphere
A calm study space might feature neutral colors, simple furniture, and minimal visual distractions.
A more expressive environment could include colorful stationery, botanical artwork, or a creative inspiration board.
The goal is to create an atmosphere that supports your preferences without overwhelming the practical working area.
2. Choose the Right Location for Studying
The location of a study space affects lighting, noise, privacy, and everyday convenience.
A separate study room can be helpful, but many effective learning environments are created within multipurpose rooms.
A Dedicated Study Room
A separate room provides flexibility for arranging furniture, bookshelves, and equipment.
It may also make it easier to control interruptions.
A dedicated study room can include:
- A comfortable desk and chair.
- Shelves for books and supplies.
- Appropriate task lighting.
- A planning board.
- Storage for documents.
- A small reading area.
However, the room should still feel welcoming rather than overly formal.
A Bedroom Study Corner
A bedroom can accommodate a practical study area when space is limited.
Position the desk where it receives suitable lighting and does not obstruct movement.
If possible, create visual separation between the study area and the bed.
A small rug, dedicated lamp, or coordinated desk accessories can help establish a distinct learning zone.
Keep study materials organized so the bedroom remains comfortable for relaxation.
A Living Room Study Area
A living room workstation may work well for people who do not have a separate study room.
Choose a relatively quiet location away from frequently used entertainment equipment when possible.
A slim desk beside a bookshelf or an unused wall can provide a functional study surface.
Closed storage can help keep the room tidy when studying is finished.
A Window-Side Study Space
A desk beside a window can feel bright and inviting.
Natural daylight may reduce the need for artificial lighting during certain hours.
However, direct sunlight can create glare on screens or printed pages.
Adjustable blinds or curtains can help control brightness.
A Small Alcove or Unused Corner
An architectural recess or overlooked corner may provide enough room for a compact workstation.
Measure the area carefully before selecting furniture.
Ensure there is sufficient room for comfortable seating, movement, and ventilation.
3. Select a Desk That Supports Your Learning Activities
The desk is the foundation of most study spaces.
Its dimensions and layout should accommodate the materials you use regularly.
Choose the Right Surface Size
A compact desk may be suitable for laptop-based learning.
However, studying with textbooks, notebooks, and reference materials often requires additional surface area.
Before choosing a desk, imagine arranging your typical study materials.
Make sure there is room to work without constantly moving objects.
Compare Different Desk Styles
| Desk Type | Suitable For | Important Consideration |
|---|---|---|
| Compact writing desk | Laptop work and occasional studying | Limited surface area |
| Standard rectangular desk | Everyday study activities | Requires adequate room |
| L-shaped desk | Multiple subjects or equipment zones | Needs suitable floor space |
| Height-adjustable desk | Alternating working positions | Requires proper adjustment |
| Wall-mounted desk | Small rooms and occasional tasks | Needs secure installation |
| Large study table | Books, diagrams, and creative projects | Requires more space |
The best desk is not necessarily the largest or most elaborate.
It is the one that comfortably supports your actual activities.
Consider Desk Materials
Wood and wood-look surfaces can create a warm appearance.
Metal and engineered materials may suit modern interiors.
Choose a surface that is stable, durable, and easy to clean.
For handwriting, a smooth and sufficiently firm working surface is particularly useful.
Leave Room for Movement
Ensure there is enough space beneath the desk for comfortable leg positioning.
Avoid placing storage boxes where they restrict movement.
4. Choose a Comfortable Study Chair
A supportive chair can make studying more comfortable, especially during extended sessions.
However, no chair can eliminate the need to change positions and take breaks.
Look for Adjustable Features
Useful features may include:
- Adjustable seat height.
- Suitable lower-back support.
- Comfortable seat depth.
- Stable construction.
- Appropriate armrest positioning.
- Breathable or comfortable upholstery.
Choose a chair that fits your body and desk.
Support Your Feet
Your feet should be comfortably supported while seated.
If they cannot rest on the floor, a suitable footrest may help.
Keep Your Shoulders Relaxed
Position the chair and desk so your shoulders remain relaxed during writing or keyboard use.
Avoid reaching upward or forward unnecessarily.
Consider Seat Comfort
An overly firm or excessively soft chair may become uncomfortable.
Test seating when possible.
Remember to Move
Stand, stretch, walk, or change posture periodically.
Comfortable studying involves both suitable furniture and regular movement.
5. Create a Calm Study Space With a Thoughtful Color Palette
Color can influence the visual character of a study area.
Although no single color guarantees better concentration or learning performance, a cohesive palette can help create an environment that feels comfortable and organized.
Soft Neutrals for Visual Simplicity
White, cream, beige, taupe, and light gray provide versatile backgrounds.
These colors work well with wooden furniture and understated accessories.
Sage Green for a Nature-Inspired Atmosphere
Muted greens can complement plants, natural textures, and botanical artwork.
A green desk mat, cushion, or small decorative object may provide enough color without requiring a painted wall.
Gentle Blue for a Refined Look
Soft blue and dusty blue can create a calm visual appearance.
Pair these colors with warm neutrals or natural wood to avoid an overly cold atmosphere.
Warm Earth Tones for Comfort
Terracotta, caramel, muted orange, and warm brown can make a study space feel welcoming.
Use these shades through accessories or selected furnishings.
Introduce Personal Accent Colors
A favorite color can appear in notebooks, artwork, storage containers, or a desk lamp.
Choose a limited number of complementary accents to maintain visual harmony.
Avoid Unnecessary Visual Complexity
A study area does not need to be completely monochrome.
However, too many unrelated patterns, colors, and decorations may make the workspace feel busy.
Select a palette that feels comfortable to you.
6. Make Natural Light Part of Your Study Space
Natural light can make a room feel open and inviting.
However, its usefulness depends on window placement, brightness, and the tasks being performed.
Position the Desk Carefully
A window beside the desk often provides useful daylight without placing strong light directly behind or in front of a computer screen.
Experiment with different arrangements when possible.
Control Direct Sunlight
Bright sunlight can create glare and uncomfortable reflections.
Use curtains, blinds, or other suitable window coverings to adjust the light.
Consider Handwriting Needs
When working with paper, try positioning the light source to minimize shadows from your writing hand.
Avoid Blocking Windows
Tall furniture or oversized storage units may unnecessarily reduce daylight.
Choose arrangements that preserve useful natural illumination.
Include an Outdoor View
A view of trees, a garden, or the surrounding neighborhood can make the study area more visually interesting.
If the window offers little visual appeal, indoor plants or landscape artwork may provide an alternative source of inspiration.
7. Use Layered Lighting for Comfortable Studying
Natural daylight changes throughout the day, so a study area also needs suitable artificial lighting.
A layered lighting arrangement combines general illumination with focused task lighting.
Ambient Lighting
Ambient lighting provides overall brightness.
Ceiling lights, wall fixtures, and other room lighting can help prevent strong contrasts between the desk and surrounding space.
Task Lighting
A desk lamp provides focused illumination for reading, writing, drawing, and reviewing documents.
An adjustable lamp allows you to direct light where it is needed.
Accent Lighting
Soft decorative lighting can add warmth and atmosphere.
However, accent lighting should not replace adequate illumination for reading or detailed work.
Choose Comfortable Brightness
The appropriate brightness depends on the activity, the reader’s vision, and the surrounding environment.
Choose lighting that makes text and materials easy to see without uncomfortable glare.
Consider Adjustable Lighting
A lamp with adjustable brightness can accommodate different activities and times of day.
Keep electrical equipment properly installed and away from liquids.
8. Organize Your Desk Into Practical Study Zones
A well-organized study desk makes it easier to locate materials and begin tasks.
Rather than arranging objects only for appearance, organize them according to how you work.
Create a Primary Work Zone
This is the central area where you write, type, read, or complete assignments.
Keep it relatively clear.
Establish a Reference Zone
Place frequently used textbooks, notes, or reference materials nearby.
A small bookstand or vertical organizer may be useful.
Create a Stationery Zone
Keep pens, pencils, highlighters, erasers, and other supplies together.
Use a holder or drawer organizer.
Add a Planning Zone
A planner, calendar, or task list can help you track assignments and study goals.
Keep planning materials accessible without allowing them to dominate the desk.
Use Flexible Zones
Not every desk needs physical dividers.
The purpose is to give objects predictable locations while preserving room for different activities.
9. Use Smart Storage to Reduce Study Clutter
Study materials can accumulate quickly.
Books, worksheets, notebooks, cables, and stationery need practical storage systems.
Organize Drawers by Category
Use drawer dividers for small supplies.
Group similar items together.
Use Vertical File Holders
Vertical organizers can hold notebooks, folders, and frequently referenced documents.
Add Bookshelves
Shelves can provide accessible storage for textbooks and reference materials.
Secure tall furniture appropriately and follow load limits.
Choose Labeled Containers
Labels can make it easier to identify materials, especially when studying multiple subjects.
Store Infrequently Used Items Separately
Keep everyday essentials close to the desk.
Move archived notes, spare supplies, and occasional materials into other storage areas.
Review Supplies Regularly
Periodically sort through papers and stationery.
Remove unnecessary duplicates and archive materials that are no longer needed for current work.
10. Create a Minimalist Study Space
A minimalist study area emphasizes practical essentials and visual simplicity.
It can be especially useful in compact rooms.
Begin With Essential Furniture
A desk, supportive chair, suitable lamp, and basic storage may be sufficient.
Keep Decorations Intentional
Choose a small number of meaningful objects.
A framed photograph or simple plant can add personality.
Use Concealed Storage
Drawers and closed containers can reduce visible clutter.
Coordinate Materials and Colors
A consistent palette can create a unified appearance.
Preserve Working Space
Leave enough room for books, notebooks, and equipment.
Minimalism should support functionality rather than restrict it.
Avoid Extreme Minimalism
Removing every personal object is unnecessary.
The goal is a comfortable environment with fewer distractions, not an empty room.
11. Make a Small Study Corner Feel Spacious
Limited floor space does not prevent you from creating an effective learning environment.
Thoughtful furniture choices and storage arrangements can make a compact study corner feel comfortable.
Choose a Slim Desk
A narrow desk may fit against an unused wall.
Ensure the surface is still deep enough for your activities.
Use Vertical Storage
Wall-mounted shelves or organizers can free up desk space.
Install them securely.
Select Compact Accessories
Choose appropriately sized lamps, stationery holders, and storage containers.
Keep the Color Palette Cohesive
Coordinated colors can help the study corner blend with the surrounding room.
Avoid Oversized Furniture
Large cabinets and chairs may overwhelm small spaces.
Measure carefully before purchasing.
Preserve Comfortable Movement
Do not sacrifice chair clearance or legroom to accommodate additional storage.
12. Create a Cozy Study Environment Without Excessive Clutter
A study space can feel warm and welcoming while remaining organized.
Add Natural Textures
Wood, cork, ceramic, and suitable textiles can soften the appearance of electronic equipment.
Use a Small Rug
A rug may help define the study area.
Choose a design that does not interfere with chair movement.
Include a Comfortable Cushion
A suitable chair cushion may add comfort when it does not interfere with proper seating support.
Choose Warm Accent Lighting
A softly illuminated lamp can make the room feel welcoming.
Maintain sufficient task lighting for studying.
Display a Few Meaningful Objects
A favorite photograph, small sculpture, or handmade accessory can add character.
Keep the Area Easy to Clean
A cozy environment should not require complicated maintenance.
13. Introduce Plants and Nature-Inspired Details
Natural elements can add visual warmth to a study area.
Plants, wood textures, and botanical artwork can create a pleasant connection to the outdoors.
Choose Plants That Suit the Space
Consider available light, temperature, and maintenance requirements.
Do not assume every indoor plant thrives in low light.
Use Stable Containers
Choose planters that will not tip easily.
Protect furniture and electrical equipment from moisture.
Consider Pet and Child Safety
Some indoor plants can be harmful if ingested.
Check the suitability of each variety for your household.
Add Botanical Artwork
Leaf illustrations, landscape photographs, and nature-inspired prints can provide visual interest without requiring plant care.
Avoid Overcrowding the Desk
One small plant may be sufficient.
Larger plants can be placed on nearby stands or shelves.
14. Design a Study Space for Digital Learning
Online courses, educational software, and digital research often require a computer-centered setup.
A comfortable digital study environment should support screen use while leaving room for notes and reference materials.
Position the Monitor Comfortably
For many users, a useful starting point is to place the monitor approximately an arm’s length away.
Adjust the distance based on screen size, eyesight, and comfort.
The top of the visible screen is often positioned around eye level or slightly below.
Consider a Laptop Stand
A suitable stand can raise the screen.
For extended laptop use, an external keyboard and mouse may allow more flexible positioning.
Keep Charging Equipment Organized
Use appropriate cable clips or organizers.
Avoid overloaded outlets, damaged cords, and unsafe cable arrangements.
Leave Space for Handwritten Notes
Even primarily digital learning may involve writing or drawing.
Preserve a clear area beside the computer.
Prepare for Online Classes
Keep headphones, a microphone, or other required accessories accessible.
Choose a reasonably quiet location when possible.
Reduce Unnecessary Digital Distractions
Close unrelated applications or use appropriate notification settings during focused study periods.
15. Create a Study Space for Handwritten Notes and Reading
Some learning activities rely heavily on printed materials.
A study area designed for handwriting and reading should provide sufficient surface space and suitable lighting.
Choose a Spacious Writing Area
Leave room for a notebook and at least one reference book.
Use a Bookstand When Helpful
A stable bookstand can hold reference materials at a comfortable viewing angle.
Organize Writing Tools
Keep frequently used pens, pencils, and highlighters together.
Provide Focused Lighting
Position the lamp to minimize shadows and glare.
Keep Reference Materials Accessible
Use nearby shelves or vertical organizers.
Avoid Excessive Desk Accessories
Decorative objects should not interfere with writing space.
16. Build a Creative Study Space for Visual Learning
Some learners prefer diagrams, sketches, charts, or other visual methods.
A flexible study area can accommodate these activities.
Add a Whiteboard
A whiteboard can be useful for brainstorming, problem-solving, and organizing ideas.
Use a Corkboard
A corkboard can display diagrams, reference images, and study reminders.
Create a Visual Planning Wall
Arrange materials by topic or project.
Keep important information easy to find.
Store Creative Supplies Together
Use containers for colored pencils, markers, drawing tools, and other materials.
Leave Space for Experimentation
A clear working surface allows you to spread out diagrams and notes when needed.
Refresh Visual Displays
Remove outdated information and replace it with current study materials.
17. Use a Study Planner to Support Organization
A planner can help turn broad learning goals into manageable activities.
It does not need to be complicated.
Choose a Format That Suits You
Options include:
- Paper planners.
- Digital calendars.
- Weekly study schedules.
- Simple notebooks.
- Task management applications.
- Whiteboards.
Choose a system you can maintain consistently.
Break Large Tasks Into Smaller Steps
Instead of writing a vague goal such as “study mathematics,” identify a specific activity.
For example, review a chapter, complete a practice set, or summarize a concept.
Prioritize Important Work
Identify assignments, assessments, and learning activities that require attention.
Allow Flexibility
Unexpected responsibilities may change your schedule.
A practical plan should be adaptable.
Review Progress Periodically
Reflect on completed tasks and adjust future plans based on actual progress.
18. Design a Study Environment With Fewer Distractions
A calm study area does not need to be completely silent or visually empty.
However, reducing unnecessary interruptions can make it easier to remain engaged with learning.
Identify Your Main Distractions
Common distractions include:
- Household conversations.
- Television noise.
- Phone notifications.
- Unrelated browser tabs.
- Visual clutter.
- Frequent interruptions.
- Uncomfortable room conditions.
Different people respond differently to these factors.
Choose a Suitable Location
When possible, select a relatively quiet area away from high-traffic household activities.
Organize the Desk Before Starting
A short preparation routine can reduce the need to search for supplies during study sessions.
Manage Digital Notifications
Use device settings to reduce nonessential interruptions.
Consider Headphones
Suitable headphones may help in shared environments.
Keep listening volume comfortable.
Communicate Study Boundaries
If you share your home, let others know when you need uninterrupted time.
19. Make Your Study Space Comfortable for Longer Sessions
Long study sessions can become tiring when the environment is uncomfortable.
Practical adjustments can help.
Maintain Comfortable Seating
Use a chair that supports your body appropriately.
Adjust Screen and Book Positioning
Avoid prolonged awkward neck positions.
Change Posture Regularly
Stand, stretch, or walk periodically.
Keep Water Accessible
A water bottle can be convenient.
Place liquids away from electrical equipment and important documents.
Maintain Suitable Temperature
Adjust ventilation, fans, or heating and cooling systems as appropriate.
Avoid Excessive Desk Crowding
Leave room for comfortable arm movement.
Recognize When You Need a Break
Study effectiveness depends on more than the physical workspace.
Rest and manageable workloads are also important.
20. Create a Study Space for Shared Rooms
A study area in a shared room requires additional planning.
The goal is to accommodate learning while respecting other activities.
Define the Study Zone
Use furniture placement, a rug, or lighting to distinguish the workspace.
Choose Compact Storage
Closed containers can keep supplies organized when the desk is not in use.
Consider Portable Accessories
A portable stationery organizer or laptop stand may be useful when the workspace serves multiple purposes.
Establish Shared Expectations
Agree on reasonable noise levels and workspace availability.
Respect Privacy
Store personal documents and devices appropriately.
Keep Circulation Paths Clear
Avoid furniture arrangements that interfere with everyday movement.
21. Create a Study Space for Children and Teenagers
Younger learners may benefit from a study area designed around their size, activities, and changing needs.
Choose Age-Appropriate Furniture
Desks and chairs should support comfortable positioning.
Adjustable furniture may accommodate growth.
Make Supplies Accessible
Keep frequently used materials within safe reach.
Use Simple Organization
Labeled drawers, baskets, and folders can make cleanup easier.
Add Personal Details
Artwork, favorite colors, and creative accessories can make the area welcoming.
Prioritize Safety
Secure tall furniture where appropriate.
Keep cords organized and follow age-specific product guidance.
Allow Room for Changing Interests
Storage and furniture arrangements should adapt as learning activities evolve.
22. Design a Study Space for Adult Learners
Studying is not limited to school or university.
Adults may use study spaces for professional development, language learning, personal interests, or new qualifications.
Support Flexible Schedules
A study area should remain convenient for shorter sessions or evening learning.
Keep Materials Organized by Subject
Use folders, shelves, or digital systems to separate different courses.
Provide Suitable Lighting
Evening study sessions may require reliable artificial illumination.
Consider Multipurpose Furniture
A desk may also support household planning or occasional work.
Keep the Environment Welcoming
Personal artwork, natural textures, and comfortable furniture can make learning feel like a rewarding part of daily life.
23. Add Personal Inspiration Without Creating Pressure
A study space can include reminders of your interests and goals.
However, decorative messages should support your experience rather than create unnecessary pressure.
Display Meaningful Artwork
Choose images that reflect your interests or aspirations.
Create a Small Inspiration Board
Include photographs, ideas, or references related to what you are learning.
Celebrate Completed Projects
Display a favorite drawing, completed piece of work, or meaningful achievement.
Keep Goals Realistic
A simple reminder of your current learning objective may be more useful than an overwhelming collection of motivational messages.
Refresh Decorations Occasionally
Allow the study space to evolve with your interests.
24. Create an Organized System for Books and Documents
Books and papers can quickly overwhelm a study area.
A practical storage system keeps materials accessible and reduces unnecessary clutter.
Organize by Subject
Group textbooks, notes, and reference materials according to topic.
Use Clearly Labeled Folders
Folders can separate assignments, handouts, and completed work.
Keep Current Materials Nearby
Store active study materials within easy reach.
Archive Older Documents
Move completed or infrequently used materials into designated storage.
Use Digital Organization When Appropriate
Consistent folder names and file structures can make digital resources easier to locate.
Protect Important Documents
Store valuable records appropriately and maintain backups of important digital work.
25. Make a Study Space More Sustainable
A thoughtful study environment can emphasize durability, responsible purchasing, and efficient use of existing resources.
Reuse Suitable Furniture
An existing desk or table may be sufficient.
Check stability and dimensions before repurposing it.
Choose Durable Accessories
Look for organizers and furniture that can withstand regular use.
Avoid Unnecessary Purchases
Buy supplies based on actual learning needs.
Consider Secondhand Books and Furniture
Inspect used items for condition and suitability.
Maintain Equipment
Clean and care for devices according to manufacturer instructions.
Reduce Paper Waste Where Practical
Use digital resources when suitable, while recognizing that printed materials remain useful for many learning activities.
26. Common Study Space Design Mistakes to Avoid
Even an attractive study area can become uncomfortable or inefficient when practical details are overlooked.
Choosing Furniture Based Only on Appearance
A beautiful desk may be too shallow for textbooks or computer equipment.
Ignoring Chair Comfort
An unsuitable chair can make extended study sessions uncomfortable.
Using Inadequate Lighting
Poorly positioned lighting may create glare or make text difficult to read.
Overdecorating
Too many accessories can reduce working space and increase visual clutter.
Neglecting Storage
Without designated locations, books and papers can accumulate quickly.
Placing Equipment Unsafely
Avoid unstable monitor stands, overloaded outlets, and damaged cords.
Creating an Overly Complicated Organization System
A system that requires excessive effort may be difficult to maintain.
Copying Another Person’s Workspace Exactly
A study setup should reflect your own learning activities, available space, and preferences.
Forgetting About Breaks
A comfortable study environment should allow movement and rest.
27. Study Space Ideas for Different Learning Needs
Different activities benefit from different arrangements.
| Learning Activity | Helpful Workspace Features | Main Priority |
|---|---|---|
| Reading and note-taking | Open desk, bookstand, task lamp | Comfortable reading and writing |
| Online courses | Computer setup, headphones, reliable lighting | Digital learning convenience |
| Language learning | Notebook storage, audio equipment, reference materials | Easy access to learning tools |
| Mathematics and science | Large writing surface, whiteboard, organized notes | Space for problem-solving |
| Art and design | Flexible table, creative storage, inspiration board | Practical creative freedom |
| Exam preparation | Organized materials, planner, reduced distractions | Consistent study routines |
| Professional development | Multipurpose desk, digital organization, comfortable seating | Flexible adult learning |
| Children’s homework | Age-appropriate furniture, simple storage | Accessibility and safety |
These suggestions are starting points.
A single study area may support several learning activities.
28. A Step-by-Step Study Space Makeover
You do not need to redesign an entire room to create a calmer study environment.
A gradual approach can be effective.
Step 1: Evaluate Your Current Space
Identify what works and what causes frustration.
Consider lighting, furniture, storage, noise, and available surface area.
Step 2: Define Your Study Priorities
List your most important activities and essential supplies.
Step 3: Measure the Area
Check desk dimensions, chair clearance, and nearby storage opportunities.
Step 4: Improve Furniture Comfort
Adjust or replace unsuitable furniture when necessary.
Step 5: Arrange Lighting
Use natural light where practical and add suitable task illumination.
Step 6: Organize Materials
Group books, notebooks, stationery, and digital equipment.
Step 7: Reduce Unnecessary Clutter
Remove items that do not support your study activities or personal enjoyment.
Step 8: Introduce a Cohesive Style
Choose colors, textures, and a few meaningful decorative objects.
Step 9: Establish a Simple Study Routine
Prepare materials before beginning and return them to designated locations afterward.
Step 10: Evaluate and Adjust
Use the space for several study sessions.
Make changes based on actual comfort and convenience.
29. Study Space Organization Checklist
Use this checklist to create or evaluate a calm, organized learning environment.
Furniture and Layout
- The desk provides enough space for my study activities.
- The chair supports comfortable seating.
- There is adequate legroom.
- Furniture does not obstruct walkways.
- Shelves and equipment are stable.
Lighting and Comfort
- Natural light is controlled appropriately.
- Task lighting makes reading and writing comfortable.
- Computer screens are positioned to reduce glare.
- The room has suitable ventilation.
- I can change posture and take breaks.
Organization
- Books and notebooks have designated storage.
- Stationery is easy to find.
- Current study materials are accessible.
- Documents are organized by subject or purpose.
- The desk can be cleared easily.
Atmosphere
- The color palette feels comfortable.
- Decorations do not interfere with studying.
- The workspace reflects my preferences.
- Noise and interruptions are manageable.
- The area feels welcoming and practical.
Long-Term Use
- Storage can adapt to changing learning needs.
- Furniture is durable and easy to maintain.
- Electrical equipment is used safely.
- The organization system is simple to follow.
- The workspace supports consistent learning habits.
Frequently Asked Questions About Study Space Design
1. How can I make my study space feel calm and organized?
Start by clearing unnecessary clutter and giving frequently used materials designated locations.
Choose suitable lighting, comfortable furniture, and a cohesive color palette.
Keep the main working surface available for studying.
A simple organization system is usually easier to maintain than an elaborate one.
2. What colors are best for a study room?
There is no single color that works best for everyone.
Soft neutrals, muted greens, gentle blues, and warm earth tones can create different inviting atmospheres.
Choose colors that complement your room and feel comfortable to you.
3. How can I create a study space in a small bedroom?
Use a compact desk, appropriately sized chair, and vertical storage.
Position the desk where lighting is suitable and movement remains comfortable.
Keep study materials organized so they do not spread across the sleeping area.
4. What should I keep on my study desk?
Keep items that support your regular activities.
These may include a computer, notebook, writing tools, desk lamp, planner, and frequently used reference materials.
Store occasional supplies elsewhere to preserve working space.
5. How can I make studying at home less distracting?
Choose a relatively quiet location, organize materials before starting, and reduce unnecessary device notifications.
Communicate study boundaries with other household members when appropriate.
Experiment with different arrangements to identify what works best for you.
6. Do I need expensive furniture for a good study space?
No. A practical study environment can be created with suitable existing furniture, simple organizers, and appropriate lighting.
Prioritize comfort, stability, and functionality before decorative purchases.
7. How can I keep my study area organized over time?
Return materials to designated locations after each session.
Review papers and supplies periodically.
Use a simple system for active and archived materials.
Adjust the arrangement when your learning activities change.
Conclusion: Create a Study Space That Makes Learning More Enjoyable
A calm and organized study space is not defined by expensive furniture, elaborate decorations, or the size of the room. Its value comes from how well it supports comfortable, focused, and meaningful learning.
A suitable desk, supportive chair, appropriate lighting, and practical storage create a strong foundation. Thoughtful colors, natural textures, personal artwork, and a few carefully selected accessories can then make the environment more welcoming.
Whether your study area occupies an entire room, a bedroom corner, or a small section of a shared living space, the most effective design choices begin with understanding your activities and preferences.
Focus on comfort and organization first. Keep essential materials accessible, reduce unnecessary distractions, and allow the space to adapt as your learning goals evolve.
Most importantly, remember that a study environment should support your learning rather than demand perfection. A useful workspace is one that you can maintain comfortably and return to with confidence.
With thoughtful planning and simple everyday habits, even a modest study corner can become an inspiring place for curiosity, concentration, personal growth, and lifelong learning.