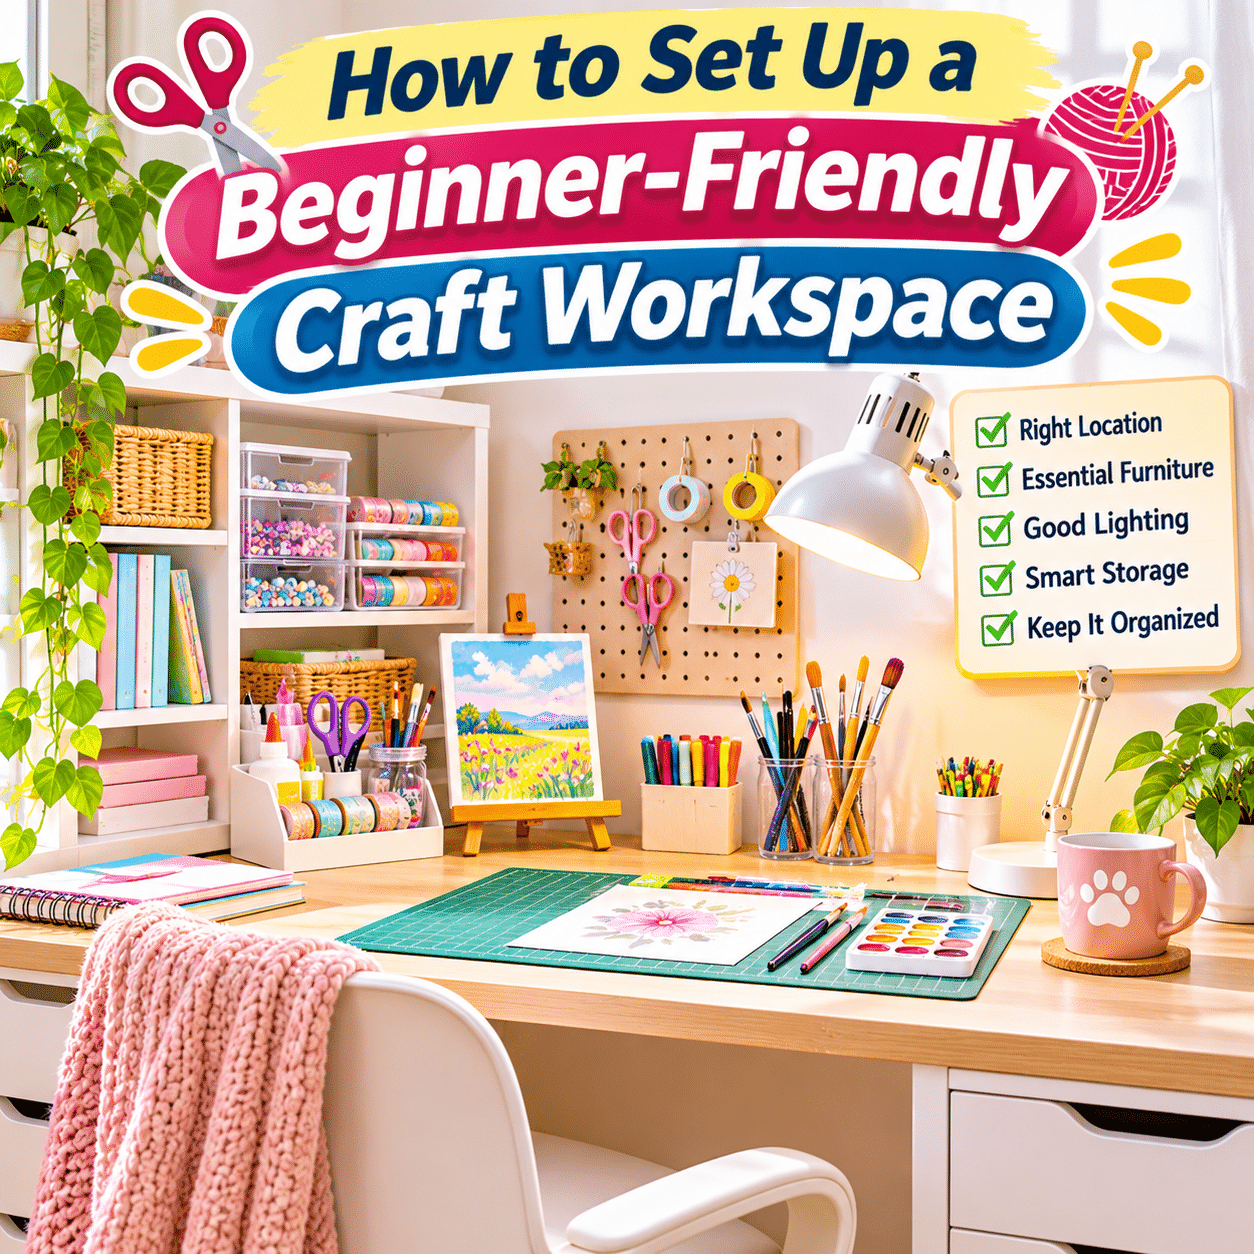
Creating a dedicated space for arts and crafts can make creative activities more enjoyable, organized, and accessible. Whether you love painting, drawing, paper crafting, sewing, scrapbooking, or simple DIY projects, having a comfortable place to work can help turn occasional creative interests into rewarding everyday routines.
However, setting up a craft workspace can feel overwhelming when you are just beginning.
Craft supplies come in countless shapes and sizes, from small scissors and colored pencils to fabric bundles, paints, cutting mats, adhesives, and specialized tools. Without a practical organization system, even a small collection can quickly spread across tables, drawers, and storage containers.
The good news is that a functional craft workspace does not require an entire room, expensive furniture, or a large collection of professional equipment.
A small desk, a comfortable chair, suitable lighting, and a few thoughtfully chosen storage solutions can provide an excellent starting point.
The most important goal is to create a space that supports your preferred activities while remaining comfortable, safe, and easy to maintain.
This guide explores how to set up a beginner-friendly craft workspace, choose the right location, arrange essential furniture, organize supplies, improve lighting, manage different creative activities, and build a practical system that can grow with your interests.
1. Why Having a Dedicated Craft Workspace Matters
A craft workspace is more than a place to store supplies.
It provides a practical environment where you can focus on creative activities without repeatedly searching for materials or clearing unrelated household items.
Make Creative Activities More Accessible
When your essential tools are organized and ready to use, starting a project becomes easier.
Instead of spending time gathering scissors, paper, brushes, or other supplies from different rooms, you can begin working with minimal preparation.
This convenience can make creative hobbies easier to incorporate into everyday life.
Reduce Clutter and Distractions
Craft projects often involve numerous small materials.
A designated workspace helps contain these items and makes cleanup more manageable.
It also reduces the likelihood of supplies being misplaced or accidentally damaged.
Support Comfortable Working Habits
A suitable table, chair, and lighting arrangement can help reduce unnecessary physical strain during activities that require concentration and detailed hand movements.
Comfort is particularly important for hobbies involving extended periods of sitting, cutting, drawing, or sewing.
Encourage Creative Exploration
An inviting workspace can make it easier to experiment with different materials and techniques.
Keeping supplies visible and accessible may also remind you of unfinished projects and creative ideas.
Protect Household Surfaces
Craft activities sometimes involve paint, glue, ink, cutting tools, or other materials that can damage furniture.
A properly prepared work surface helps protect your home while providing a more suitable environment for creative tasks.
2. Identify the Types of Crafts You Want to Explore
Before choosing furniture or purchasing storage containers, consider which activities you are most interested in.
Different crafts require different tools, surfaces, and storage arrangements.
Common Beginner-Friendly Crafts
| Craft Activity | Typical Supplies | Workspace Requirements |
|---|---|---|
| Drawing and sketching | Pencils, erasers, sketchbooks | Smooth surface, good lighting |
| Watercolor painting | Paints, brushes, paper, water containers | Water-resistant protection, drying space |
| Acrylic painting | Paints, brushes, palettes, canvas | Protected surface, suitable ventilation |
| Paper crafting | Paper, scissors, adhesives, rulers | Flat cutting and assembly area |
| Scrapbooking | Albums, decorative paper, stickers | Organized small-item storage |
| Sewing | Fabric, thread, needles, sewing machine | Stable table, safe tool storage |
| Embroidery | Hoops, needles, floss, fabric | Comfortable seating, focused lighting |
| Jewelry making | Beads, pliers, findings | Small-part organizers, clear surface |
| Clay crafting | Clay, sculpting tools, work mats | Suitable surface, material-specific cleanup |
| General DIY projects | Measuring tools, adhesives, materials | Flexible work area, safety precautions |
You do not need to prepare for every activity at once.
Begin with one or two crafts and expand your workspace as your interests develop.
Consider Your Working Style
Ask yourself:
- Do I prefer sitting or standing?
- Will I work on small or large projects?
- Do I need access to water?
- Will I use electrical equipment?
- Do my activities produce dust or strong odors?
- How frequently will I use the workspace?
- Do I need to pack everything away after each session?
These questions help determine the most practical arrangement.
3. Choose the Right Location for Your Craft Workspace
A craft workspace can fit into many different areas of the home.
The best location depends on available space, lighting, noise, ventilation, and the activities you plan to do.
A Spare Room
A spare room offers flexibility for larger projects and additional storage.
It may accommodate a dedicated table, shelving, and multiple activity zones.
However, an entire room is not necessary for a successful craft setup.
A Bedroom Corner
A compact desk in a bedroom can work well for drawing, journaling, embroidery, and other relatively quiet activities.
Choose a location that does not obstruct movement or interfere with essential bedroom functions.
A Living Room Corner
A small table or workstation can be integrated into a living room.
Closed storage may help keep supplies organized when the area is shared with other household activities.
A Home Office
If you already have a home office, a portion of the desk or a nearby storage cabinet can support creative hobbies.
Keep craft materials organized so they do not interfere with work equipment.
A Dining Table
A dining table can serve as a temporary craft station.
Use protective mats and portable storage containers so supplies can be packed away when the table is needed for meals.
Avoid using food preparation or dining surfaces for hazardous materials without appropriate protection and cleaning.
A Closet or Foldaway Workspace
A small closet, wall-mounted folding desk, or compact cabinet can provide a practical solution for limited spaces.
Ensure adequate lighting, ventilation, and safe access to equipment.
4. Measure Your Available Space Before Buying Furniture
A common beginner mistake is purchasing furniture before understanding the available room dimensions.
Measure the Floor Area
Record the width and depth of the space.
Consider nearby doors, windows, cabinets, and walking paths.
Allow Room for Movement
Make sure you can:
- Pull out the chair.
- Sit and stand comfortably.
- Open drawers.
- Access storage shelves.
- Move around the table safely.
- Carry materials without hitting nearby furniture.
Consider Project Size
A workspace for sketching may require less surface area than one used for cutting fabric or assembling large paper projects.
Choose a table that accommodates your most common activities.
Plan for Future Storage
You may gradually collect additional supplies.
Leave some flexibility without filling every available corner immediately.
5. Choose a Practical Craft Table or Desk
The worktable is the foundation of most craft spaces.
It should provide a stable surface that suits your preferred activities.
Look for a Stable Structure
A craft table should not wobble during cutting, drawing, or other detailed work.
If you plan to use a sewing machine or other equipment, confirm that the furniture can safely support its weight and movement.
Choose an Appropriate Surface
Useful qualities include:
- Smooth texture.
- Easy cleaning.
- Adequate durability.
- Resistance to ordinary wear.
- Enough room for supplies.
- Compatibility with protective mats.
Different activities may require additional surface protection.
Consider Table Height
The correct height depends on your body proportions, chair, and activity.
When seated, aim for a comfortable position that allows your shoulders to remain relaxed and your arms to work without excessive reaching.
An adjustable table may be useful, but it is not essential.
Consider Foldable Furniture
A folding desk can work well when a permanent workspace is not possible.
Check that it locks securely and remains stable during use.
Avoid Overcrowding the Surface
A large table can still feel uncomfortable when covered with unnecessary items.
Reserve the main working area for the current project.
6. Select a Comfortable Chair
Creative hobbies often involve sitting for extended periods.
A suitable chair can help support comfortable working habits.
Look for Supportive Features
Consider:
- Stable construction.
- Appropriate seat height.
- Comfortable back support.
- Suitable seat depth.
- Enough freedom of movement.
- Compatibility with the table.
Keep Your Feet Supported
Your feet should rest comfortably on the floor or a suitable footrest.
Avoid sitting in a position that creates unnecessary pressure behind the knees.
Adjust Your Working Position
Try to keep frequently used materials within easy reach.
Avoid prolonged leaning, twisting, or raising your shoulders while working.
Change Positions Regularly
Even a comfortable chair cannot eliminate the effects of remaining in one position for too long.
Take breaks, stand up, and change posture periodically.
7. Set Up Proper Lighting for Detailed Craft Work
Lighting is particularly important for activities involving color, fine details, and precise hand movements.
Use Natural Light When Available
A desk near a window can provide pleasant daylight.
However, direct sunlight may cause glare, heat, or fading of certain materials.
Position the desk to balance natural light with visual comfort.
Add a Task Lamp
A desk lamp can illuminate the specific area where you are working.
Look for adjustable positioning and sufficient brightness for your activity.
Reduce Shadows
Place the lamp so your hand and tools do not cast strong shadows over the working area.
The ideal position depends on whether you are right-handed or left-handed.
Avoid Excessive Glare
Highly reflective surfaces can create uncomfortable glare.
Adjust lamp angles or use diffused lighting when necessary.
Consider Color Appearance
For painting, fabric selection, and other color-sensitive activities, consistent lighting can make it easier to compare colors.
Daylight or good-quality neutral lighting may be useful, although personal comfort remains important.
8. Organize Your Workspace Into Functional Zones
Even a small craft desk can benefit from a simple zone-based arrangement.
Main Working Zone
This is the central surface used for drawing, cutting, assembling, or other creative tasks.
Keep it as clear as possible.
Frequently Used Tools Zone
Place everyday essentials within easy reach.
Examples include:
- Scissors.
- Pencils.
- Rulers.
- Erasers.
- Brushes.
- Measuring tools.
Use a small organizer rather than spreading everything across the desk.
Materials Storage Zone
Store paper, fabric, paints, and other supplies in drawers, bins, or shelves.
Group similar materials together.
Work-in-Progress Zone
Reserve a tray, folder, or container for unfinished projects.
This prevents incomplete work from becoming mixed with unused supplies.
Cleaning Zone
Keep suitable cleaning materials nearby when needed.
Store hazardous cleaning products securely and separately from ordinary craft supplies.
9. Choose Simple Storage Solutions for Beginners
You do not need specialized craft furniture to create an organized workspace.
Basic storage containers can work very well.
Drawer Organizers
Drawer dividers are useful for small tools and accessories.
They can separate items such as:
- Pencils.
- Erasers.
- Clips.
- Small rulers.
- Craft knives.
- Measuring tools.
Sharp tools should be stored securely.
Clear Storage Boxes
Transparent containers make it easier to identify contents.
They work well for paper accessories, ribbons, fabric pieces, and other suitable materials.
Small Baskets
Baskets can hold frequently used, nonhazardous supplies.
Choose sizes that fit your shelves or cabinets.
Vertical Shelving
Wall shelves and bookcases can increase storage capacity without occupying additional desk space.
Install shelves securely and avoid placing heavy items where they could fall.
Rolling Storage Carts
A compact rolling cart can provide flexible storage.
Choose one with stable wheels and a suitable weight capacity.
Lock the wheels when necessary.
Portable Craft Boxes
A portable organizer is useful when working at a shared table.
Look for compartments that keep small items separated during transport.
10. Organize Craft Supplies by Category
Grouping supplies according to their purpose makes them easier to locate and maintain.
Suggested Organization System
| Category | Examples | Suggested Storage |
|---|---|---|
| Drawing tools | Pencils, pens, markers | Cups, drawers, cases |
| Paper materials | Cardstock, sketchbooks, decorative paper | Flat folders, shelves |
| Cutting tools | Scissors, craft knives, cutters | Secure drawers or tool cases |
| Adhesives | Glue sticks, craft glue, tape | Labeled containers |
| Painting supplies | Brushes, paints, palettes | Dedicated bins or drawers |
| Sewing supplies | Thread, needles, pins | Compartment boxes |
| Fabric | Fabric pieces, felt, scraps | Folded bins or drawers |
| Decorative items | Stickers, ribbons, embellishments | Small labeled organizers |
| Works in progress | Unfinished projects and components | Project trays or boxes |
| Cleaning supplies | Cloths, appropriate cleaners | Separate secure storage |
Keep Categories Simple
Avoid creating too many subdivisions at the beginning.
For example, a single container labeled “Drawing Tools” may be sufficient until your collection becomes larger.
Label Containers Clearly
Use short, practical labels.
Examples include:
- PAPER
- PAINT
- BRUSHES
- FABRIC
- THREAD
- ADHESIVES
- TOOLS
- CURRENT PROJECT
Store Frequently Used Items Closest
Items used during most sessions should be easiest to reach.
Occasional supplies can be stored farther away.
11. Create a Safe Cutting and Measuring Station
Many crafts involve cutting paper, fabric, or other materials.
A dedicated cutting setup can improve organization and protect the work surface.
Use an Appropriate Cutting Mat
A self-healing cutting mat can protect the table during compatible cutting activities.
Choose a mat suitable for the tools and materials being used.
Keep Measuring Tools Nearby
Useful items may include:
- Rulers.
- Measuring tapes.
- Cutting guides.
- Squares.
- Fabric measuring tools.
Store Sharp Tools Securely
Craft knives, rotary cutters, scissors, and replacement blades should be stored safely.
Use blade covers and appropriate cases.
Keep them inaccessible to children and pets.
Follow Tool Instructions
Different cutting tools have different operating requirements.
Use the correct technique and protective equipment for each tool.
Keep the Cutting Area Clear
Remove unnecessary objects before cutting.
This reduces the likelihood of accidentally damaging materials or contacting sharp tools.
12. Set Up a Beginner-Friendly Painting Area
Painting can be enjoyable at home, but it requires attention to surfaces, materials, and cleanup.
Protect the Table
Use a suitable washable mat or other protective covering.
Avoid relying on thin coverings that may allow paint or liquid to reach the furniture.
Organize Paints by Type
Separate watercolors, acrylic paints, and other materials according to their storage requirements.
Keep containers closed when not in use.
Store Brushes Properly
Clean brushes according to the paint type and manufacturer instructions.
Allow them to dry appropriately before storage.
Avoid leaving brushes submerged in water for extended periods when this may damage them.
Provide Suitable Ventilation
Ventilation requirements depend on the materials.
Some paints, solvents, sprays, resins, and adhesives can release harmful vapors or particles.
Follow product safety instructions and avoid using materials that require specialized ventilation in unsuitable indoor spaces.
Prepare a Cleanup Area
Keep suitable water containers, cleaning cloths, and waste materials available.
Dispose of paint residues and other materials according to product instructions and local requirements.
13. Set Up a Small Sewing and Fabric Craft Area
Sewing and embroidery require different arrangements depending on whether you work by hand or use a machine.
Hand Sewing
A compact desk can support many hand-sewing projects.
Useful supplies include:
- Needles.
- Thread.
- Fabric.
- Scissors.
- Measuring tape.
- Pin cushion or secure needle holder.
Machine Sewing
A sewing machine requires a stable table and adequate space for fabric movement.
Follow the machine manufacturer’s setup and operating instructions.
Organize Fabric
Fold fabric neatly and store it in clean, dry containers.
Separate large pieces from small scraps when useful.
Keep Needles and Pins Secure
Use designated containers for sharp sewing accessories.
Check the work surface and floor for dropped needles or pins after each session.
Provide Focused Lighting
Detailed stitching may require additional task lighting.
Position the lamp to illuminate the work without creating glare.
14. Create a Paper Crafting and Scrapbooking Station
Paper crafting is a practical starting point for beginners because many activities can be completed on a small table.
Store Paper Flat
Use folders, document trays, or suitable shelves to prevent unnecessary bending.
Keep paper away from moisture and direct sunlight.
Organize Decorative Supplies
Separate:
- Stickers.
- Washi tape.
- Ribbons.
- Decorative paper.
- Stamps.
- Embellishments.
Small compartment boxes can help prevent items from becoming mixed.
Keep Adhesives Accessible
Store glue and tape in suitable containers.
Close adhesive products after use.
Protect the Working Surface
Use a cutting mat or protective board when trimming paper.
Avoid cutting directly on household furniture.
Keep Projects Together
Store unfinished scrapbook pages or paper projects in folders or trays.
This helps protect them from bending and accidental damage.
15. Plan a Craft Workspace for Small Living Spaces
A limited floor area does not prevent you from creating a useful craft corner.
The key is to choose flexible furniture and control the amount of visible clutter.
Use a Compact Desk
A narrow desk may be sufficient for drawing, journaling, embroidery, or small paper projects.
Take Advantage of Vertical Space
Use secure shelves, pegboards, or wall-mounted organizers for appropriate lightweight supplies.
Avoid overcrowding the wall with items that are difficult to reach.
Choose Stackable Containers
Stackable boxes can make better use of cabinet space.
Place heavier containers at the bottom.
Use Portable Project Trays
A tray can hold supplies for one project and be moved when the table is needed for another purpose.
Consider Foldaway Furniture
A wall-mounted folding desk or compact cabinet may be useful when space is extremely limited.
Check stability and load capacity.
Keep Only Active Supplies on Display
Store materials that are not currently needed.
This helps maintain a comfortable working surface.
16. Make Your Craft Workspace Comfortable and Inviting
A functional workspace can also reflect your personal style.
The goal is to create an environment where you enjoy spending time.
Choose a Simple Color Scheme
A consistent palette can help the space feel visually organized.
Neutral furniture combined with colorful craft materials often creates a balanced appearance.
Display Selected Creative Projects
Consider displaying:
- A favorite drawing.
- A small handmade decoration.
- A completed embroidery piece.
- A framed creative quote.
- A few inspiring reference images.
Avoid covering every available surface with decorations.
Add Suitable Greenery
A small plant can bring a natural element to the workspace.
Choose plants appropriate for the environment and keep potentially toxic varieties away from pets and children.
Keep Personal Items Minimal
A few meaningful objects can make the area inviting without interfering with work.
Prioritize Function Over Decoration
Decorative organizers are only useful if they support your daily activities.
Choose solutions that make supplies easier to access and maintain.
17. Create a Beginner-Friendly Craft Supply Starter Kit
Beginners often feel tempted to purchase a large collection of materials immediately.
However, starting with a smaller selection can make it easier to discover what you actually enjoy.
Basic General Craft Supplies
Depending on your chosen activities, consider:
- Pencils.
- Eraser.
- Ruler.
- Suitable scissors.
- Cutting mat.
- Paper or sketchbook.
- Adhesive appropriate for the project.
- Small storage containers.
- Cleaning cloth.
- Protective work surface.
Additional supplies should be selected according to your craft.
Drawing Starter Supplies
- Sketchbook.
- Graphite pencils.
- Eraser.
- Sharpener.
- Optional colored pencils.
Paper Crafting Starter Supplies
- Cardstock.
- Scissors.
- Ruler.
- Glue stick.
- Decorative paper.
- Cutting mat.
Painting Starter Supplies
- Beginner-appropriate paints.
- Suitable brushes.
- Painting surface.
- Palette.
- Water container when applicable.
- Protective table covering.
Sewing Starter Supplies
- Fabric.
- Thread.
- Needles.
- Suitable scissors.
- Measuring tape.
- Secure needle storage.
Choose quality and quantity according to your actual needs rather than purchasing everything at once.
18. Plan a Practical Craft Workspace Budget
A beginner-friendly workspace can be created gradually.
The most important purchases are those that improve safety, comfort, and functionality.
Prioritize Essential Items
A sensible order is:
- Stable work surface.
- Comfortable seating.
- Suitable lighting.
- Essential tools for your chosen craft.
- Basic storage.
- Optional decorative accessories.
Reuse Existing Furniture
A desk, side table, or sturdy dining table may already provide a suitable work surface.
Repurpose Storage Containers
Clean jars, boxes, and organizers can hold suitable nonhazardous supplies.
Avoid using food containers for hazardous chemicals or unlabeled substances.
Purchase Supplies Gradually
Begin with materials for a specific project.
Expand only when new activities require additional tools.
Avoid Buying Specialized Equipment Too Early
Cutting machines, professional sewing equipment, and other specialized tools may be useful later.
However, beginners often benefit from learning basic techniques before investing in complex equipment.
19. Keep Your Craft Workspace Safe
Creative hobbies can involve sharp tools, electrical equipment, chemicals, heat, and small components.
Safety should be considered during the initial setup.
Store Sharp Objects Securely
Keep knives, blades, scissors, needles, and pins in suitable containers.
Use protective covers when available.
Manage Electrical Cords
Keep cords away from cutting surfaces, water, and walkways.
Avoid overloading electrical outlets.
Follow Chemical Safety Instructions
Read labels and safety information for paints, adhesives, solvents, resins, and cleaning products.
Use appropriate ventilation and protective equipment.
Do not assume that products labeled natural, low odor, or water-based are automatically harmless.
Keep Small Items Away From Children and Pets
Beads, pins, buttons, batteries, and other small components may create choking or ingestion hazards.
Maintain Clear Walkways
Avoid leaving storage boxes, cords, or equipment where someone could trip.
Consider Fire Safety
Keep flammable materials away from heat sources.
Use heat-producing craft equipment only according to manufacturer instructions.
Maintain Suitable Ventilation
Dust-producing activities, sprays, solvent-based materials, and certain heated processes may require specialized controls.
A small fan or open window is not necessarily sufficient for every hazardous process.
Choose materials and activities appropriate for your home environment.
20. Organize Works in Progress and Finished Projects
Crafting often involves multiple stages.
Without a simple system, unfinished projects can accumulate and become difficult to manage.
Use a Project Tray
Keep the materials for one active project together.
Label Project Containers
For longer projects, include:
- Project name.
- Main materials.
- Remaining steps.
- Relevant instructions.
Limit Active Projects
Working on too many projects simultaneously may create unnecessary clutter.
Choose a manageable number based on your available space and time.
Store Finished Projects Carefully
Protect completed items from moisture, dust, sunlight, or physical damage as appropriate.
Review Unfinished Projects Periodically
Decide whether each project should be completed, modified, stored, or discontinued.
There is no need to keep every unfinished project indefinitely.
21. Build a Simple Craft Workspace Cleaning Routine
Regular maintenance helps keep the workspace comfortable and ready for use.
After Each Craft Session
- Return tools to their designated locations.
- Close paint and adhesive containers.
- Remove scraps and waste.
- Clean spills appropriately.
- Store sharp objects securely.
- Protect unfinished projects.
- Wipe the work surface when needed.
Weekly
- Organize frequently used supplies.
- Empty waste containers.
- Clean storage surfaces.
- Check tool condition.
- Review active projects.
- Remove unnecessary clutter.
Monthly
- Review supply quantities.
- Check product expiration or deterioration.
- Reorganize overcrowded containers.
- Inspect furniture and equipment.
- Assess whether the layout remains practical.
- Identify supplies that are no longer needed.
Occasionally
- Deep-clean appropriate storage areas.
- Review unused materials.
- Update project organization.
- Adjust lighting or furniture arrangements.
- Expand storage only when necessary.
22. Common Beginner Craft Workspace Mistakes
Mistake 1: Buying Too Many Supplies Immediately
A large collection can become difficult to organize before you know which crafts you enjoy.
Start with a few essential materials.
Mistake 2: Choosing Furniture Based Only on Appearance
A beautiful desk may not provide enough stability or working space.
Prioritize function and comfort.
Mistake 3: Ignoring Lighting
Poor lighting can make detailed work more difficult.
Add suitable task lighting.
Mistake 4: Keeping Every Tool on the Desk
Too many visible items reduce usable working space.
Store less frequently used tools in drawers or containers.
Mistake 5: Mixing All Supplies Together
Unsorted materials become harder to locate.
Group items by category.
Mistake 6: Forgetting Surface Protection
Paint, glue, and cutting tools can damage furniture.
Use appropriate mats and coverings.
Mistake 7: Overlooking Ventilation
Some materials require more than ordinary room ventilation.
Follow product safety requirements.
Mistake 8: Creating an Overcomplicated Storage System
Too many labels and categories can make cleanup frustrating.
Keep organization simple.
Mistake 9: Neglecting Comfortable Posture
Poor furniture arrangement may cause unnecessary strain.
Adjust the chair, table, and tool placement.
Mistake 10: Failing to Plan for Cleanup
A workspace without a practical cleanup routine can quickly become cluttered.
Keep appropriate waste and cleaning arrangements available.
23. Troubleshooting Common Craft Workspace Problems
| Problem | Possible Cause | Practical Solution |
|---|---|---|
| Desk becomes cluttered quickly | Too many supplies on the surface | Move occasional items into storage |
| Tools are difficult to find | No consistent categories | Use labeled drawers or containers |
| Workspace feels too small | Poor furniture or storage arrangement | Use compact furniture and vertical storage |
| Lighting creates shadows | Poor lamp placement | Adjust task lighting |
| Back or neck becomes uncomfortable | Unsuitable posture or furniture | Adjust working height and take breaks |
| Supplies become damaged | Improper storage conditions | Use suitable dry, protected containers |
| Projects remain unfinished | Too many active projects | Use dedicated project trays |
| Paint or glue damages furniture | Insufficient surface protection | Add appropriate protective mats |
| Storage boxes overflow | Excessive or unsorted materials | Review and reduce unnecessary supplies |
| Workspace feels uninspiring | Uncomfortable or cluttered environment | Simplify the layout and add a few personal touches |
24. Frequently Asked Questions
1. How do I set up a craft workspace as a beginner?
Start with a stable table, comfortable chair, suitable lighting, basic tools, and a few storage containers. Organize the space around the crafts you plan to practice.
2. Do I need a separate room for crafting?
No. A small desk, bedroom corner, dining table, or foldaway workstation can provide a practical craft area.
3. What is the best table for a beginner craft workspace?
Choose a stable, appropriately sized table with a surface suitable for your activities. Protect it with a cutting mat or other covering when necessary.
4. How much space do I need for crafting?
The required space depends on the activity. Drawing and embroidery may fit on a compact desk, while sewing and large DIY projects often require more room.
5. How can I organize craft supplies cheaply?
Reuse suitable containers, organize items by category, and purchase additional storage only when necessary.
6. What lighting is best for a craft desk?
A combination of comfortable general lighting and adjustable task lighting works well for many activities.
7. Should I place my craft desk near a window?
Natural light can be useful, but avoid excessive glare, heat, and direct sunlight that may affect materials.
8. What should I buy first for a craft workspace?
Prioritize a suitable work surface, comfortable seating, lighting, and the essential tools for your chosen craft.
9. How do I organize small craft supplies?
Use drawer dividers, compartment boxes, or labeled containers to keep small items separated.
10. How do I store paper and cardstock?
Store paper flat in a clean, dry location away from moisture and excessive sunlight.
11. How should I store craft paints?
Follow the manufacturer’s storage instructions, keep containers closed, and protect them from unsuitable temperatures.
12. Can I use my dining table for crafting?
Yes, for appropriate activities. Protect the surface, maintain hygiene, and avoid using hazardous materials in food areas without suitable precautions.
13. Is a rolling cart useful for craft supplies?
A rolling cart can provide flexible storage, especially in small spaces. Choose a stable model with an appropriate weight capacity.
14. How do I keep unfinished projects organized?
Use separate trays, folders, or labeled containers for each active project.
15. What is the best way to store scissors and craft knives?
Store sharp tools in secure drawers, cases, or organizers with appropriate blade protection.
16. How can I make a small craft corner look attractive?
Choose a simple color scheme, use coordinated storage, and display a few meaningful creative projects without overcrowding the space.
17. Do I need expensive craft furniture?
No. Existing furniture and basic storage solutions can support many beginner activities.
18. How can I make my craft workspace more comfortable?
Adjust your seating, table height, lighting, and tool placement. Take regular breaks and avoid prolonged awkward positions.
19. How often should I clean my craft workspace?
Tidy up after each session and review storage regularly. Clean more frequently when activities produce dust, spills, or other residue.
20. How can I expand my workspace as my hobbies grow?
Add tools, storage, and specialized equipment gradually according to your actual needs and available space.
25. Complete Beginner Craft Workspace Setup Checklist
Use this checklist to create a practical and organized creative area.
Location and Layout
- A suitable workspace location has been selected.
- Available space has been measured.
- Doors and walkways remain clear.
- The area supports the intended activities.
- Lighting and ventilation have been considered.
- Storage can be accessed safely.
Furniture and Comfort
- The worktable is stable.
- The table provides adequate working space.
- A comfortable chair is available.
- Working height is suitable.
- Frequently used tools are within easy reach.
- There is room to change positions and take breaks.
Lighting
- General lighting is sufficient.
- Task lighting is available when needed.
- Shadows do not interfere with detailed work.
- Glare is minimized.
- Lighting is suitable for color-sensitive activities.
Tools and Materials
- Essential tools have been selected.
- Supplies match the intended craft activities.
- Cutting tools have appropriate protection.
- Work surface protection is available.
- Materials are stored according to instructions.
- Unnecessary purchases have been avoided.
Storage and Organization
- Supplies are grouped by category.
- Frequently used items are easy to access.
- Small components have suitable containers.
- Storage boxes are labeled where useful.
- Unfinished projects have designated storage.
- Heavy items are stored securely.
- The main work surface remains reasonably clear.
Safety
- Sharp tools are stored securely.
- Electrical cords are managed safely.
- Chemicals are stored according to instructions.
- Appropriate ventilation is available.
- Small hazardous items are inaccessible to children and pets.
- Heat-producing equipment is used safely.
- Walkways remain free of obstacles.
Maintenance
- A simple cleanup routine has been established.
- Waste disposal is available.
- Cleaning supplies are stored appropriately.
- Tools are inspected periodically.
- Unused materials are reviewed.
- The workspace can be adjusted as needs change.
Final Thoughts
Setting up a beginner-friendly craft workspace is an enjoyable way to make creativity a more accessible part of everyday life.
You do not need an elaborate studio, expensive furniture, or a large collection of specialized equipment to begin.
A practical workspace starts with a suitable location, a stable work surface, comfortable seating, adequate lighting, and a simple organization system.
From there, you can gradually introduce the tools and materials that support your favorite activities.
Whether you enjoy sketching, painting, sewing, paper crafting, or experimenting with handmade projects, the most effective setup is one that matches your available space and personal working style.
Remember that comfort and safety are just as important as appearance. Proper tool storage, suitable ventilation, protected surfaces, and regular cleanup habits help keep creative activities manageable.
As your skills develop, your workspace can evolve alongside them.
You may discover that certain tools deserve a permanent place on your desk, while others are better stored until needed. You may also find that a simple portable setup suits your lifestyle better than a dedicated craft room.
There is no single perfect arrangement.
The goal is to create a welcoming, functional space where materials are easy to find, projects are enjoyable to complete, and creativity feels like a natural part of your routine.
With thoughtful planning and a few practical habits, even the smallest corner of your home can become a comfortable place to explore new ideas, learn creative skills, and enjoy the satisfaction of making something with your own hands.