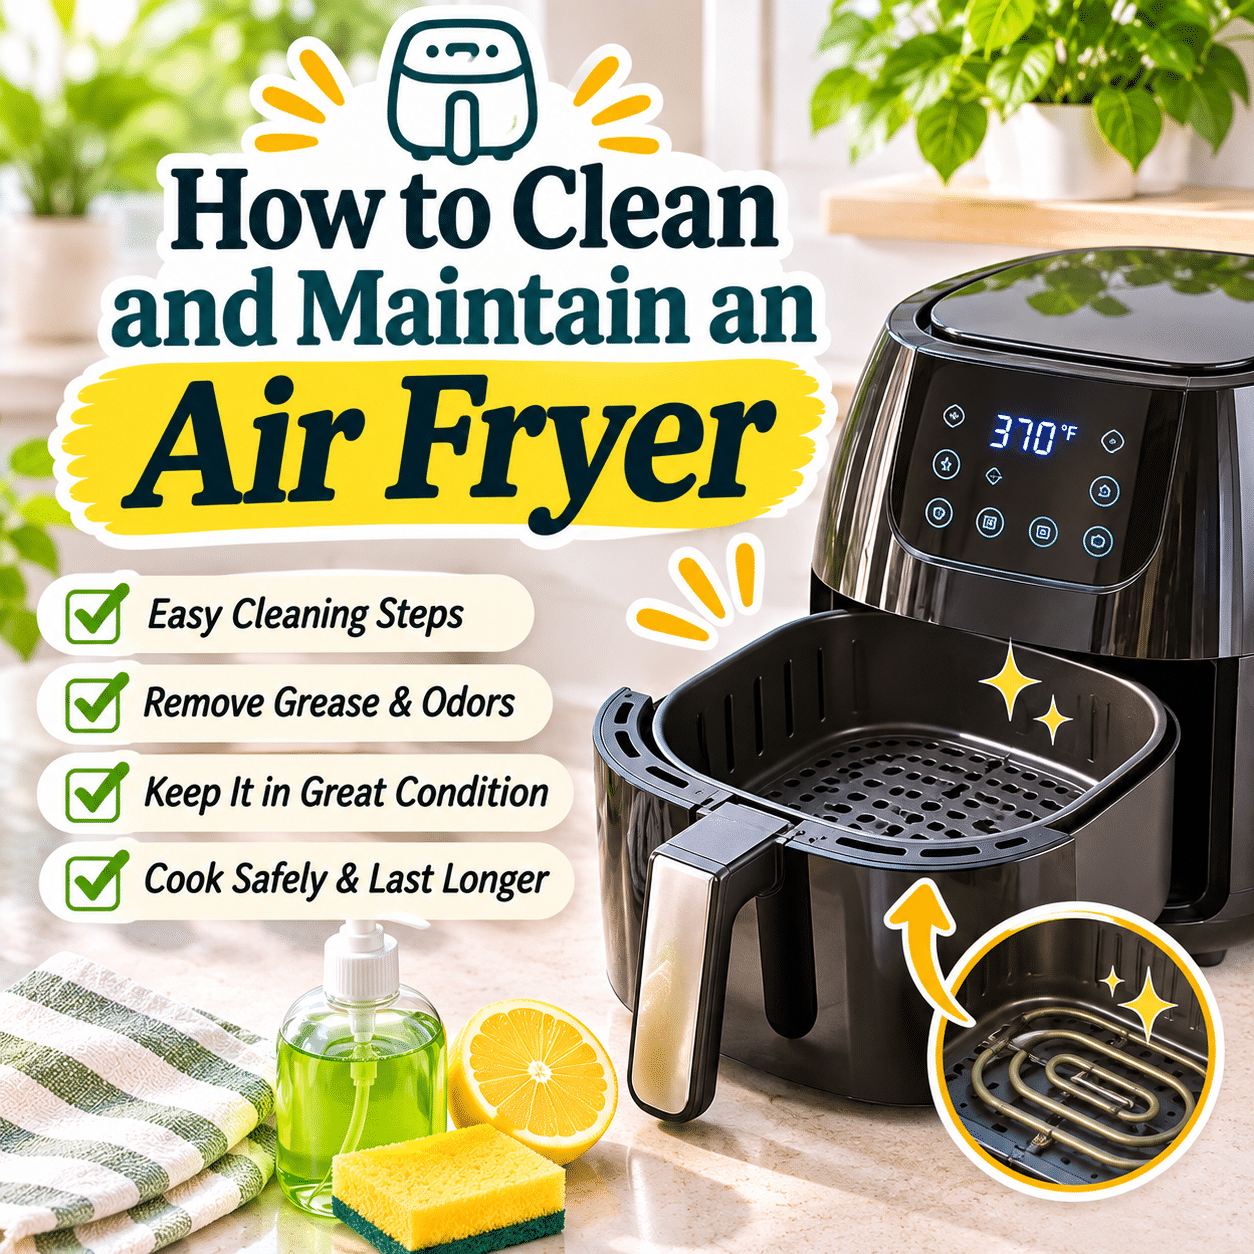
An air fryer has become a practical kitchen appliance for preparing everything from roasted vegetables and crispy potatoes to chicken, seafood, and convenient everyday meals. Its compact design, relatively quick cooking process, and ability to produce appealing textures with modest amounts of added oil make it useful in many households.
However, like any frequently used kitchen appliance, an air fryer requires regular cleaning and proper maintenance.
Cooking oils, food particles, crumbs, and moisture can accumulate inside the basket, cooking chamber, and removable accessories. If these residues are not removed, they may contribute to unpleasant odors, smoke, uneven cooking, and unnecessary wear.
A poorly maintained air fryer can also become more difficult to clean over time. Grease that is easy to remove after one cooking session may become stubborn when repeatedly heated.
Fortunately, keeping an air fryer clean does not need to involve complicated procedures, expensive cleaning products, or lengthy maintenance sessions.
A simple routine that includes cleaning removable components, wiping accessible interior surfaces, inspecting the heating area, and using the appliance correctly can help preserve its performance and appearance.
The key is understanding which parts can be washed, which areas require extra care, and which cleaning methods should be avoided.
This guide explains how to clean and maintain an air fryer safely, remove common cooking residues, prevent odors, protect nonstick surfaces, and establish practical habits that keep the appliance ready for everyday use.
1. Understand Why Regular Air Fryer Cleaning Matters
Air fryers circulate heated air around food inside a compact cooking chamber.
During cooking, small amounts of oil, moisture, crumbs, and food residue may collect on interior surfaces.
Over time, these deposits can affect cleanliness and cooking performance.
Regular cleaning helps:
- Remove grease and food particles.
- Reduce unpleasant cooking odors.
- Minimize smoke caused by accumulated residue.
- Maintain cleaner food-contact surfaces.
- Protect removable cooking accessories.
- Keep airflow openings unobstructed.
- Make future cleaning easier.
- Support the appliance’s long-term usability.
Cleaning also provides an opportunity to inspect the basket, tray, power cord, and other visible components for damage.
A clean air fryer is generally easier to use and maintain than one that requires occasional intensive scrubbing.
2. Identify the Main Parts of an Air Fryer
Before cleaning, become familiar with the appliance’s basic components.
Common air fryer parts include:
- Main appliance housing.
- Removable cooking basket.
- Inner cooking tray or crisper plate.
- Cooking drawer.
- Heating element.
- Interior cooking chamber.
- Air intake and exhaust vents.
- Control panel.
- Power cord.
- Removable racks or accessories.
The exact design varies by model.
Basket-style air fryers often have a removable drawer and perforated tray.
Oven-style air fryers may include racks, baking trays, crumb trays, and a hinged door.
Dual-basket models have separate cooking compartments.
Because these designs differ, the manufacturer’s instructions should always take priority over general cleaning recommendations.
3. Read the Manufacturer’s Cleaning Instructions
The first step in proper air fryer maintenance is understanding the appliance’s specific requirements.
Check the user manual for guidance about:
- Removable components.
- Dishwasher-safe accessories.
- Approved cleaning products.
- Nonstick coating care.
- Heating element cleaning.
- Interior surface maintenance.
- Ventilation requirements.
- Replacement parts.
- Electrical safety precautions.
Do not assume that all air fryer baskets or trays are dishwasher-safe.
Some manufacturers recommend handwashing even when certain parts can technically withstand dishwasher cleaning.
Other models may have special coatings or removable components that require particular care.
Following the manufacturer’s guidance helps prevent avoidable damage.
4. Unplug the Air Fryer Before Cleaning
Electrical safety should always come first.
Before cleaning:
- Turn off the appliance.
- Unplug it from the electrical outlet.
- Allow it to cool completely.
- Remove the basket or accessories only when safe to handle.
- Prepare a clean working area.
Never immerse the main electrical housing in water.
Do not rinse the appliance body under a faucet.
Avoid allowing water or cleaning liquid to enter electrical components, controls, or ventilation openings.
Do not clean the heating element while it is hot.
A safe cleaning routine begins only after the appliance has cooled sufficiently.
5. Allow the Air Fryer to Cool Naturally
Air fryer components can remain hot after cooking ends.
The basket, tray, heating element, and interior walls may retain heat for some time.
Allow the appliance to cool before handling or cleaning these areas.
Avoid placing extremely hot removable components directly into cold water unless the manufacturer specifically permits it.
Sudden temperature changes may damage certain materials or coatings.
You can remove loose crumbs after the appliance has cooled enough to handle safely.
Do not rush the cooling process by pouring water into the appliance housing.
Patience at this stage helps protect both the user and the equipment.
6. Gather Simple Cleaning Supplies
Most routine air fryer cleaning requires only basic household supplies.
Useful items may include:
- Mild dishwashing liquid.
- Warm water.
- A soft sponge.
- A microfiber cloth.
- A soft cleaning brush.
- A nonabrasive dishcloth.
- A soft toothbrush reserved for cleaning.
- A dry towel.
- A small bowl for washing removable accessories.
Avoid using harsh abrasive pads or metal scrapers on nonstick surfaces.
Do not use oven cleaners, strong degreasers, or other aggressive chemicals unless specifically approved by the manufacturer.
The objective is to remove cooking residue without damaging the appliance.
7. Clean the Basket After Cooking
The cooking basket is one of the most frequently soiled air fryer components.
Food particles and oil can collect along the bottom, sides, and corners.
After the basket has cooled:
- Remove loose food particles.
- Fill a sink or suitable basin with warm water.
- Add a small amount of mild dishwashing liquid.
- Wash the basket with a soft sponge.
- Pay attention to corners and perforations.
- Rinse thoroughly.
- Dry completely before reassembly.
If the basket has a nonstick coating, avoid aggressive scrubbing.
Regular gentle cleaning is generally more effective than allowing residue to accumulate.
8. Clean the Crisper Plate or Cooking Tray
Many basket-style air fryers include a removable perforated plate.
This component helps elevate food and allows heated air to circulate.
Grease and crumbs can become trapped around the perforations.
Remove the plate according to the appliance instructions.
Wash it using warm water, mild dish soap, and a soft sponge.
Use a soft brush to clean difficult-to-reach openings.
Avoid sharp tools that could scratch protective coatings.
Rinse thoroughly and allow the plate to dry before returning it to the basket.
Inspect rubber supports or silicone feet if the plate includes them.
Do not remove or replace these parts unless the manufacturer permits it.
9. Clean Removable Accessories Separately
Some air fryers include additional accessories.
Examples include:
- Cooking racks.
- Grill plates.
- Skewers.
- Baking trays.
- Crumb trays.
- Rotisserie components.
- Silicone inserts.
- Specialty cooking baskets.
Each accessory may have different cleaning requirements.
Separate removable components when appropriate.
Wash them according to their materials and manufacturer instructions.
Avoid stacking sharp metal accessories against nonstick surfaces during washing or storage.
Dry everything thoroughly before reassembly.
Keeping accessories clean prevents old food residue from transferring to future meals.
10. Remove Stubborn Grease From the Basket
Grease that has been heated repeatedly may become difficult to remove.
For suitable removable components, begin with a gentle soaking method.
- Allow the component to cool.
- Add warm water and mild dish soap.
- Let it soak briefly according to the manufacturer’s guidance.
- Loosen residue with a soft sponge or brush.
- Rinse thoroughly.
- Repeat if necessary.
Avoid scraping hardened grease with knives, metal utensils, or abrasive pads.
If residue remains, consult the appliance instructions before using additional cleaning products.
Some coatings can be damaged by concentrated cleaners or prolonged soaking.
Gentle repeated cleaning is often preferable to aggressive scrubbing.
11. Clean Food Residue From Basket Corners
Basket corners and seams can collect crumbs and oil.
These areas may be difficult to reach with a regular sponge.
Use a soft brush or suitable nonabrasive cleaning tool.
Work carefully around seams, handles, and removable supports.
Do not force cleaning tools into narrow openings.
Avoid disassembling structural components unless the manufacturer provides instructions for doing so.
After cleaning, rinse removable food-contact components thoroughly.
Check that no loosened residue remains trapped in the basket.
12. Protect Nonstick Coatings During Cleaning
Many air fryer baskets and trays have nonstick coatings.
These surfaces require gentle handling.
To help preserve them:
- Use soft sponges.
- Avoid steel wool.
- Avoid metal scraping tools.
- Do not use abrasive powders.
- Follow approved cleaning instructions.
- Avoid cutting food directly inside coated baskets.
- Use suitable cooking utensils.
- Store accessories carefully to prevent scratching.
A scratched or deteriorating coating may become harder to clean.
If the coating begins peeling, flaking, or showing significant damage, consult the manufacturer about replacement.
Do not assume that damaged coated components should continue to be used indefinitely.
13. Clean the Interior Cooking Chamber
The cooking chamber may collect grease splashes, crumbs, and food residue.
Once the appliance is unplugged and completely cool, remove accessible loose debris.
Use a lightly dampened soft cloth to wipe suitable interior surfaces.
Follow the manufacturer’s cleaning instructions.
Avoid allowing excess liquid to enter openings or electrical components.
Do not pour water directly into the appliance housing.
Do not use sharp objects to scrape interior surfaces.
If residue is difficult to reach, consult the manufacturer rather than attempting to dismantle the appliance.
14. Clean Around the Heating Element Carefully
The heating element is an important part of the air fryer’s cooking system.
Grease and food particles may accumulate near it, depending on the appliance design.
Cleaning this area requires particular caution.
Before attempting any cleaning:
- Turn off and unplug the appliance.
- Allow it to cool completely.
- Consult the manufacturer’s instructions.
- Avoid direct contact with fragile components.
- Keep cleaning liquid away from electrical connections.
- Do not bend or dislodge the heating element.
Some manufacturers permit careful cleaning of accessible heating-area surfaces using a soft brush or lightly dampened cloth.
Others advise against direct user cleaning of certain components.
Never spray cleaning chemicals directly onto the heating element.
If heavy buildup cannot be removed safely, contact the manufacturer or an authorized service provider.
15. Clean the Exterior Housing
The outside of an air fryer can collect fingerprints, dust, cooking oil, and food splashes.
Use a soft cloth lightly dampened with water or an approved mild cleaning solution.
Wipe exterior surfaces gently.
Pay attention to:
- Handles.
- Side panels.
- Top surfaces.
- Drawer fronts.
- Areas around controls.
Avoid saturating the cloth.
Do not allow liquid to enter seams, buttons, displays, or ventilation openings.
Dry the exterior with a clean cloth when appropriate.
For stainless steel finishes, follow the manufacturer’s recommended cleaning direction and products.
16. Clean the Control Panel Without Damaging It
Air fryer control panels may include buttons, dials, or touchscreens.
These components should be cleaned carefully.
Use a soft, slightly damp cloth if permitted by the manufacturer.
Avoid spraying cleaner directly onto the controls.
Do not scrub printed markings aggressively.
Keep excess moisture away from buttons and display edges.
Dry the surface gently.
If the control panel becomes sticky or difficult to operate, consult the manufacturer’s guidance.
Do not attempt to open the control housing to clean internal components.
17. Keep Air Intake and Exhaust Vents Clear
Air fryers rely on airflow for cooking and cooling.
Blocked vents may interfere with normal operation.
Inspect accessible exterior ventilation openings for dust, grease, or debris.
Clean only as directed by the manufacturer.
A soft, dry brush or cloth may be suitable for certain accessible exterior areas.
Do not push debris into the appliance.
Avoid inserting tools into ventilation openings.
Never operate the air fryer with blocked vents.
Maintain the clearance recommended in the user manual.
18. Remove Unpleasant Air Fryer Odors
Air fryers may develop odors from cooking oils, strongly flavored foods, or accumulated residue.
The first step is identifying the source.
Check the basket, crisper plate, removable accessories, and accessible cooking chamber.
Clean affected components thoroughly using approved methods.
Allow removable parts to dry completely.
Avoid covering persistent odors with fragrances or unapproved cleaning chemicals.
Do not run the appliance with vinegar, lemon slices, or cleaning solutions inside unless the manufacturer specifically approves that procedure.
If a burning or electrical odor persists after cleaning, stop using the appliance and seek appropriate assistance.
19. Prevent Smoke Caused by Grease Buildup
Smoke can occur when grease, crumbs, or food residue become overheated.
Regular cleaning helps reduce this risk.
After cooking oily foods, inspect the basket and tray.
Remove accumulated grease before the next use.
Avoid allowing loose crumbs to collect near hot components.
Follow recipe and manufacturer guidance about oil quantities and cooking temperatures.
Some fatty foods naturally release grease during cooking.
However, persistent heavy smoke, unusual burning smells, or abnormal operation should not be ignored.
Stop cooking, turn off the appliance, and investigate safely after it has cooled.
20. Avoid Using Too Much Cooking Oil
Air fryers generally require less added oil than traditional deep-frying methods for many recipes.
Excess oil may collect in the basket or drawer.
This can increase cleanup effort and contribute to smoking under some conditions.
Use only the amount appropriate for the recipe and appliance.
Avoid pouring large quantities of oil into the cooking chamber.
Apply oil to food when appropriate rather than allowing it to pool beneath the basket.
Follow manufacturer recommendations about cooking sprays and nonstick coatings.
Some aerosol sprays may contain additives that are unsuitable for certain coated surfaces.
21. Prevent Food From Sticking to the Basket
Food sticking to the cooking surface can make cleaning more difficult.
Several habits may help:
- Follow recommended preheating instructions.
- Use suitable amounts of cooking oil.
- Avoid overcrowding.
- Turn or shake food when appropriate.
- Cook at suitable temperatures.
- Clean residue after each use.
- Use utensils compatible with the coating.
Do not use sharp metal tools to force stuck food away from nonstick surfaces.
Allow the basket to cool and soak removable components if permitted.
Avoid using unapproved liners that may interfere with airflow.
22. Use Air Fryer Liners Safely
Some people use parchment liners or reusable accessories to reduce direct contact between food and cooking surfaces.
However, liners must be compatible with the appliance.
Important considerations include:
- Follow manufacturer instructions.
- Use only materials rated for the intended temperature.
- Avoid blocking necessary airflow.
- Never allow loose parchment to contact the heating element.
- Do not preheat with unsecured lightweight paper inside.
- Ensure food appropriately weighs down a permitted liner.
- Avoid oversized liners that cover ventilation openings.
Liners do not eliminate the need for cleaning.
Grease and crumbs can still collect in other parts of the appliance.
23. Understand Dishwasher-Safe Components
Some air fryer baskets, trays, and accessories are labeled dishwasher-safe.
Others require handwashing.
Always verify the manufacturer’s instructions.
Even when dishwasher cleaning is permitted, repeated exposure to strong detergents and high temperatures may affect the appearance or longevity of certain finishes.
Handwashing may be preferable for delicate coated components.
Never place the main electrical housing in a dishwasher.
Do not wash attached electrical controls or nonremovable heating components under running water.
24. Clean an Oven-Style Air Fryer
Oven-style air fryers often have different cleaning needs from basket-style models.
They may include:
- Wire racks.
- Baking trays.
- Crumb trays.
- Glass doors.
- Interior walls.
- Multiple heating elements.
Remove and clean approved accessories separately.
Empty the crumb tray regularly.
Wipe accessible interior surfaces after the appliance has cooled.
Clean the glass door using methods approved by the manufacturer.
Avoid spraying liquid near heating elements, fans, or electrical openings.
Do not assume that a conventional oven-cleaning product is suitable for an air fryer oven.
25. Clean a Dual-Basket Air Fryer
Dual-basket air fryers contain two separate cooking compartments.
Each basket may accumulate different amounts of grease or residue.
Clean both baskets according to their individual use.
If one basket was used for oily food and the other for vegetables, they may require different levels of attention.
Remove and wash crisper plates where appropriate.
Inspect both cooking chambers.
Keep accessories matched to their intended compartments if the manufacturer specifies this.
Dry and reassemble all components correctly.
26. Maintain the Air Fryer Basket Handle
The basket handle is frequently touched and may collect grease or food residue.
Wipe the handle regularly.
Clean around accessible joints and seams using a suitable soft cloth or brush.
Avoid soaking electrical or nonremovable handle assemblies unless approved.
Inspect the handle for looseness, cracks, or other damage.
Do not continue using a basket with an unsafe handle.
Consult the manufacturer about repair or replacement.
A secure handle is especially important when moving hot food.
27. Inspect the Power Cord and Plug
The power cord and plug are essential safety components.
Inspect them periodically for:
- Fraying.
- Cracks.
- Exposed wiring.
- Discoloration.
- Melting.
- Unusual heat damage.
- Loose connections.
Do not use the appliance if the cord or plug appears damaged.
Avoid pulling the cord to disconnect the appliance.
Keep the cord away from hot surfaces and sharp edges.
Do not wrap it tightly around a hot appliance.
Follow manufacturer instructions regarding extension cords and electrical connections.
If electrical damage is suspected, seek authorized service rather than attempting an improvised repair.
28. Position the Air Fryer Properly During Use
Correct placement supports ventilation and safe operation.
Place the appliance on a stable, heat-resistant surface appropriate for its design.
Maintain the clearances specified by the manufacturer.
Avoid operating it directly against walls, curtains, or other heat-sensitive materials.
Keep exhaust openings unobstructed.
Do not place objects on top of the appliance unless explicitly permitted.
Keep the air fryer away from standing water.
Avoid using it in enclosed spaces that restrict ventilation.
Proper positioning also helps prevent grease and heat from affecting nearby surfaces.
29. Avoid Overfilling the Cooking Basket
Overcrowding can interfere with air circulation.
It may also cause food to cook unevenly.
When ingredients are packed too tightly, moisture and grease can accumulate in ways that make cleanup more difficult.
Follow recommended basket capacities.
Cook in smaller batches when necessary.
Shake or turn food when the recipe requires it.
Do not force oversized ingredients into the cooking chamber.
Keeping the basket within its intended capacity supports more consistent cooking and easier maintenance.
30. Remove Crumbs and Loose Food Particles Regularly
Crumbs can collect beneath crisper plates and around removable accessories.
If repeatedly heated, they may burn and produce unpleasant odors.
After the appliance has cooled, remove loose particles from accessible areas.
Empty crumb trays where provided.
Use a soft brush or cloth for suitable surfaces.
Avoid shaking the entire electrical appliance aggressively.
Do not insert tools into inaccessible openings.
A quick inspection after cooking can prevent small amounts of debris from becoming stubborn residue.
31. Establish an After-Use Cleaning Routine
A short cleaning routine after each cooking session is one of the easiest ways to maintain an air fryer.
After cooking:
- Turn off and unplug the appliance.
- Allow it to cool.
- Remove food and loose crumbs.
- Wash the basket and removable tray.
- Wipe accessible greasy areas as appropriate.
- Rinse food-contact accessories thoroughly.
- Dry all washed components.
- Reassemble the appliance when completely dry.
This routine is generally easier than allowing residue to build up over several uses.
32. Create a Weekly Air Fryer Maintenance Routine
For frequently used air fryers, a weekly review can help maintain cleanliness.
Possible tasks include:
- Inspecting the basket.
- Checking the crisper plate.
- Cleaning removable accessories.
- Wiping the exterior.
- Inspecting accessible interior surfaces.
- Checking for grease buildup.
- Reviewing ventilation openings.
- Inspecting the handle and power cord.
The amount of cleaning required depends on how often the appliance is used and what foods are prepared.
A lightly used air fryer may not require the same maintenance schedule as one used daily.
33. Perform Periodic Deep Cleaning
Occasional deeper cleaning may be useful when grease or residue accumulates in areas not addressed during routine washing.
Begin by reviewing the manufacturer’s instructions.
Unplug the appliance and allow it to cool completely.
Remove approved accessories.
Clean accessible surfaces using suitable nonabrasive methods.
Inspect areas around the cooking chamber and heating system without disassembling protected components.
Dry everything thoroughly.
If buildup remains in inaccessible areas, contact the manufacturer or an authorized service provider.
Do not attempt deep cleaning methods that require pouring water into the housing or operating the appliance with cleaning chemicals inside.
34. Avoid Common Air Fryer Cleaning Mistakes
Several cleaning habits can damage an air fryer or create unnecessary safety risks.
1. Cleaning while the appliance is hot.
Allow sufficient cooling time.
2. Forgetting to unplug it.
Disconnect power before cleaning.
3. Immersing the main housing in water.
Keep electrical components dry.
4. Using steel wool on nonstick surfaces.
Choose soft cleaning tools.
5. Spraying cleaner directly onto the heating element.
Follow manufacturer-approved methods.
6. Using harsh oven cleaners without approval.
Avoid unsuitable chemicals.
7. Scraping food residue with metal utensils.
Use gentle soaking and nonabrasive tools.
8. Ignoring crumbs beneath the crisper plate.
Remove debris regularly.
9. Reassembling damp components.
Dry accessories thoroughly.
10. Blocking ventilation openings.
Maintain appropriate airflow.
11. Assuming every accessory is dishwasher-safe.
Check the manual.
12. Ignoring damaged cords or handles.
Stop using unsafe equipment.
35. Troubleshoot Common Air Fryer Problems
| Problem | Possible Cause | Practical Solution |
|---|---|---|
| Basket feels greasy | Residual cooking oil | Wash with warm water and mild dish soap |
| Food sticks to the tray | Residue, cooking method, or coating condition | Clean gently and review cooking practices |
| Air fryer smells unpleasant | Food residue or trapped grease | Clean approved components and inspect the chamber |
| Smoke appears during cooking | Grease buildup, crumbs, or cooking conditions | Stop safely and inspect after cooling |
| Crisper plate is difficult to clean | Residue trapped in perforations | Use a soft brush and approved soaking |
| Exterior feels sticky | Oil splashes or fingerprints | Wipe with a suitable soft cloth |
| Food cooks unevenly | Overcrowding or airflow problems | Reduce batch size and follow cooking instructions |
| Nonstick coating is damaged | Abrasive tools or wear | Consult the manufacturer about replacement |
| Basket handle feels loose | Wear or component damage | Stop using it until assessed |
| Appliance produces unusual electrical odor | Possible electrical problem | Stop use, unplug when safe, and seek service |
| Interior grease is difficult to reach | Appliance design limits access | Follow manufacturer instructions or seek authorized help |
| Controls respond inconsistently | Moisture, dirt, or electrical issues | Stop use if abnormal and consult the manufacturer |
36. Know When Cleaning Is Not Enough
Some problems require repair or replacement rather than additional cleaning.
Warning signs may include:
- Damaged power cords.
- Loose electrical connections.
- Cracked appliance housing.
- Unusual electrical smells.
- Persistent overheating.
- Damaged basket handles.
- Significant coating deterioration.
- Malfunctioning controls.
- Unusual mechanical noises.
- Repeated unexplained shutdowns.
Stop using the appliance if you suspect an electrical or mechanical safety problem.
Do not attempt to repair internal wiring, heating elements, or control systems without appropriate authorization and expertise.
Consult the manufacturer or a qualified service provider.
37. Store the Air Fryer Properly
Proper storage can help protect the appliance when it is not in use.
Before storing:
- Unplug the appliance.
- Allow it to cool completely.
- Clean removable components.
- Dry all washed parts.
- Reassemble accessories correctly.
- Inspect the power cord.
- Choose a clean, dry location.
Avoid storing the air fryer in damp cabinets or areas exposed to excessive heat.
Do not place heavy objects on top of the appliance.
Keep the cord arranged without sharp bends or unnecessary strain.
If the appliance will remain unused for an extended period, follow the manufacturer’s storage recommendations.
38. Maintain Air Fryer Accessories Over Time
Accessories can experience wear through repeated cooking and cleaning.
Inspect racks, trays, baskets, and silicone components periodically.
Look for:
- Cracks.
- Warping.
- Loose parts.
- Damaged coatings.
- Corrosion.
- Excessive discoloration.
- Deteriorating silicone supports.
Some discoloration may be cosmetic, while other changes may indicate material damage.
Follow manufacturer guidance when evaluating whether a component remains suitable for use.
Use compatible replacement accessories rather than assuming any similarly sized product will fit safely.
39. Build Habits That Reduce Cleaning Time
Good cooking habits can make air fryer cleaning easier.
Helpful practices include:
- Using appropriate oil quantities.
- Avoiding overcrowding.
- Removing loose crumbs after cooking.
- Cleaning the basket regularly.
- Using compatible utensils.
- Following recommended cooking temperatures.
- Keeping ventilation openings clear.
- Avoiding unapproved liners.
- Checking accessories for damage.
- Cleaning spills before repeated heating makes them harder to remove.
These habits reduce unnecessary buildup.
They also help keep maintenance manageable during busy household routines.
40. Create a Long-Term Air Fryer Care System
A sustainable maintenance routine should be simple enough to follow consistently.
You do not need to perform an intensive cleaning session after every use.
Instead, match the cleaning effort to the amount and type of cooking residue.
A practical approach includes:
After Each Use: Clean the basket and removable cooking surfaces once cool.
Regularly: Inspect the interior, exterior, and accessible vents.
Periodically: Review components for wear and clean approved areas more thoroughly.
Whenever Problems Appear: Investigate unusual odors, smoke, damaged components, or abnormal operation.
Following these habits can help maintain cleanliness and reduce avoidable wear.
Step-by-Step Guide: Clean an Air Fryer Safely
Use this general procedure for routine cleaning, while following your model’s specific instructions.
Step 1: Turn Off and Unplug the Appliance
Disconnect the air fryer from its power source.
Step 2: Allow It to Cool Completely
Do not handle hot cooking components.
Step 3: Remove Approved Accessories
Take out the basket, crisper plate, or other removable parts.
Step 4: Discard Loose Food Particles
Remove crumbs and food scraps.
Step 5: Prepare Warm, Soapy Water
Use mild dishwashing liquid.
Step 6: Wash the Basket
Clean gently with a soft sponge.
Step 7: Clean the Crisper Plate
Pay attention to perforations and corners.
Step 8: Address Stubborn Residue
Use approved soaking methods rather than abrasive scraping.
Step 9: Rinse Removable Food-Contact Components
Remove cleaning residue thoroughly.
Step 10: Wipe Accessible Interior Surfaces
Use a suitable lightly dampened cloth according to manufacturer guidance.
Step 11: Clean the Exterior
Wipe handles, controls, and outer surfaces carefully.
Step 12: Inspect Accessible Ventilation Areas
Remove exterior dust or debris only as permitted.
Step 13: Dry All Components
Ensure washed accessories are thoroughly dry.
Step 14: Reassemble the Appliance
Return removable parts to their correct positions.
Step 15: Store or Prepare for the Next Use
Keep the appliance in a clean, dry, well-ventilated location.
Practical Air Fryer Cleaning and Maintenance Checklist
Before Cleaning
- Turn off the appliance.
- Unplug the power cord.
- Allow the air fryer to cool completely.
- Review manufacturer instructions.
- Gather suitable cleaning supplies.
- Avoid harsh or abrasive products.
Cleaning Removable Components
- Remove loose crumbs.
- Wash the basket.
- Clean the crisper plate.
- Clean approved accessories.
- Remove grease gently.
- Inspect nonstick surfaces.
- Rinse thoroughly.
- Dry completely.
Cleaning the Main Appliance
- Wipe accessible interior surfaces safely.
- Inspect the heating area according to manufacturer guidance.
- Clean the exterior housing.
- Wipe the handle.
- Clean the control panel carefully.
- Check accessible ventilation openings.
- Avoid introducing water into electrical components.
Routine Maintenance
- Inspect the power cord.
- Check the basket handle.
- Review removable accessories for damage.
- Maintain appropriate ventilation clearance.
- Avoid excessive cooking oil.
- Prevent unnecessary grease buildup.
- Store the appliance properly.
- Seek authorized assistance for safety-related problems.
Frequently Asked Questions
1. How often should I clean my air fryer?
Clean the basket and removable food-contact components after each use once they have cooled. Inspect the interior and exterior regularly, and perform additional cleaning when residue accumulates.
2. Can I wash an air fryer basket with dish soap?
Many removable baskets can be washed using warm water and mild dish soap. Follow the manufacturer’s instructions for your specific model and coating.
3. Can I put an air fryer basket in the dishwasher?
Some baskets and accessories are dishwasher-safe, while others require handwashing. Check the appliance manual before using a dishwasher.
4. How do I remove stubborn grease from an air fryer?
For suitable removable components, use warm soapy water and gentle soaking. Clean with a soft sponge or brush. Avoid abrasive tools and unapproved chemical cleaners.
5. Can I clean an air fryer heating element?
Some manufacturers provide instructions for carefully cleaning accessible heating-area surfaces. Others restrict direct cleaning. Always unplug, cool, and follow the specific appliance guidance.
6. Can I use baking soda to clean my air fryer?
Baking soda is sometimes suggested for household cleaning, but its suitability depends on the appliance materials and manufacturer instructions. Avoid abrasive pastes or residue-producing methods unless approved.
7. Can I use vinegar inside an air fryer?
Do not pour or spray vinegar into the appliance housing or heating system. Use only manufacturer-approved cleaning methods for interior components.
8. Why does my air fryer smell bad?
Odors may result from grease, food residue, strongly flavored ingredients, or other issues. Clean approved components and inspect the appliance. Persistent burning or electrical odors require additional caution.
9. Why does my air fryer smoke?
Possible causes include accumulated grease, loose crumbs, fatty foods, excessive oil, or abnormal operation. Stop the appliance safely and investigate after it cools. Persistent or unexplained smoke may require service.
10. How do I protect an air fryer’s nonstick coating?
Use soft cleaning tools, avoid abrasive cleaners, choose compatible utensils, and follow manufacturer care instructions. Replace significantly damaged components when advised.
11. Can I put water directly into an air fryer to clean it?
Do not pour water into the main electrical housing. Clean removable parts separately and follow the manufacturer’s instructions for interior surfaces.
12. How do I clean an oven-style air fryer?
Remove approved racks and trays, clean the crumb tray, and wipe accessible interior surfaces after cooling. Follow manufacturer guidance for the door, heating elements, and accessories.
13. Should I clean my air fryer after cooking vegetables?
Yes. Even foods prepared with little oil can leave crumbs, moisture, or residue. Clean removable food-contact components after use.
14. How can I make air fryer cleaning easier?
Clean residue regularly, use appropriate oil quantities, avoid overcrowding, and choose gentle cleaning methods. Do not allow grease and crumbs to accumulate through repeated cooking.
15. When should I replace an air fryer basket?
Consider replacement when the basket has significant coating damage, cracks, warping, unsafe handles, or other deterioration identified by the manufacturer. Use compatible replacement parts.
Final Thoughts
Cleaning and maintaining an air fryer is an important part of keeping the appliance convenient, hygienic, and ready for everyday cooking.
Although air fryers are relatively compact, their baskets, trays, cooking chambers, and accessories can accumulate grease and food residue through regular use.
The most effective maintenance approach begins with simple habits: unplugging the appliance before cleaning, allowing it to cool, washing removable food-contact components, and wiping accessible surfaces according to the manufacturer’s instructions.
Protecting nonstick coatings, keeping ventilation openings clear, and avoiding harsh cleaning methods can also help reduce unnecessary wear.
Periodic inspections provide an opportunity to identify damaged accessories, loose handles, or electrical problems before they become more serious.
You do not need expensive cleaning products or complicated maintenance techniques. In most cases, mild dish soap, warm water, soft cleaning tools, and consistent attention are sufficient for routine care.
Most importantly, maintenance should support safe and enjoyable cooking rather than become another difficult household task.
A few minutes of appropriate cleaning after use can often prevent the need for much more demanding work later.
The best way to maintain an air fryer is to clean it gently, use it correctly, inspect it regularly, and prevent small amounts of cooking residue from becoming long-term problems.