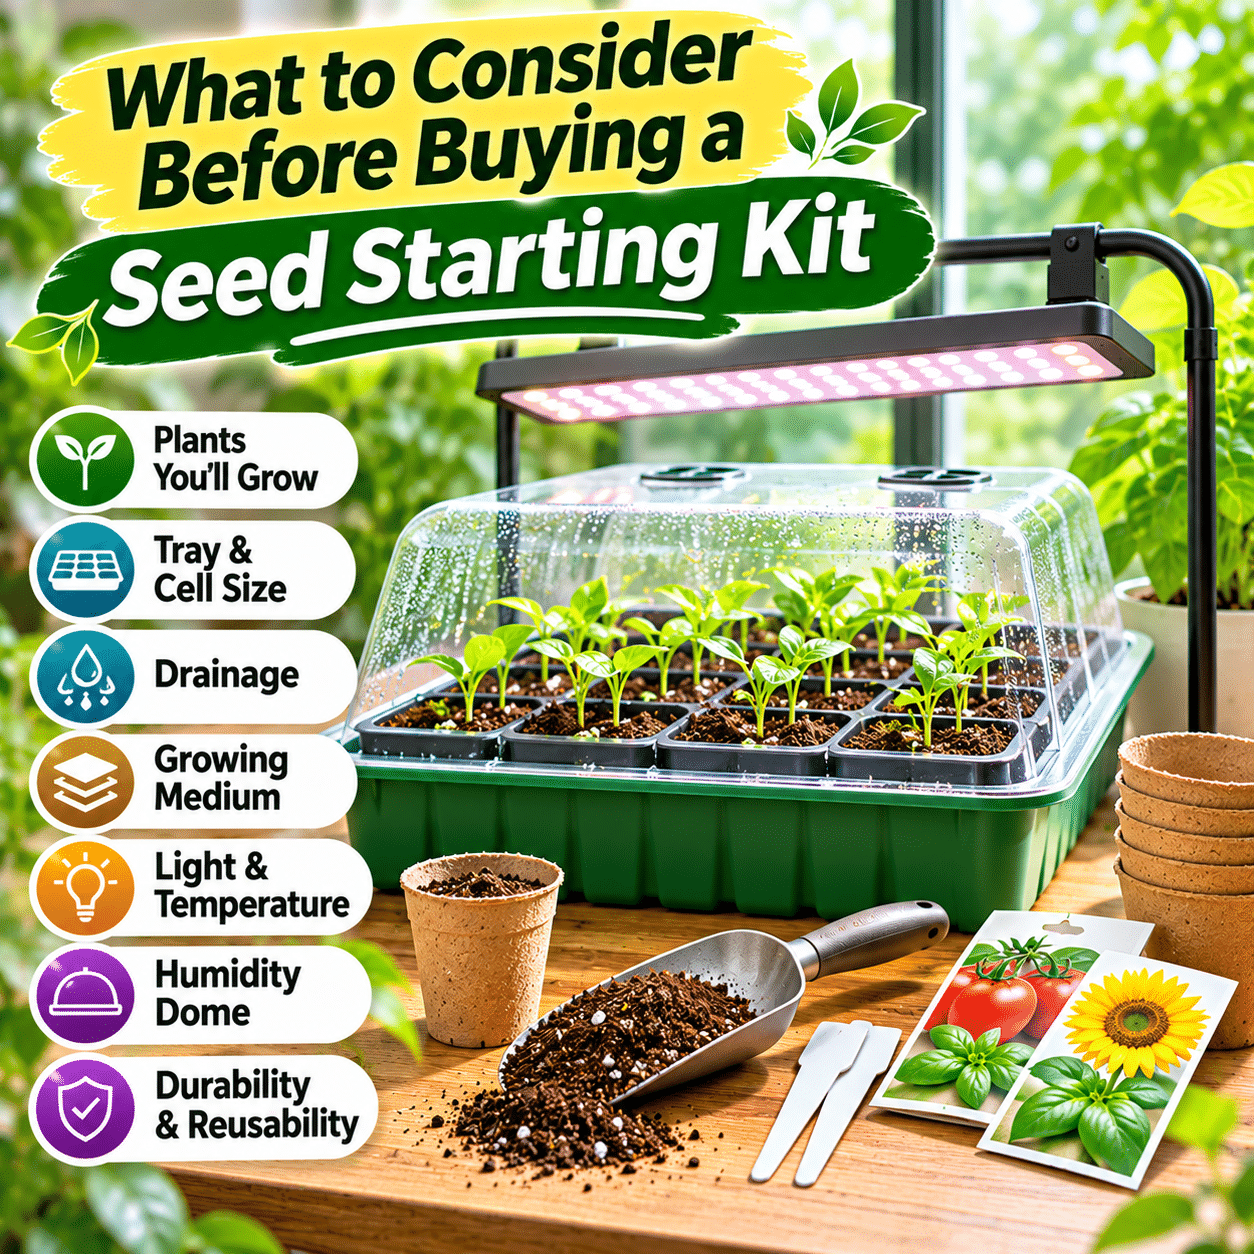
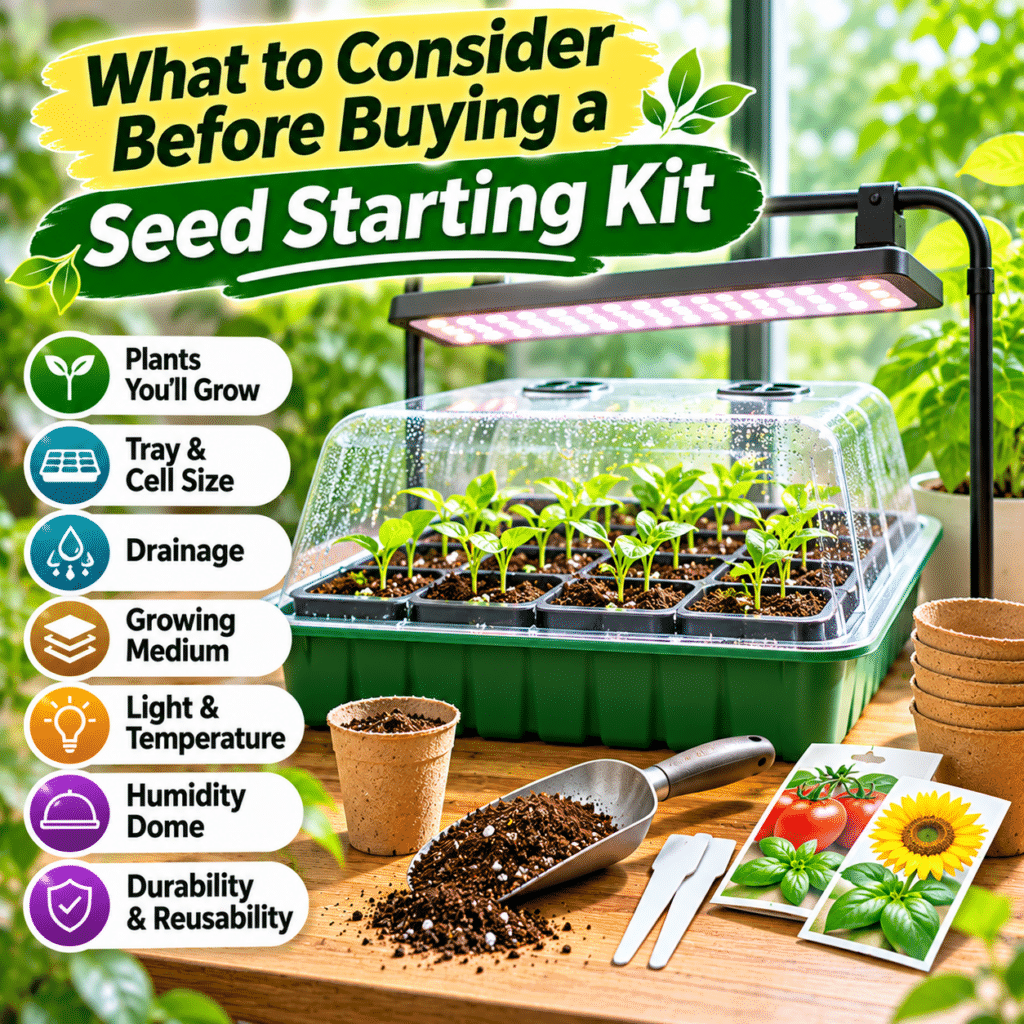
Starting plants from seeds is one of the most rewarding ways to grow herbs, vegetables, flowers, and ornamental plants at home. It allows gardeners to observe the earliest stages of plant development, experiment with different varieties, and prepare young plants for containers, raised beds, or outdoor gardens.
However, successful seed starting involves more than placing seeds in soil and adding water. Seeds need suitable moisture, temperature, oxygen, and, depending on the species, specific light conditions to germinate. Once seedlings emerge, they require appropriate lighting, airflow, growing space, and careful watering to develop into healthy young plants.
A seed starting kit can simplify this process by bringing together useful components such as growing trays, seed cells, humidity domes, growing media, and sometimes lighting or heating equipment.
Not every kit offers the same features, and a larger or more expensive package is not necessarily better. The right choice depends on what you plan to grow, how much space you have, and whether you want a simple beginner setup or a more comprehensive indoor propagation system.
This guide explains what to consider before buying a seed starting kit, compares common designs and materials, and helps you choose a practical setup for successful home gardening.
1. Understand What a Seed Starting Kit Is
A seed starting kit is a collection of supplies designed to help seeds germinate and develop into seedlings.
Some kits contain only the basic equipment needed to hold seeds and growing medium. Others include additional accessories that help manage temperature, humidity, lighting, and watering.
Common Components
Depending on the product, a kit may include:
- Seed starting trays.
- Individual growing cells.
- A bottom watering tray.
- A transparent humidity dome.
- Seed starting mix or growing pellets.
- Plant labels.
- A small planting tool.
- A watering accessory.
- LED grow lights.
- A seedling heat mat.
- Instructions for assembly and use.
The contents vary considerably between manufacturers.
Before purchasing, check exactly what is included rather than assuming that every kit provides a complete growing system.
What a Seed Starting Kit Can Help With
A suitable kit can make it easier to:
- Organize multiple seed varieties.
- Maintain a consistent growing environment.
- Monitor germination.
- Water young seedlings.
- Reduce mess during indoor propagation.
- Manage limited growing space.
- Prepare seedlings for transplanting.
However, a kit cannot guarantee germination.
Seed quality, species requirements, environmental conditions, and growing practices all influence results.
2. Identify What You Want to Grow
The first step in choosing a seed starting kit is determining which plants you intend to grow.
Different seeds have different germination requirements and growth habits.
Vegetable Seeds
Common vegetables started from seed include:
- Tomatoes.
- Peppers.
- Lettuce.
- Broccoli.
- Cabbage.
- Eggplant.
Some vegetables benefit from indoor seed starting before transplanting outdoors.
Others, including many root crops, are often better direct-sown because transplanting can disturb developing roots.
Herb Seeds
Popular herbs include:
- Basil.
- Parsley.
- Cilantro.
- Thyme.
- Oregano.
- Chives.
Herbs differ in germination speed, preferred temperature, and transplant tolerance.
Some can be started in small cells, while others may benefit from larger containers or direct sowing.
Flower Seeds
Seed starting kits can also be used for ornamental flowers.
Examples include:
- Marigolds.
- Zinnias.
- Petunias.
- Snapdragons.
- Cosmos.
Certain flower seeds require light for germination, while others need to be covered.
Always follow species-specific sowing instructions.
Native and Perennial Plants
Some native plants and perennials require specialized treatments such as cold stratification or scarification.
A basic seed starting kit may provide the containers, but it does not replace these germination requirements.
Buying tip: Choose the kit around the seeds you actually plan to grow, not simply the number of cells advertised.
3. Choose the Right Seed Starting Tray Size
Seed starting trays are available in different dimensions and cell configurations.
The best size depends on the number of plants you want and the space available.
Small Seed Starting Kits
Compact kits are useful for:
- Beginners.
- Small herb collections.
- Apartment gardening.
- Windowsill propagation.
- Testing a few seed varieties.
They are easier to move and usually require less growing medium.
Medium-Sized Kits
Medium kits may suit gardeners who want to grow several varieties simultaneously.
They provide more capacity without necessarily requiring a large dedicated growing area.
Large Seed Starting Kits
Larger trays can be useful for:
- Seasonal vegetable gardens.
- Flower production.
- Multiple seed varieties.
- Larger transplanting projects.
However, a large tray may be inconvenient if you only need a handful of seedlings.
Measure Your Available Space
Before buying, measure:
- Shelf width.
- Shelf depth.
- Available vertical clearance.
- Distance to the light source.
- Space for watering and maintenance.
If you plan to use grow lights, consider the actual illuminated coverage area rather than assuming the entire tray will receive equal light.
4. Understand Seed Cell Size and Depth
Seed starting trays typically contain individual compartments called cells.
Cell size affects root development, moisture management, and how long seedlings can remain in the tray.
Small Cells
Small cells are commonly used when starting many seedlings in a limited area.
Advantages:
- Efficient use of space.
- Lower growing medium requirements.
- Convenient for large batches.
- Easy organization.
Limitations:
- Dry out relatively quickly.
- Offer limited root space.
- May require earlier transplanting.
- Can become crowded as seedlings grow.
Larger Cells
Larger cells provide more room for root development.
Advantages:
- Greater growing medium volume.
- More space for developing roots.
- Potentially longer growing periods before transplanting.
- Suitable for some faster-growing seedlings.
Limitations:
- Require more space.
- Use more growing medium.
- Reduce the number of plants per tray.
- May remain wet longer under some conditions.
Match Cell Size to the Plant
Fast-growing plants with vigorous root systems may benefit from larger cells.
Small, slow-growing seedlings may perform adequately in smaller compartments.
Consider how long the seedlings will remain in the tray before transplanting.
5. Prioritize Proper Drainage
Drainage is one of the most important features of a seed starting kit.
Seeds need moisture to germinate, but excessively wet growing media can reduce oxygen availability and encourage unfavorable conditions.
Why Drainage Holes Matter
Drainage openings allow excess water to escape from individual cells.
This helps prevent water from accumulating around developing roots.
What to Look For
Check whether the tray includes:
- Drainage holes in individual cells.
- Openings large enough to function properly.
- A separate bottom tray.
- A design that allows excess water to be removed.
- Easy access for cleaning.
Bottom Trays
A bottom tray collects drainage water and protects indoor surfaces.
Some systems also allow bottom watering.
However, seedlings should not remain in standing water indefinitely.
After the growing medium has absorbed sufficient moisture, excess water should be removed when appropriate.
Avoid Permanently Waterlogged Conditions
A humidity dome and a wet tray do not automatically create an ideal growing environment.
Moisture should be managed according to seed and seedling requirements.
6. Compare Seed Starting Tray Materials
Seed starting trays are made from several materials.
Each offers different advantages in durability, flexibility, and environmental impact.
Plastic Trays
Plastic is one of the most common materials used in seed starting kits.
Advantages:
- Lightweight.
- Often affordable.
- Easy to handle.
- Available in many configurations.
- Can be reusable.
- Compatible with humidity domes and bottom trays.
Limitations:
- Thin plastic may crack or deform.
- Some products become brittle over time.
- Low-quality trays may be difficult to clean.
- Environmental impact varies by material and lifespan.
For repeated use, look for sturdy construction rather than the thinnest disposable design.
Rigid Reusable Trays
Some kits use thicker plastic or other durable materials.
These may offer:
- Better structural stability.
- Longer potential service life.
- Easier handling.
- Improved resistance to repeated cleaning.
They may cost more initially but can provide good long-term value.
Biodegradable Fiber Pots
Some seed starting systems use molded fiber or similar materials.
These may be designed for transplanting with the seedling.
Advantages:
- Can reduce the need to remove seedlings from individual containers.
- May be convenient for certain transplant-sensitive plants.
- Often made from plant-based materials.
Limitations:
- Decomposition rates vary.
- Container walls may dry quickly.
- Some materials can restrict root movement if they do not break down sufficiently.
- They may become fragile when wet.
Do not assume every biodegradable pot decomposes quickly under all growing conditions.
Follow product instructions and check root development before transplanting.
Compressed Growing Pellets
Some kits include pellets that expand when hydrated.
They are often made from peat, coconut coir, or other growing materials.
These can simplify setup, but their properties differ.
Consider moisture retention, expansion size, material sourcing, and suitability for the plants you intend to grow.
7. Evaluate the Quality of the Growing Medium
A suitable growing medium supports germination and early root development.
Seed starting mixes are generally formulated to provide a balance of moisture retention and air space.
Characteristics of a Good Seed Starting Mix
Look for a medium that is:
- Fine enough for small seeds.
- Relatively uniform.
- Able to retain appropriate moisture.
- Well aerated.
- Free from excessive compaction.
- Suitable for seed germination.
Common Ingredients
Seed starting mixes may contain:
- Coconut coir.
- Peat moss.
- Perlite.
- Vermiculite.
- Composted or processed organic materials.
- Other horticultural components.
Each ingredient contributes different physical properties.
Peat-Based Mixes
Peat can retain moisture and provide a lightweight growing medium.
However, peat harvesting raises environmental concerns, particularly regarding peatland ecosystems.
Coconut Coir
Coir is produced from coconut husk fibers.
It can provide useful moisture retention and aeration when properly processed.
Quality varies, and poorly processed coir may contain undesirable salt levels.
Perlite and Vermiculite
Perlite is commonly used to improve air space and drainage characteristics.
Vermiculite can help retain moisture and certain nutrients.
Does the Kit Include Growing Medium?
Some kits include enough medium for one planting cycle.
Others require a separate purchase.
Check the quantity and suitability before buying.
8. Understand Humidity Domes
A humidity dome is a transparent cover placed over a seed starting tray.
Its primary purpose is to reduce moisture loss and help maintain a humid environment around the growing medium.
Potential Benefits
Humidity domes can:
- Reduce surface drying.
- Help maintain more consistent moisture.
- Protect exposed trays from some drafts.
- Support germination conditions for certain seeds.
Important Limitations
Excessive humidity and poor airflow can contribute to fungal growth and other seedling problems.
A dome should not remain closed indefinitely without considering plant development.
Adjustable Ventilation
Some domes include adjustable vents.
These can help manage moisture and airflow.
However, vent openings do not replace regular observation.
Dome Height
A taller dome may accommodate seedlings for a longer period.
A low dome may become restrictive soon after emergence.
When to Remove the Dome
For many common seeds, humidity covers are removed or opened progressively after germination begins.
The appropriate timing depends on the species and growing conditions.
Follow the seed and kit instructions, and avoid allowing seedlings to remain crowded against the cover.
9. Decide Whether You Need Built-In Grow Lights
Some seed starting kits include integrated LED lighting.
Others provide trays and domes without lights.
Why Seedlings Need Adequate Light
After germination, seedlings require sufficient light for photosynthesis and healthy development.
Insufficient light can cause seedlings to become elongated, weak, and unstable.
Advantages of Integrated Grow Lights
A kit with built-in lighting may offer:
- Convenient installation.
- Coordinated tray and light dimensions.
- Reduced need for separate equipment.
- Compact organization.
- Simple daily operation.
Potential Limitations
Integrated lights may provide limited intensity or poor coverage.
Some designs also offer little adjustment as seedlings grow.
What to Check
Consider:
- Light output information.
- Coverage area.
- Adjustable mounting height.
- Dimming capability.
- Timer functions.
- Heat management.
- Electrical safety.
A grow light’s wattage alone does not establish how much useful light reaches the seedlings.
When reliable data is available, photosynthetic photon flux density (PPFD) measurements can help evaluate performance.
Separate Grow Lights
A separate adjustable LED fixture may offer more flexibility, particularly when growing seedlings with different requirements.
For gardeners who already own suitable grow lights, purchasing a kit without integrated lighting may be more economical.
10. Consider Whether a Seedling Heat Mat Is Necessary
Temperature strongly influences germination.
Some seeds germinate best when the growing medium is warmer than typical room temperature.
A seedling heat mat provides controlled warmth beneath a tray.
Plants That May Benefit
Certain warm-season crops, including tomatoes, peppers, and eggplants, may benefit from suitable bottom heat during germination.
However, the ideal temperature varies by species.
Some cool-season crops germinate well at lower temperatures and may not benefit from additional heating.
What to Look For
If buying a kit with a heat mat, consider:
- Appropriate dimensions.
- Clear electrical specifications.
- Compatibility with the tray.
- Suitable moisture protection.
- Reliable construction.
- Manufacturer instructions.
Thermostat Compatibility
A thermostat with a temperature probe can help regulate growing medium temperature.
This may be particularly useful in environments where overheating is possible.
Avoid Unnecessary Heat
A heat mat is not automatically beneficial for every seed.
Excessive warmth can reduce germination success or create unfavorable growing conditions.
Many seedlings also require different temperatures after germination.
Follow species-specific guidance rather than leaving heating equipment on continuously.
11. Consider Watering Convenience
Seed starting requires careful moisture management.
The growing medium should generally remain appropriately moist during germination without becoming waterlogged.
Top Watering
Watering from above can be convenient when done gently.
However, strong water flow may displace seeds or damage delicate seedlings.
Bottom Watering
Bottom watering allows moisture to move upward through the growing medium.
It can help reduce disturbance at the surface.
However, it is important to monitor how thoroughly the medium becomes moist and remove excess water when appropriate.
Useful Watering Accessories
A kit may include:
- A small watering bottle.
- A fine-mist sprayer.
- A bottom watering tray.
- A narrow-spout watering tool.
What Matters Most
Choose a system that allows controlled watering and easy observation.
Complex automatic watering features are not necessary for every home seed starting setup.
12. Look for Clear Seed Labels and Organization Features
When growing multiple varieties, labeling becomes important.
Young seedlings may look similar even when they belong to different plants.
Useful Label Information
Consider recording:
- Plant name.
- Variety.
- Sowing date.
- Expected germination period.
- Transplanting notes.
Common Label Types
Seed starting kits may include:
- Plastic plant markers.
- Wooden labels.
- Reusable writing surfaces.
- Printed identification cards.
Durability
Choose labels that remain legible under moist conditions.
Water-resistant markers or pencils may be useful depending on the label material.
Tray Organization
Removable cell inserts can make it easier to group different varieties and move seedlings separately.
This is especially helpful when seeds germinate at different rates.
13. Consider Modular and Removable Tray Designs
Some kits use one large fixed tray, while others contain removable cell modules.
Fixed Trays
Advantages:
- Simple construction.
- Easy organization.
- Often economical.
- Convenient for growing similar plants together.
Limitations:
- Individual seedlings may be harder to move.
- Cleaning large trays can be awkward.
- Different germination schedules may be difficult to manage.
Removable Modules
Advantages:
- Easier separation of plant varieties.
- More flexible watering arrangements.
- Convenient transplanting.
- Easier replacement of individual components.
Limitations:
- More individual pieces to manage.
- Some systems use proprietary dimensions.
- Components may be misplaced.
For gardeners starting several plant species simultaneously, modular designs can offer useful flexibility.
14. Evaluate Ease of Transplanting
Seedlings eventually need more growing space.
A good seed starting kit should allow plants to be removed with minimal root disturbance.
Flexible Cells
Flexible cell walls may make it easier to release a root ball.
However, excessively thin material may tear during repeated use.
Removable Bottom Designs
Some trays feature openings or removable bases that allow seedlings to be pushed upward.
These can simplify transplanting when used carefully.
Biodegradable Cells
Some biodegradable containers are designed to be transplanted with the seedling.
Their effectiveness depends on the material and how readily roots can grow through the container.
Root Development
Seedlings should generally be transplanted before severe root crowding develops.
The appropriate timing depends on plant species, cell size, and growing conditions.
Avoid pulling seedlings forcefully by their stems.
15. Choose a Kit That Fits Your Indoor Growing Environment
The surrounding environment affects seed starting success.
Windowsill Seed Starting
A windowsill may provide useful daylight, but light intensity and temperature can vary significantly.
Consider:
- Window orientation.
- Seasonal daylight.
- Cold glass surfaces.
- Drafts.
- Space limitations.
- Supplemental lighting needs.
Shelf-Based Seed Starting
Shelves can accommodate multiple trays in a compact area.
Look for:
- Appropriate tray dimensions.
- Adequate vertical clearance.
- Compatible grow lights.
- Safe electrical arrangements.
- Convenient watering access.
Dedicated Growing Areas
A dedicated propagation space may support larger kits and additional environmental controls.
Consider:
- Lighting coverage.
- Temperature management.
- Ventilation.
- Water containment.
- Electrical capacity.
- Cleaning access.
Small Apartments
Compact modular kits may be especially convenient.
A smaller setup that is easy to maintain can be more practical than a large system that occupies too much living space.
16. Understand Airflow and Seedling Health
Humidity is useful during germination, but airflow becomes increasingly important as seedlings develop.
Why Airflow Matters
Poor air circulation and persistently wet conditions can contribute to problems such as damping-off, a group of diseases that can cause young seedlings to collapse.
Useful Kit Features
Consider:
- Adjustable dome vents.
- Removable covers.
- Adequate spacing.
- Easy access for inspection.
- Designs that do not trap excessive condensation.
Avoid Overcrowding
Too many seedlings growing close together may compete for light and space.
Crowding can also make watering and monitoring more difficult.
Follow recommended sowing densities and thin seedlings when appropriate.
Clean Growing Conditions
Use clean trays and suitable growing media.
Avoid reusing contaminated materials without appropriate cleaning or treatment.
17. Compare Basic and Complete Seed Starting Kits
Seed starting kits range from simple tray systems to comprehensive propagation setups.
| Feature | Basic kit | Intermediate kit | Complete kit |
|---|---|---|---|
| Seed cells | Usually included | Usually included | Usually included |
| Bottom tray | Often included | Commonly included | Commonly included |
| Humidity dome | Optional | Commonly included | Commonly included |
| Growing medium | Varies | Often included | Often included |
| Plant labels | Optional | Often included | Often included |
| Grow lights | Usually separate | Sometimes included | Often included |
| Heat mat | Usually separate | Optional | May be included |
| Timer or controls | Uncommon | Varies | May be included |
| Best suited for | Simple seed starting | Regular home gardening | More controlled indoor propagation |
Product contents vary, so this comparison should be treated as a general guide.
A complete kit is not automatically the best choice.
Choose the level of equipment that matches your actual growing needs.
18. Evaluate Electrical Safety in Kits With Lights or Heat Mats
Seed starting environments often involve water, humidity, and electrical equipment.
Safety deserves particular attention when purchasing powered kits.
Check Electrical Specifications
Look for:
- Clear voltage and power ratings.
- Suitable power adapters.
- Reliable connectors.
- Appropriate insulation.
- Manufacturer installation instructions.
- Credible safety certification where applicable.
Moisture Protection
Electrical components should be suitable for their intended environment.
Check whether the manufacturer specifies protection against water exposure.
Do not assume that a device is waterproof simply because it is marketed for gardening.
Safe Installation
Follow these precautions:
- Keep plugs and connections away from standing water.
- Avoid overloaded outlets.
- Do not use damaged cables.
- Maintain required ventilation.
- Follow heat mat placement instructions.
- Disconnect equipment before cleaning.
- Keep electrical components away from children and pets.
Avoid Improvised Heating Systems
Do not substitute household heating appliances for purpose-designed seedling heating equipment.
Choose products intended for horticultural use and follow their operating instructions.
19. Consider Energy Consumption
Kits with lights and heating equipment use electricity.
Operating costs depend on power consumption and daily running time.
Estimating Electricity Use
Use the formula:
Daily energy use (kWh) = Power (W) × Operating hours ÷ 1,000
For example, an LED fixture consuming 30 watts for 14 hours uses:
30 × 14 ÷ 1,000 = 0.42 kWh per day
Over 30 days:
0.42 × 30 = 12.6 kWh
Multiply this amount by your electricity rate to estimate the cost.
Heat mats and other powered accessories should be calculated separately.
Actual energy use may vary when thermostats, timers, or dimming controls cycle equipment on and off.
Prioritize Useful Features
A timer may improve consistency and prevent unnecessary operation.
A thermostat may help regulate heating equipment.
Choose controls that provide practical benefits rather than unnecessary complexity.
20. Consider Durability and Reusability
Seed starting trays are exposed to repeated watering, handling, cleaning, and transplanting.
A reusable kit should withstand these activities.
Signs of Better Construction
Look for:
- Sturdy cell walls.
- Stable tray bases.
- Well-fitting domes.
- Smooth edges.
- Reliable drainage openings.
- Durable connectors.
- Easy-to-clean surfaces.
Reusable Versus Disposable Kits
Disposable kits may be convenient for occasional use.
Reusable kits may provide better long-term value for gardeners who start seeds every season.
Replacement Components
Check whether the manufacturer offers replacement:
- Cell inserts.
- Bottom trays.
- Humidity domes.
- Growing pellets.
- Light components.
- Other accessories.
A modular kit with replaceable parts may remain useful longer than a system that requires complete replacement after one component fails.
21. Consider Environmental and Sustainability Factors
Seed starting equipment can have different environmental impacts depending on its materials, manufacturing, transport, and useful lifespan.
Reusable Trays
Durable trays can reduce the need for repeated purchases.
Recycled Materials
Some kits use recycled plastic.
Look for clear manufacturer information when recycled content is important to your purchasing decision.
Biodegradable Containers
Biodegradable pots may be useful in certain situations, but their environmental benefits depend on material sourcing, manufacturing, and disposal conditions.
Growing Medium Choices
Peat-free mixes may be attractive to gardeners concerned about peatland conservation.
However, alternative ingredients also have environmental impacts.
Avoid Unnecessary Accessories
Buying only the equipment you need can reduce waste and storage requirements.
A simple reusable setup may provide excellent long-term value.
22. Common Mistakes to Avoid When Buying a Seed Starting Kit
Choosing Based Only on the Number of Cells
A kit with more cells is not necessarily more useful.
Better approach: Match capacity to your actual planting plans and available space.
Ignoring Cell Depth
Very small cells may require early transplanting.
Better approach: Consider the growth rate and root structure of your plants.
Buying Trays Without Proper Drainage
Poor drainage can make moisture management difficult.
Better approach: Choose functional drainage holes and a suitable bottom tray.
Assuming a Humidity Dome Should Stay Closed
Excessive humidity and poor airflow can create problems after germination.
Better approach: Adjust or remove the dome according to seedling development.
Overlooking Lighting Requirements
Seedlings may become weak and elongated under inadequate light.
Better approach: Plan for suitable lighting before seeds germinate.
Using Heat for Every Seed Variety
Not all seeds benefit from additional warmth.
Better approach: Follow species-specific temperature recommendations.
Choosing Fragile Trays for Repeated Use
Thin disposable trays may crack during handling.
Better approach: Choose durable construction if you intend to reuse the kit.
Ignoring Transplanting Convenience
Seedlings can be damaged when removed from poorly designed cells.
Better approach: Look for flexible or easily removable cell designs.
Buying Too Many Accessories
Complex kits may include equipment you rarely use.
Better approach: Prioritize the components that directly support germination and early growth.
23. How to Choose a Seed Starting Kit for Different Gardening Goals
For Beginners
A simple kit with seed cells, drainage, a bottom tray, and a removable humidity dome can provide a practical starting point.
Choose a manageable number of cells and clear instructions.
For Indoor Herb Growing
Look for:
- Compact dimensions.
- Suitable cell depth.
- Reliable drainage.
- Easy watering.
- Compatibility with grow lights.
For Vegetable Seedlings
Consider:
- Adequate root space.
- Durable trays.
- Good lighting coverage.
- Temperature management when appropriate.
- Easy transplanting.
For Flower Gardening
A kit with multiple cells may be useful when starting several varieties.
Removable modules can help manage different germination schedules.
For Small Apartments
Prioritize:
- Compact trays.
- Stackable storage when empty.
- Minimal mess.
- Easy cleaning.
- Safe lighting arrangements.
For Experienced Gardeners
A modular reusable system may offer better flexibility.
Separate grow lights, thermostatically controlled heat mats, and replaceable tray components can provide greater control over growing conditions.
24. Step-by-Step Guide to Choosing the Right Seed Starting Kit
A systematic approach can help you select a kit without unnecessary spending.
Step 1: Decide What You Will Grow
List the plant species and varieties you intend to start.
Check their germination and transplanting requirements.
Step 2: Estimate the Number of Seedlings
Consider how many mature plants you want and allow for the possibility that some seeds may not germinate.
Avoid starting more seedlings than you can reasonably maintain.
Step 3: Measure Your Growing Space
Check the available width, depth, and height.
Account for lighting and watering access.
Step 4: Choose the Cell Size
Match cell dimensions to seedling growth rate and expected transplanting time.
Step 5: Evaluate Drainage
Look for reliable drainage holes and a suitable bottom tray.
Step 6: Check the Growing Medium
Determine whether the kit includes growing medium and whether it suits your seeds.
Step 7: Consider a Humidity Dome
Choose a removable, well-fitting dome when useful.
Adjustable ventilation can be convenient.
Step 8: Plan Lighting and Temperature
Decide whether you need separate grow lights or heating equipment.
Avoid buying these accessories automatically.
Step 9: Evaluate Durability
Choose reusable construction if you expect to start seeds regularly.
Step 10: Compare Overall Value
Consider the quality and usefulness of the included components rather than the total number of accessories.
25. Practical Seed Starting Kit Buying Checklist
Use this checklist before purchasing.
Plant and Growing Requirements
- I know which seeds I plan to grow.
- I have checked their germination requirements.
- The kit has enough cells for my planting plans.
- The cell size suits the expected seedling growth.
- The setup fits my available space.
Tray and Growing Medium
- Individual cells have suitable drainage.
- A bottom tray is included or available.
- The tray is stable and easy to handle.
- The growing medium is suitable or can be purchased separately.
- Seedlings can be removed without unnecessary root damage.
Environmental Control
- A humidity dome is included if needed.
- Ventilation can be managed.
- Suitable lighting is available.
- Temperature requirements have been considered.
- Heating equipment is included only if useful.
Convenience and Safety
- The kit is easy to water.
- Components are easy to clean.
- Electrical equipment has clear safety instructions.
- Water and electrical connections can be kept appropriately separated.
- The setup is convenient to monitor daily.
Durability and Value
- The materials suit my expected frequency of use.
- The tray is durable enough for intended reuse.
- Replacement components are available when relevant.
- The kit does not contain unnecessary accessories.
- The overall cost matches my gardening needs.
26. Frequently Asked Questions
What should a beginner seed starting kit include?
A beginner kit should ideally include seed cells with drainage holes, a bottom tray, and clear instructions.
A removable humidity dome and suitable growing medium can also be convenient.
Grow lights may be necessary if natural lighting is insufficient.
Are seed starting kits worth buying?
They can be worthwhile because they organize useful supplies and simplify setup.
However, individual components may be more economical if you already own suitable equipment.
How many cells should a seed starting kit have?
The ideal number depends on how many plants you want to grow and how much space you have.
A smaller kit is often easier for beginners to manage.
Do seed starting kits need drainage holes?
Drainage holes are strongly recommended for most conventional seed starting systems.
They help prevent excess water from accumulating around developing roots.
Do I need a humidity dome?
Not always.
A dome can help reduce moisture loss during germination, but it should be managed carefully to avoid excessive humidity and poor airflow.
Can I start seeds without grow lights?
Yes, if sufficient natural light is available after germination.
However, many indoor locations do not provide enough light for strong seedling development.
Do all seeds need a heat mat?
No.
Different seeds have different temperature requirements.
Additional bottom heat may help some warm-season crops but may be unnecessary or unsuitable for others.
Are biodegradable seed pots better than plastic trays?
Neither option is universally better.
Biodegradable pots can simplify transplanting in some situations, while reusable plastic trays may offer greater durability.
Performance and environmental impact depend on the specific materials and how they are used.
Can seed starting trays be reused?
Yes, if they remain structurally sound.
Clean them thoroughly before reuse, and disinfect when appropriate to reduce the risk of transferring plant pathogens.
How often should seedlings be watered?
There is no universal schedule.
Watering frequency depends on cell size, growing medium, temperature, airflow, plant development, and humidity.
Monitor the growing medium and avoid both excessive drying and prolonged waterlogging.
When should seedlings be transplanted?
Transplant when the seedlings are sufficiently developed and the growing conditions are appropriate.
Timing varies by species, root development, and container size.
Avoid allowing seedlings to become severely root-bound.
Can I use regular garden soil in a seed starting kit?
Ordinary garden soil is often too dense or inconsistent for small seed starting cells.
A suitable seed starting mix generally provides more predictable moisture retention and aeration.
Are kits with built-in LED lights better?
They can be convenient, but their performance varies.
Check actual lighting capability, coverage, adjustability, and safety rather than assuming integrated lighting is sufficient.
Can I grow different seeds in the same tray?
Yes, but different species may require different temperatures, moisture levels, and germination times.
Removable modules can make mixed planting easier to manage.
How can I prevent weak, leggy seedlings?
Provide suitable light intensity, avoid overcrowding, manage temperature appropriately, and maintain healthy growing conditions.
Weak, elongated seedlings often indicate insufficient light, although other environmental factors can contribute.
Final Thoughts
Choosing the right seed starting kit begins with understanding the plants you want to grow and the environment in which you will grow them.
Tray capacity, cell size, drainage, growing medium, humidity control, lighting, and temperature management all influence how practical and effective a kit will be.
For beginners, a simple seed starting tray with reliable drainage, a removable humidity dome, and suitable growing medium may provide everything needed to get started, provided adequate light and appropriate temperatures are available. More experienced gardeners may benefit from reusable modular trays, adjustable lighting, and carefully controlled heating equipment.
Avoid choosing a kit solely because it includes many accessories or advertises a large number of planting cells. Instead, focus on functional design, durability, ease of watering, transplanting convenience, and compatibility with your intended seeds.
Remember that successful germination depends on more than equipment. Seed quality, correct sowing depth, suitable moisture, appropriate temperature, adequate light after emergence, and regular observation remain essential.
With a thoughtfully selected seed starting kit and a consistent care routine, you can create a reliable foundation for growing healthy seedlings and enjoy the process of nurturing plants from their earliest stages.