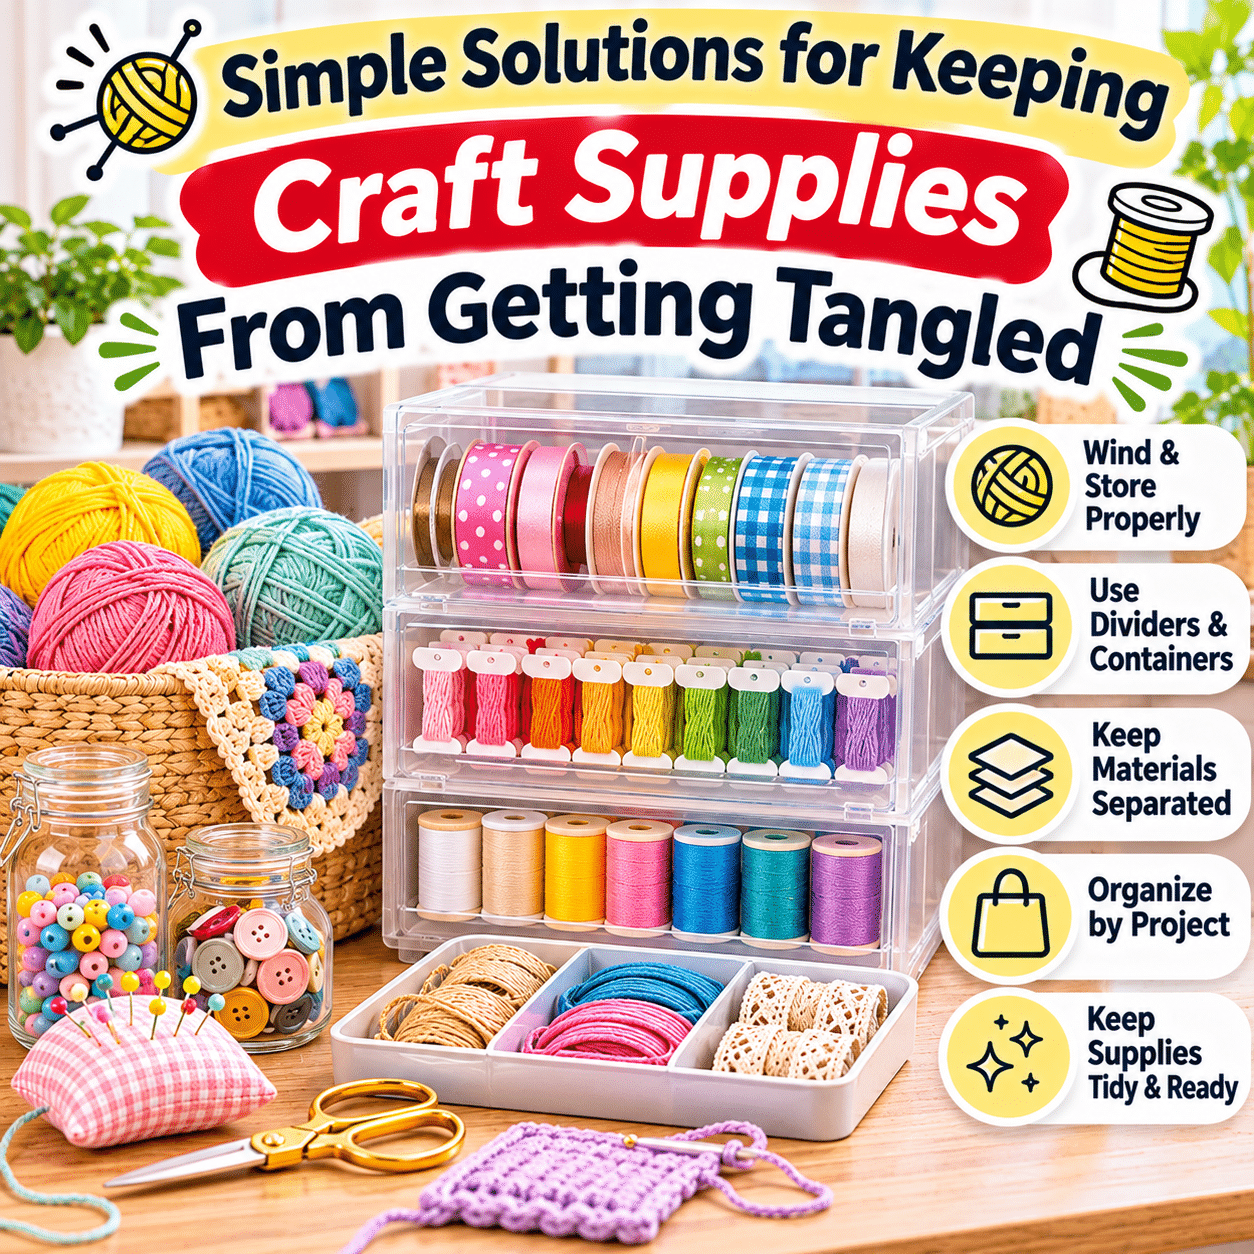
Crafting is a rewarding way to explore creativity, develop practical skills, and create handmade projects. Whether you enjoy knitting, crocheting, sewing, embroidery, jewelry making, macramé, or other creative hobbies, working with flexible materials often brings one familiar challenge: tangled supplies.
Embroidery floss can become knotted inside storage boxes, yarn strands may twist together, ribbons can unravel across drawers, and jewelry-making cords can turn into frustrating bundles. Even carefully arranged supplies may become disorganized when materials are moved between projects or stored without proper separation.
Tangled craft supplies are more than a minor inconvenience. They can interrupt creative activities, waste time, damage delicate materials, and make it difficult to identify what is available for future projects.
Fortunately, preventing tangles does not require an expensive craft room or complicated storage equipment. Simple techniques such as winding materials properly, separating categories, using suitable organizers, and maintaining consistent storage habits can make craft supplies easier to manage.
This comprehensive guide explores practical ways to prevent tangles, organize different crafting materials, protect delicate supplies, and create a reliable storage system that supports enjoyable creative work for years to come.
1. Understand Why Craft Supplies Become Tangled
Before choosing storage solutions, it helps to understand how tangles develop.
Flexible Materials Move Easily
Craft supplies such as yarn, thread, ribbon, and cord can shift inside drawers, bags, and containers.
When loose ends overlap, they may twist around other materials.
Different Materials Become Mixed Together
Storing multiple types of supplies in one container can create unnecessary contact between strands.
For example, embroidery floss, elastic cord, and thin ribbon may behave differently when stored together.
Loose Ends Create Knots
Unsecured ends can slip beneath other strands and form loops that tighten when pulled.
Improper Winding Causes Problems
Materials wound too loosely may unravel, while excessive tension can stretch elastic fibers or distort delicate threads.
Frequent Handling Increases Movement
Supplies used for several projects may be repeatedly removed, transferred, and returned to storage.
Without consistent organization, tangles can develop gradually.
The most effective prevention strategy is to reduce unnecessary movement while keeping individual materials easy to access.
2. Sort Craft Supplies Before Organizing Them
A reliable organization system begins with separating materials according to their characteristics and intended uses.
Group Supplies by Material Type
Common categories include:
- Knitting yarn.
- Crochet yarn.
- Embroidery floss.
- Sewing thread.
- Ribbons.
- Decorative trims.
- Jewelry-making cords.
- Elastic strings.
- Macramé rope.
- Beading wire.
- Fabric strips.
- Decorative twine.
Separate Different Thicknesses
Thick rope and delicate embroidery thread should not necessarily share the same storage compartment.
Consider Material Texture
Some fibers have rough or fuzzy surfaces that can catch on neighboring strands.
Smooth cords may slide easily, while textured yarn can become entangled more readily.
Identify Frequently Used Supplies
Materials used regularly should remain accessible.
Less frequently used supplies can be stored in secondary containers.
Remove Unusable Materials
Discard or appropriately repurpose badly damaged strands that cannot be used effectively.
Sorting supplies before storage reduces unnecessary mixing and makes future organization easier.
3. Choose Storage Solutions Based on Material Characteristics
Different craft supplies benefit from different storage methods.
| Craft Material | Common Tangling Problem | Practical Storage Solution |
|---|---|---|
| Embroidery floss | Loose strands form knots | Floss bobbins or thread cards |
| Sewing thread | Ends unwind from spools | Spool racks or divided boxes |
| Knitting yarn | Multiple strands become intertwined | Individual yarn bags or compartments |
| Crochet yarn | Loose ends catch on nearby skeins | Organized bins with separated skeins |
| Ribbon | Rolls unwind and overlap | Ribbon spools or divided organizers |
| Jewelry cord | Thin cords knot together | Individual cards or small pouches |
| Elastic string | Loose loops become tangled | Gentle winding on suitable cards |
| Macramé rope | Long lengths twist together | Loose coils with soft ties |
| Beading wire | Kinks and loops develop | Original spools or suitable reels |
| Decorative twine | Loose ends unwind | Small spools or secured bundles |
| Fabric strips | Long strips become intertwined | Rolled bundles or separate compartments |
The goal is not to use a different organizer for every item.
Instead, choose storage methods that suit the material’s flexibility, thickness, and sensitivity to tension.
4. Use Bobbins to Organize Embroidery Floss
Embroidery floss is particularly vulnerable to tangling because it consists of multiple fine strands.
Wind Floss Onto Suitable Bobbins
Floss bobbins provide a compact way to keep individual colors separated.
They may be made from cardboard, plastic, or other suitable materials.
Avoid Excessive Tension
Wind floss gently to prevent unnecessary stretching or distortion.
Secure Loose Ends
Use the bobbin’s slots or another suitable fastening method.
Label Each Bobbin
Include useful information such as:
- Color number.
- Brand.
- Thread type.
- Project reference.
Store Bobbins in Divided Containers
A compartmentalized box can prevent bobbins from shifting excessively.
Avoid Overcrowding
Leave enough room to remove individual bobbins without disturbing nearby materials.
A consistent bobbin system can make embroidery supplies easier to identify and use.
5. Keep Sewing Thread Spools Organized
Sewing thread is generally easier to manage when it remains on its original spool.
However, loose thread ends can still unwind and become tangled.
Use a Dedicated Spool Rack
A rack can keep thread spools separated and visible.
Consider Divided Storage Boxes
Compartmentalized containers are useful for protecting spools from dust and unnecessary movement.
Secure Thread Ends
Use built-in spool notches or suitable thread clips when available.
Separate Thread Types
Consider grouping:
- General-purpose sewing thread.
- Embroidery machine thread.
- Quilting thread.
- Specialty decorative thread.
Protect Thread From Environmental Damage
Store thread away from prolonged direct sunlight, excessive moisture, and unnecessary heat.
Avoid Loose Storage
A drawer filled with unsecured spools may allow threads to unwind and overlap.
Keeping thread on its original spool and securing the end is often the simplest solution.
6. Prevent Yarn Skeins From Tangling
Yarn can become tangled when multiple skeins are stored together or when working ends are left loose.
Keep Skeins Individually Organized
Use separate compartments, small bags, or suitable containers.
Identify the Working End
Before starting a project, locate the strand you intend to use.
Some skeins are designed for center-pull use, while others work better when pulled from the outside.
Avoid Pulling Aggressively
If yarn resists movement, inspect the skein rather than pulling harder.
Secure Unused Ends
Tuck loose ends gently into the skein or use an appropriate yarn band.
Store Partially Used Skeins Carefully
Partially used yarn may unravel more easily than an intact skein.
Preserve Product Labels
Keep information about fiber content, care instructions, yarn weight, and dye lot when relevant.
Proper skein management helps reduce tangles during both storage and active crafting.
7. Wind Loose Yarn Into Manageable Balls or Cakes
Loose yarn is more likely to tangle when stored without structure.
Use Gentle Winding Techniques
Wind yarn into a stable ball or cake without excessive tension.
Avoid Stretching Fibers
Tightly wound yarn can place unnecessary strain on some fibers, particularly elastic or delicate varieties.
Consider a Yarn Winder
A suitable yarn winder can create consistent cakes for certain yarn types.
Use a Yarn Swift When Appropriate
A swift can help support yarn sold in hanks while it is being wound.
Keep Colors and Fibers Separate
Avoid combining unrelated yarn lengths into one bundle.
Secure the End
Tuck the end into the finished ball or cake without creating a tight knot.
Store Finished Balls Carefully
Use baskets, divided containers, or individual bags to prevent unwanted rolling.
The best winding method depends on the yarn’s fiber content, construction, and intended use.
8. Use Yarn Bowls and Holders During Crafting
Tangling often occurs while supplies are being used rather than stored.
Consider a Yarn Bowl
A yarn bowl can help guide yarn while reducing uncontrolled rolling.
Use a Stable Yarn Holder
Some holders support yarn cakes or cones while allowing the strand to feed smoothly.
Keep the Working Area Clear
Avoid placing multiple loose skeins directly beside one another.
Separate Active Strands
When working with several colors, maintain enough distance between yarn sources.
Avoid Pulling Yarn Across Obstacles
Chair legs, drawer handles, and nearby tools can catch strands.
Check for Snags
Smooth edges and clean surfaces help protect delicate fibers.
A well-arranged crafting station can prevent tangles before they develop.
9. Organize Multiple Yarn Colors for Complex Projects
Colorwork and multistrand projects can create additional tangling challenges.
Use Separate Yarn Sources
Keep each color in an individual container or designated area.
Arrange Colors in Working Order
Place frequently used colors where they can feed smoothly.
Manage Strand Direction
Observe how strands cross during stitching.
When appropriate, adjust the position of yarn sources to reduce twisting.
Pause to Untwist
Correct minor twists before they become tight knots.
Avoid Excessive Strand Lengths
Use manageable lengths when the technique allows.
Keep Project Materials Together
A dedicated project bag can help prevent unrelated yarn from becoming mixed into active work.
Complex projects benefit from a system that maintains separation without interrupting creative flow.
10. Store Ribbons Without Unraveling
Ribbons are common in gift wrapping, sewing, decorating, and handmade projects.
Their smooth surfaces and long lengths can make them difficult to contain.
Keep Ribbons on Spools
Original spools often provide suitable storage.
Secure Loose Ends
Use gentle ribbon clips, suitable bands, or other non-damaging fasteners.
Avoid Tight Creases
Some ribbons develop permanent folds when compressed.
Store Rolls Upright or Horizontally
Choose the arrangement that keeps rolls stable and easy to retrieve.
Use Divided Containers
Separate different widths and materials.
Protect Delicate Ribbons
Silk, satin, and other sensitive materials may require careful handling.
Keep Ribbons Away From Moisture
Store them in a clean, dry location.
Properly secured ribbon rolls are easier to manage than loose bundles.
11. Organize Decorative Trims and Fabric Strips
Decorative trims, lace, bias tape, and fabric strips can become tangled when stored together.
Wind Trims Onto Cards
Flat storage cards work well for certain flexible trims.
Roll Longer Fabric Strips
Rolling can reduce folding and help keep lengths contained.
Separate Delicate Lace
Fine lace may snag on rough materials or fasteners.
Label Material Details
Useful information may include:
- Width.
- Length.
- Material.
- Color.
- Intended project.
Avoid Overpacking
Compressed trims may wrinkle or become difficult to remove.
Store Sharp Accessories Separately
Pins and needles should not be loose among fabric strips.
A consistent winding system makes decorative materials easier to locate and reuse.
12. Prevent Jewelry-Making Cords From Knotting
Jewelry-making supplies often include thin cords that can knot quickly.
Separate Cord Types
Keep materials such as:
- Waxed cotton cord.
- Nylon cord.
- Elastic string.
- Leather cord.
- Decorative string.
- Specialty beading thread.
Use Individual Spools or Cards
Winding each material separately reduces contact between loose ends.
Avoid Tight Knots for Storage
Tightly knotting delicate cord may create permanent bends or damage.
Secure Ends Gently
Use appropriate clips or spool notches.
Store Small Lengths Separately
Short pieces can be placed in labeled pouches or compartments.
Keep Cords Away From Sharp Findings
Metal components and sharp edges may damage delicate materials.
Check Elastic Materials
Elastic cords can deteriorate with age, heat, sunlight, and repeated stretching.
Inspect them before use.
13. Store Beading Wire Without Kinks
Beading wire requires special attention because some types can retain bends or become damaged when sharply folded.
Keep Wire on Suitable Spools
Original spools are often the safest storage option.
Avoid Sharp Bends
Do not fold wire tightly to fit a small container.
Use Appropriate Reels
Choose storage with a suitable winding diameter.
Secure Wire Ends
Prevent wire from unwinding unexpectedly.
Separate Wire Types
Different materials and diameters may require different handling.
Inspect Before Use
Discard damaged lengths when they are no longer suitable for the intended project.
Protect Hands
Cut wire ends may be sharp.
Handle and store them carefully.
Preventing kinks is often easier than trying to straighten damaged wire afterward.
14. Organize Macramé Rope and Long Craft Cords
Macramé projects frequently use long lengths of rope that can become tangled during preparation.
Measure Before Cutting
Prepare manageable lengths according to the project instructions.
Coil Rope Loosely
Use broad loops rather than tight knots.
Secure Bundles With Soft Ties
Avoid fasteners that compress or damage fibers.
Label Prepared Lengths
Mark bundles by length or intended project.
Separate Different Rope Types
Cotton rope, braided cord, and twisted cord may behave differently.
Avoid Dragging Rope Across Rough Surfaces
Friction can cause fraying or unwanted fiber separation.
Keep Prepared Project Bundles Together
A dedicated project container can reduce confusion during assembly.
15. Use Small Pouches for Loose Craft Materials
Pouches are useful when materials cannot remain on spools or cards.
Choose Suitable Sizes
A pouch should contain the material without excessive compression.
Keep One Category Per Pouch
For example:
- Embroidery floss leftovers.
- Jewelry cords.
- Decorative trims.
- Small yarn remnants.
Use Transparent Pouches When Helpful
Visibility makes contents easier to identify.
Avoid Mixing Sharp Components
Needles, pins, and sharp tools require secure storage.
Label Pouches
Use clear category names or project references.
Keep Pouches Inside a Larger Organizer
A basket or drawer can hold several labeled pouches.
This approach is particularly useful for compact craft spaces.
16. Use Drawer Dividers to Prevent Materials From Mixing
Drawers provide convenient storage, but loose materials can shift whenever they are opened.
Divide the Drawer Into Sections
Use suitable dividers for different supply categories.
Arrange by Frequency of Use
Keep frequently used materials near the front.
Avoid Overcrowding
Leave enough room to remove items without disturbing others.
Use Small Containers Within Drawers
Bobbins, spools, and cords may benefit from additional separation.
Keep Heavy Tools Away From Delicate Materials
Scissors, cutting equipment, and other heavy objects can damage soft supplies.
Maintain Consistent Categories
Return materials to the same sections after each project.
A well-divided drawer can make even a small crafting area more functional.
17. Organize Craft Supplies in Clear Storage Boxes
Clear containers can help identify supplies without opening every box.
Choose Appropriate Box Sizes
Small boxes work well for compact materials, while larger containers may hold yarn or fabric.
Use Divided Boxes for Small Items
Compartments help prevent bobbins and spools from shifting.
Avoid Overfilling
Crowded boxes can cause tangles when materials are removed.
Keep Containers Clean and Dry
Dust and moisture can affect stored craft supplies.
Label the Outside
Even transparent boxes benefit from simple category labels.
Store Boxes Safely
Avoid unstable stacks or placing heavy containers above delicate supplies.
Clear storage is most effective when the contents remain organized internally.
18. Create Separate Storage for Active Projects
Craft supplies often become tangled when materials from unfinished projects are mixed with general storage.
Use a Dedicated Project Bag
Keep the materials for one project together.
Include Only Necessary Supplies
Avoid filling the bag with unrelated materials.
Secure Working Strands
Before putting a project away, prevent loose yarn or thread from unraveling.
Protect Needles and Hooks
Use suitable cases or holders.
Keep Patterns and Notes Together
Store instructions in a protective sleeve or dedicated compartment.
Label Multiple Projects
A simple project name can prevent confusion.
Review Unfinished Projects
Periodically check that materials remain in good condition.
Dedicated project storage reduces the need to repeatedly sort and untangle supplies.
19. Manage Partially Used Craft Materials
Leftover materials are especially likely to become disorganized.
Separate Usable Leftovers
Keep remnants that are long enough for realistic future uses.
Wind Loose Lengths
Use cards, bobbins, or suitable spools.
Group by Material
Avoid combining unrelated fibers simply because they are leftovers.
Record Useful Details
Keep fiber content, color, and care information when available.
Avoid Excessive Accumulation
Very short or damaged pieces may not justify long-term storage.
Create a Small Remnants Collection
A dedicated container can make leftovers easier to reuse.
Review Periodically
Remove materials that no longer serve a practical purpose.
A manageable remnants collection supports creativity without creating unnecessary clutter.
20. Prevent Tangling When Transporting Craft Supplies
Traveling with craft supplies can introduce additional movement and friction.
Choose a Suitable Craft Bag
Look for secure compartments and enough room for the project.
Use Individual Pouches
Separate yarn, thread, cords, and accessories.
Secure Loose Ends
Prevent strands from unwinding during transport.
Protect Sharp Tools
Use appropriate cases for needles, scissors, and other tools.
Avoid Overpacking
Crowded bags can place pressure on delicate materials.
Keep Active Projects Contained
A project pouch can prevent unfinished work from mixing with other belongings.
Check Transportation Restrictions
If traveling by air, verify current rules for scissors, needles, and other craft tools.
Good travel organization helps keep supplies ready for use after arrival.
21. Organize Craft Supplies in Small Spaces
A dedicated craft room is not necessary for effective organization.
Use Existing Drawers
Reserve one or two sections for frequently used supplies.
Choose Stackable Containers
Use stable, appropriately sized boxes.
Consider Vertical Storage
Suitable shelves and wall organizers can free up work surfaces.
Use Portable Craft Caddies
A portable organizer can support crafting in different rooms.
Keep Materials Categorized
Even small storage areas benefit from clear separation.
Avoid Oversized Organizers
Large containers may consume more space than necessary.
Prioritize Accessibility
Frequently used materials should remain easy to retrieve.
Keep Walkways Clear
Storage should not create tripping hazards or obstruct doors.
A compact, well-planned system can be more practical than a large but disorganized collection.
22. Protect Craft Materials From Environmental Damage
Proper storage helps preserve materials and reduce the likelihood of tangling caused by deterioration.
Avoid Excessive Moisture
Damp conditions can contribute to odors, mildew, corrosion, or material damage.
Limit Prolonged Direct Sunlight
Some dyes, fibers, and elastic materials may deteriorate with prolonged exposure.
Maintain Suitable Temperatures
Extreme heat can affect certain adhesives, plastics, elastic cords, and specialty materials.
Protect Against Dust
Use closed containers when appropriate.
Keep Supplies Away From Pests
Natural fibers may be vulnerable to certain household pests.
Inspect Stored Materials
Check occasionally for damage, contamination, or deterioration.
Follow Material-Specific Guidance
Different fibers and craft materials have different storage requirements.
Protecting materials supports both organization and long-term usability.
23. Learn How to Untangle Craft Supplies Without Damaging Them
Even careful storage cannot prevent every knot.
When tangles occur, gentle handling is usually more effective than force.
Step 1: Stop Pulling
Pulling tightly can make knots smaller and more difficult to release.
Step 2: Find the Loose Ends
Identify where the material begins and ends.
Step 3: Spread the Material on a Clear Surface
A clean, flat work area makes overlapping strands easier to see.
Step 4: Loosen Large Loops First
Work from the outside of the tangled section toward tighter areas.
Step 5: Use Fingers Before Tools
Gentle finger movements may be sufficient for many tangles.
Step 6: Use a Blunt Tool When Appropriate
A smooth, blunt tool may help loosen certain knots.
Avoid sharp tools that could cut or weaken fibers.
Step 7: Work Slowly
Delicate threads, elastic cords, and specialty yarns can be damaged by excessive tension.
Step 8: Rewind Immediately
Once untangled, place the material onto a suitable bobbin, spool, or storage card.
Know When to Stop
Some materials become weakened, kinked, or damaged beyond practical recovery.
Replacing a short damaged section may be safer and more efficient than forcing it back into use.
24. Common Mistakes That Cause Craft Supplies to Tangle
Mistake 1: Storing Loose Strands Together
Different materials become intertwined.
Better approach: Wind individual materials onto suitable holders.
Mistake 2: Leaving Ends Unsecured
Thread and ribbon may unwind during storage.
Better approach: Secure ends gently.
Mistake 3: Overfilling Storage Boxes
Materials become compressed and difficult to remove.
Better approach: Leave enough space for easy access.
Mistake 4: Mixing Different Material Types
Rough fibers may catch on delicate strands.
Better approach: Separate materials by type and texture.
Mistake 5: Winding Too Tightly
Excessive tension may stretch or distort materials.
Better approach: Use gentle, even winding.
Mistake 6: Folding Wire Sharply
Certain wires can develop permanent kinks.
Better approach: Store them on appropriate spools.
Mistake 7: Ignoring Partially Used Supplies
Loose remnants accumulate.
Better approach: Rewind leftovers immediately after use.
Mistake 8: Mixing Active Projects
Strands from different projects may become tangled.
Better approach: Use separate project bags.
Mistake 9: Pulling Hard on Knots
Tension can tighten tangles or damage fibers.
Better approach: Loosen knots gradually.
Mistake 10: Using Complicated Storage Systems
Excessive organization rules may discourage consistent use.
Better approach: Choose simple methods that fit everyday crafting habits.
25. Troubleshooting Common Craft Supply Tangling Problems
| Problem | Possible Cause | Practical Solution |
|---|---|---|
| Embroidery floss forms knots | Loose strands | Wind onto labeled bobbins |
| Sewing thread unwinds | Unsecured spool ends | Use spool notches or suitable clips |
| Yarn skeins become intertwined | Mixed loose storage | Separate skeins and secure ends |
| Ribbon rolls unravel | No end restraint | Use gentle ribbon clips |
| Jewelry cords form tight knots | Loose storage | Wind individually onto cards |
| Elastic string becomes distorted | Excessive winding tension | Store with gentle, loose winding |
| Beading wire develops kinks | Sharp bends | Keep on suitable reels |
| Macramé rope becomes twisted | Long loose lengths | Coil loosely and secure bundles |
| Craft drawers become tangled | Overcrowding | Add dividers and reduce excess materials |
| Active projects become mixed | Shared storage | Use separate project bags |
| Yarn tangles during use | Uncontrolled rolling | Use a yarn bowl or suitable holder |
| Materials snag on storage containers | Rough edges | Choose smooth, appropriate organizers |
| Leftover threads become disorganized | No remnants system | Use labeled bobbins or small pouches |
| Supplies tangle during travel | Excessive movement | Use secure compartments and project bags |
The most effective troubleshooting method is to identify how materials are moving, overlapping, or unwinding and adjust the storage system accordingly.
26. Create a Practical Craft Supply Organization Checklist
A simple checklist can help prevent tangles before, during, and after creative activities.
Initial Organization
- Gather craft supplies from existing storage areas.
- Sort materials by type.
- Separate delicate and rough-textured materials.
- Inspect supplies for damage.
- Wind loose threads onto suitable holders.
- Secure ribbon and cord ends.
- Keep wire on appropriate spools.
- Choose suitable containers.
- Label materials when helpful.
- Store sharp tools separately.
Before Starting a Project
- Gather only the necessary supplies.
- Check yarn and thread for existing tangles.
- Identify working ends.
- Prepare separate yarn sources when needed.
- Keep the work surface clear.
- Arrange materials to reduce crossing strands.
- Prepare a project bag or container.
During Crafting
- Avoid pulling aggressively on tangled strands.
- Keep unused materials contained.
- Prevent yarn balls from rolling freely.
- Untwist crossing strands when necessary.
- Return tools to designated locations.
- Keep sharp objects away from delicate materials.
After Crafting
- Secure loose yarn and thread ends.
- Rewind unused lengths.
- Store leftover materials appropriately.
- Return spools and bobbins to their compartments.
- Place unfinished projects in dedicated storage.
- Remove scraps from the work surface.
- Close containers securely.
Periodic Maintenance
- Review storage boxes and drawers.
- Check for tangled materials.
- Inspect elastic cords and specialty fibers.
- Remove damaged supplies.
- Reorganize overflowing compartments.
- Clean storage containers.
- Review unfinished projects.
- Update labels when necessary.
Consistent maintenance can prevent small organization problems from becoming major tangles.
27. Frequently Asked Questions About Preventing Tangled Craft Supplies
1. What is the easiest way to prevent craft supplies from tangling?
Separate flexible materials by type, wind loose strands onto suitable holders, and secure their ends before storage.
2. How do I keep embroidery floss organized?
Use labeled floss bobbins or thread cards and store them in a divided container.
3. Should embroidery floss be stored on bobbins?
Bobbins are a practical option for many embroidery projects, provided the floss is wound gently.
4. How can I prevent sewing thread from unraveling?
Keep thread on its spool and secure the loose end using an appropriate spool notch or thread clip.
5. What is the best way to store yarn?
Keep skeins, balls, or cakes organized in suitable containers, with loose ends secured and different yarns separated.
6. Should yarn be stored in balls or skeins?
Both can work. The best choice depends on the yarn type, its original packaging, and how it will be used.
7. Can winding yarn too tightly cause damage?
Yes. Excessive tension may stretch or distort certain fibers, especially delicate or elastic yarns.
8. How do I stop yarn from tangling while crocheting?
Use a stable yarn holder or bowl, keep the working area clear, and avoid pulling yarn through obstacles.
9. How can I organize multiple yarn colors?
Keep colors in separate containers or compartments and manage crossing strands during the project.
10. What is the best way to store ribbon rolls?
Keep ribbons on suitable spools, secure loose ends, and avoid excessive compression.
11. How do I organize loose ribbon pieces?
Wind suitable lengths onto cards or store them separately in labeled pouches.
12. How can I prevent jewelry cords from knotting?
Wind cords individually onto suitable spools or cards and secure their ends.
13. Should elastic cord be stored tightly wound?
No. Excessive tension can stretch or distort elastic materials.
14. How do I store beading wire without kinks?
Keep wire on suitable reels or original spools and avoid sharp bends.
15. What is the best way to organize macramé rope?
Coil long lengths loosely, secure them with soft ties, and label prepared project bundles.
16. Are clear storage boxes useful for craft supplies?
Yes. Clear boxes improve visibility, especially when combined with dividers and simple labels.
17. How can I organize craft supplies without a craft room?
Use drawers, compact containers, portable caddies, and suitable vertical storage.
18. Should different craft materials be stored together?
Related materials can share a larger storage area, but flexible strands should be separated when they could become intertwined.
19. How do I organize leftover yarn and thread?
Wind usable remnants onto suitable holders and store them by material or project.
20. How can I prevent craft supplies from tangling during travel?
Use secure project bags, individual pouches, and properly wound materials.
21. What should I do when yarn becomes badly tangled?
Stop pulling, spread the yarn on a clear surface, loosen large loops, and work gradually through the tangle.
22. Can a needle help untangle embroidery floss?
A smooth, blunt tool may help loosen certain knots, but sharp points can damage delicate fibers.
23. How do I keep craft drawers from becoming messy?
Use simple dividers, avoid overcrowding, and return supplies to consistent locations.
24. How should I store delicate specialty threads?
Follow material-specific guidance, avoid excessive tension, and protect threads from moisture, rough surfaces, and prolonged sunlight.
25. Can humidity damage craft supplies?
Excessive moisture may contribute to mildew, corrosion, odors, or deterioration, depending on the material.
26. How often should craft supplies be reorganized?
Review them when compartments become crowded, projects change, or materials are difficult to locate.
27. Are expensive craft organizers necessary?
No. Simple bobbins, suitable containers, dividers, and consistent storage habits can be highly effective.
28. What is the most important habit for preventing tangles?
Securing loose ends and returning materials to their designated storage locations immediately after use is one of the most effective habits.
28. Build a Long-Term Tangle-Free Craft Storage System
A reliable organization system should support creativity rather than create additional work.
Keep Materials Separated
Group supplies by type, texture, and practical use.
Choose Suitable Winding Methods
Use bobbins, spools, cards, or loose coils according to material characteristics.
Secure Loose Ends
Prevent unnecessary unraveling during storage and transport.
Maintain Accessible Storage
Frequently used supplies should be easy to retrieve without disturbing other materials.
Protect Delicate Fibers
Avoid excessive tension, moisture, heat, and rough surfaces.
Organize Active Projects Separately
Keep unfinished work contained and identifiable.
Manage Leftovers Promptly
Rewind and store usable remnants after each crafting session.
Avoid Unnecessary Accumulation
Maintain a collection that reflects realistic creative needs.
Review Storage Periodically
Adjust containers and categories as projects and supplies change.
Keep the System Easy to Repeat
The best organization method is one that remains practical during everyday crafting.
A simple system used consistently is often more effective than an elaborate arrangement that becomes difficult to maintain.
Final Thoughts
Tangled craft supplies can turn an enjoyable creative activity into a frustrating search for usable materials. Loose yarn, embroidery floss, ribbon, jewelry cords, and other flexible supplies can quickly become difficult to manage when they are stored without proper separation.
Fortunately, most tangling problems can be reduced through straightforward organization habits.
Winding loose materials onto suitable holders, securing ends, separating different supply types, and using divided containers can help keep crafting materials accessible and protected.
Dedicated project bags, careful handling during active work, and consistent cleanup routines further reduce the likelihood of tangles developing between crafting sessions.
Just as importantly, storage methods should match the characteristics of each material. Delicate threads, elastic cords, structured ribbons, and beading wire may require different levels of support and protection.
The goal is not to create a perfectly arranged craft collection. It is to make materials easy to find, comfortable to use, and simple to put away.
With thoughtful storage and a few reliable habits, craft supplies can remain organized and ready for future projects—allowing more time for creativity and less time spent untangling knots.