Keeping your pet’s feeding bowls clean is one of the simplest yet most important parts of everyday pet care. Whether you have a dog, cat, or another companion animal, food and water bowls come into regular contact with moisture, saliva, food particles, and the surrounding environment.
Without consistent cleaning, these surfaces can accumulate residue, develop unpleasant odors, and provide conditions where microorganisms may multiply. Even bowls that appear clean can contain invisible buildup, particularly around scratches, seams, and hard-to-reach areas.
Fortunately, maintaining hygienic feeding bowls does not require complicated equipment or expensive cleaning products. A few practical habits, appropriate cleaning tools, and a consistent routine can help keep your pet’s feeding area clean and comfortable.
The type of bowl, the food being served, the cleaning method, and the surrounding environment all influence how often maintenance is needed. A bowl used for wet food may require more immediate attention than one used for dry kibble, while water bowls benefit from regular washing even when the water looks clear.
This guide explains how to clean different types of pet feeding bowls, remove stubborn residue, maintain water bowls, choose suitable cleaning materials, organize a practical hygiene routine, and recognize when a bowl should be replaced.
1. Why Cleaning Pet Feeding Bowls Matters
Pet feeding bowls are used repeatedly throughout the day, making them important surfaces to maintain.
Regular cleaning helps reduce accumulated food residue, unwanted odors, and microbial contamination.
Food Residue Can Accumulate Quickly
Food particles often remain inside a bowl after a meal.
Wet food, meat-based products, and soft treats may leave visible residue, while dry kibble can leave oils, crumbs, and saliva.
These materials can accumulate if the bowl is repeatedly refilled without washing.
A bowl does not need to look visibly dirty for cleaning to be worthwhile.
Moisture Supports Microbial Growth
Water and food moisture can create conditions that allow bacteria and other microorganisms to multiply.
The amount and type of contamination depend on many factors, including the food, environment, cleaning frequency, and bowl condition.
Regular washing helps remove the organic material and contamination that can accumulate during normal use.
Clean Bowls Support a Pleasant Feeding Environment
Pets may respond differently to odors, textures, and changes in their feeding environment.
Removing old food residue and maintaining fresh water can help keep feeding areas more pleasant.
However, changes in appetite or drinking behavior should not automatically be attributed to bowl cleanliness. Persistent changes may require veterinary attention.
Regular Maintenance Protects Bowl Condition
Cleaning provides an opportunity to inspect bowls for scratches, cracks, corrosion, chipped surfaces, and other damage.
Identifying these problems early helps you decide when continued use is no longer appropriate.
2. Understand the Difference Between Cleaning and Sanitizing
Cleaning and sanitizing are related but distinct processes.
Understanding the difference helps you choose appropriate methods without relying unnecessarily on harsh chemicals.
What Is Cleaning?
Cleaning involves physically removing food residue, dirt, grease, and other unwanted material.
Typical cleaning methods include:
- Warm water.
- Dishwashing detergent.
- A suitable sponge or brush.
- Thorough rinsing.
- Complete drying when appropriate.
For routine household care, washing with detergent and water is a fundamental step.
What Is Sanitizing?
Sanitizing involves reducing microorganisms on a surface to an acceptable level through an appropriate method.
Some dishwashers have sanitizing cycles, while certain products are formulated for food-contact surface sanitation.
Sanitizing methods must be suitable for the bowl material and used according to their instructions.
Is Disinfecting Always Necessary?
Routine disinfection is not necessarily required after every ordinary meal in a healthy household.
However, additional precautions may be appropriate when a pet is ill, a household member has increased infection vulnerability, or contamination is suspected.
In those situations, follow veterinary or public-health guidance and use only methods suitable for food-contact surfaces.
Never assume that a cleaning product is safe for pet bowls simply because it is marketed as antibacterial.
3. Establish a Practical Pet Bowl Cleaning Schedule
A consistent schedule makes bowl hygiene easier to manage.
Cleaning needs vary depending on the type of food, the number of pets, and how frequently the bowls are used.
Suggested Cleaning Routine
| Item | Recommended Routine | Main Purpose |
|---|---|---|
| Wet food bowl | Wash after each meal | Remove moist food residue |
| Dry food bowl | Wash after each meal | Remove crumbs, oils, and saliva |
| Water bowl | Wash daily and refresh water as needed | Reduce residue and buildup |
| Feeding mat | Wipe after spills and wash regularly | Maintain a clean feeding surface |
| Elevated bowl stand | Inspect daily and clean as needed | Remove splashes and food debris |
| Food measuring scoop | Wash regularly and whenever contaminated | Prevent residue accumulation |
| Automatic feeder components | Clean according to manufacturer instructions | Maintain food-contact surfaces |
| Pet water fountain | Clean according to manufacturer guidance, with more frequent attention when needed | Reduce buildup in the reservoir and components |
These are practical starting points rather than universal rules.
Some bowls may require more frequent cleaning, particularly in warm environments, multi-pet households, or when animals have health concerns.
4. Gather the Right Cleaning Supplies
You do not need an extensive collection of products to clean feeding bowls effectively.
Simple, appropriate tools are usually sufficient.
Basic Cleaning Supplies
Prepare:
- Warm running water.
- Dishwashing detergent suitable for food-contact items.
- A dedicated sponge or cleaning brush.
- A clean drying rack or towel.
- A suitable container or sink area for washing.
- Protective gloves when appropriate.
Choose tools that can reach the inside edges and base of the bowl.
Use a Dedicated Cleaning Brush
Keeping a brush specifically for pet feeding equipment can help maintain a consistent cleaning routine.
If you use a shared kitchen sink, clean the sink and surrounding surfaces after washing pet bowls.
Store the brush where it can dry between uses.
Avoid Damaged Sponges
Old sponges can retain moisture, food particles, and odors.
Rinse cleaning tools after use, allow them to dry, and replace them when they become worn or difficult to clean.
Choose Cleaning Products Carefully
A regular dishwashing detergent suitable for food-contact surfaces is generally appropriate for routine washing when used as directed and rinsed thoroughly.
Avoid using heavily fragranced products unnecessarily.
Do not mix cleaning chemicals or use industrial cleaning agents without confirming that they are suitable for the intended surface and application.
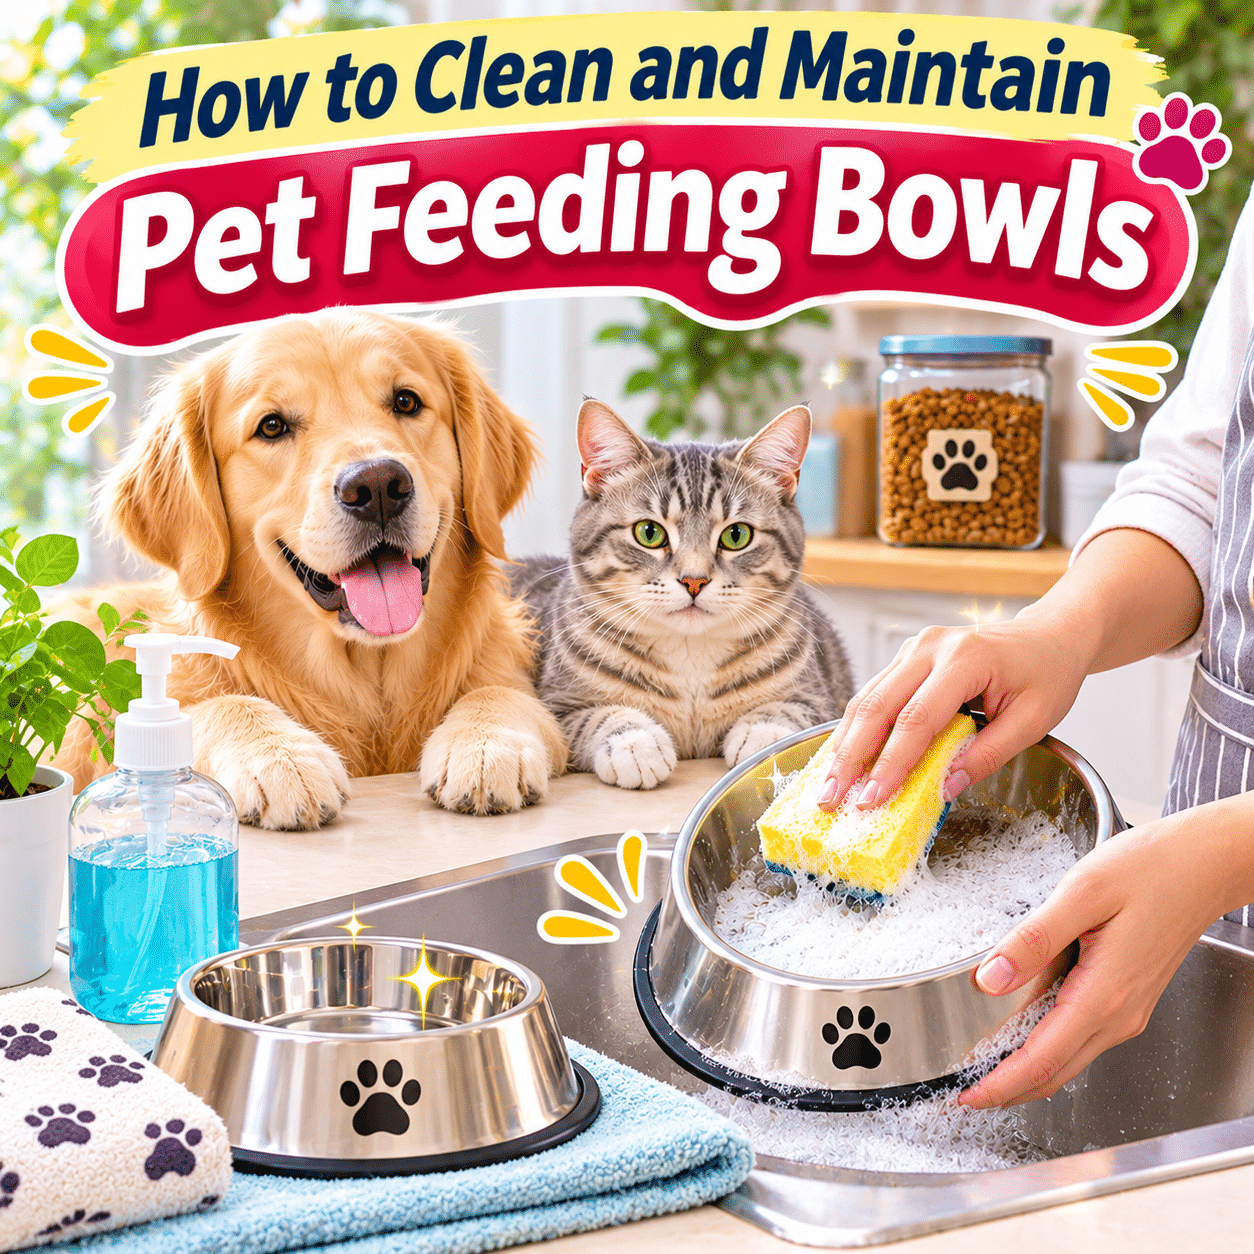
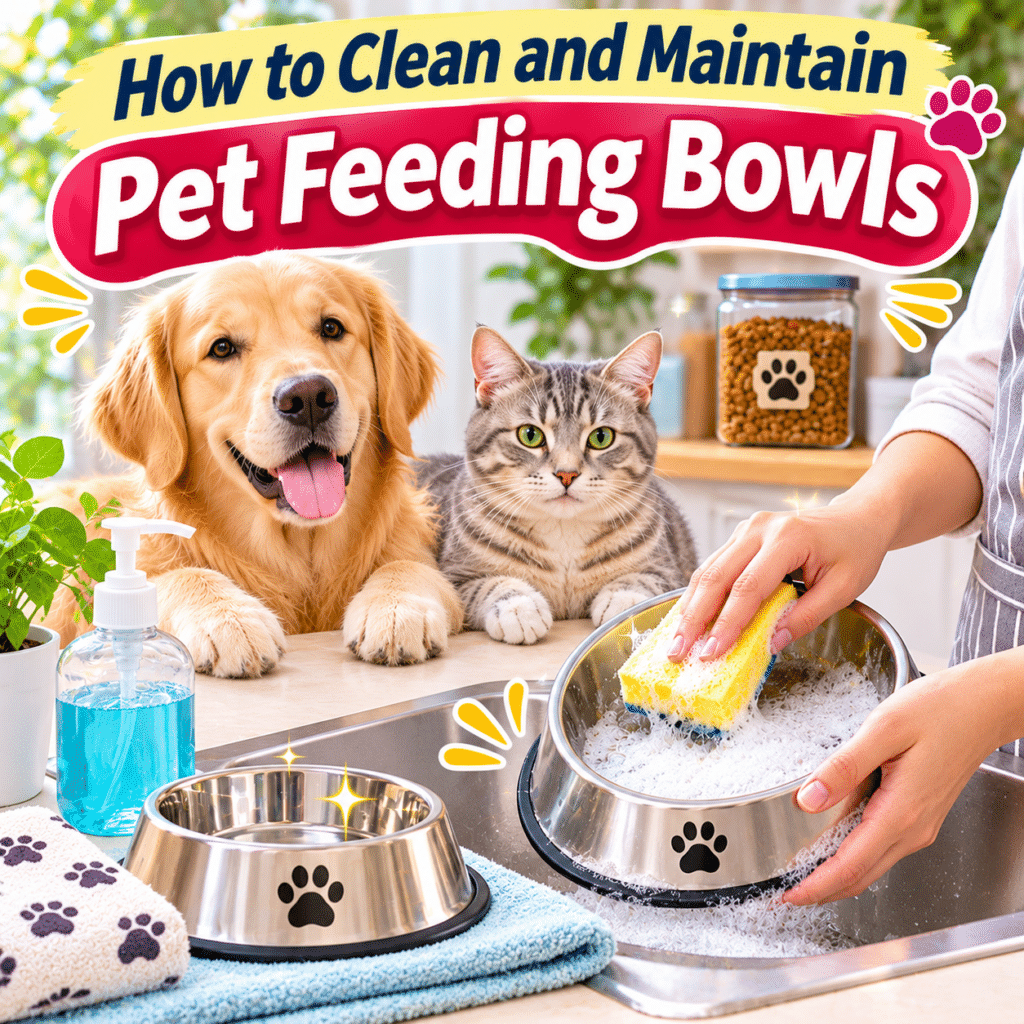
5. How to Clean Pet Food Bowls Step by Step
The following method works for many common pet feeding bowls, provided the manufacturer’s care instructions allow it.
Step 1: Remove Leftover Food
Empty any remaining food into an appropriate waste container.
Do not allow wet food residue to remain in the bowl for extended periods.
Avoid pushing large quantities of food into the sink drain.
Step 2: Rinse Away Loose Particles
Rinse the bowl with warm water to remove crumbs and loose residue.
This helps prepare the surface for washing.
Step 3: Apply Dishwashing Detergent
Add a small amount of suitable dishwashing detergent to the bowl or cleaning tool.
Follow the detergent manufacturer’s instructions.
Step 4: Scrub All Food-Contact Surfaces
Wash the interior thoroughly.
Pay particular attention to:
- The bottom of the bowl.
- Curved interior edges.
- Corners and seams.
- Areas around removable components.
- The outer rim.
- The underside where residue may accumulate.
Use a brush or sponge appropriate for the material.
Avoid abrasive tools that could scratch delicate surfaces.
Step 5: Rinse Thoroughly
Rinse with clean running water until detergent and loosened residue have been removed.
Do not leave visible soap residue inside the bowl.
Step 6: Dry the Bowl
Allow the bowl to air-dry on a clean rack or dry it with a clean towel.
For food storage or stacking, ensure the bowl is completely dry.
Step 7: Inspect Before Reuse
Check for remaining residue, unpleasant odors, cracks, or surface damage.
If the bowl is clean and in good condition, it is ready for the next meal.
6. How to Clean Pet Water Bowls
Water bowls may appear cleaner than food bowls, but they still require regular washing.
Saliva, dust, hair, and environmental particles can accumulate during normal use.
Empty and Refresh Water Regularly
Provide fresh drinking water and replace it whenever it becomes dirty.
Do not simply add fresh water indefinitely without washing the bowl.
Wash the Bowl Daily
Empty the bowl, wash it with suitable detergent and water, rinse thoroughly, and refill with fresh water.
Increase cleaning frequency when necessary.
Pay Attention to Slippery Residue
A slippery film may develop on the inner surface of a water bowl.
This can involve microbial biofilm and other accumulated material.
Scrub the affected surfaces thoroughly with an appropriate cleaning tool.
If the film repeatedly returns quickly, inspect the bowl’s condition and consider whether a different material or design would be easier to maintain.
Clean the Outer Surface
Water splashes can leave marks on the outside of the bowl and the surrounding floor.
Wipe these surfaces regularly.
Monitor Water Quality
Use water appropriate for drinking.
If you notice unusual discoloration, odors, or visible contamination, replace the water and clean the bowl before reuse.
7. Cleaning Stainless Steel Pet Bowls
Stainless steel is a popular material for pet feeding bowls because it is generally durable, nonporous, and relatively easy to clean.
However, quality and construction vary.
Routine Cleaning
Wash stainless steel bowls with warm water and dishwashing detergent.
Use a soft sponge or suitable brush.
Rinse and dry thoroughly.
Removing Water Spots
Mineral deposits from water may leave pale marks or spots.
For compatible stainless steel surfaces, a brief treatment with diluted white vinegar may help loosen mineral deposits.
Follow the manufacturer’s care instructions, rinse thoroughly, and wash again with detergent if needed.
Never combine vinegar with bleach or other cleaning chemicals.
Avoid Harsh Abrasives
Steel wool and aggressive scouring tools can scratch surfaces.
Use gentler cleaning tools whenever possible.
Inspect for Corrosion
Although stainless steel resists corrosion, poor-quality materials or damaged surfaces may develop rust-like marks.
If corrosion, pitting, or other persistent damage appears, assess whether the bowl should be replaced.
8. Cleaning Ceramic Pet Bowls
Ceramic bowls are available in many shapes and designs.
Their suitability depends on the quality of the material, glaze, and construction.
Wash Gently
Use warm water, dishwashing detergent, and a nonabrasive sponge.
Pay attention to the rim and base.
Inspect the Glaze
Check for:
- Chips.
- Cracks.
- Rough edges.
- Damaged glazing.
- Areas that retain residue.
Damaged ceramic surfaces may be difficult to clean effectively and can create injury hazards.
Confirm Food-Contact Suitability
Choose ceramic bowls intended for food use and made with appropriate materials and glazes.
Decorative ceramics are not automatically suitable for pet feeding.
Handle Carefully
Ceramic bowls can break when dropped.
Avoid placing them on unstable surfaces where they may fall.
Replace cracked or chipped bowls rather than continuing to use them.
9. Cleaning Plastic Pet Bowls
Plastic bowls are often lightweight and inexpensive, but they require regular inspection.
Some plastics can become scratched or worn with use.
Use Gentle Cleaning Tools
Wash with warm water and suitable detergent.
Avoid abrasive scrubbing pads that may damage the surface.
Check for Scratches
Deep scratches can make thorough cleaning more difficult.
Inspect the interior regularly.
Watch for Persistent Odors
If a plastic bowl retains unpleasant odors after appropriate cleaning, consider replacing it.
Avoid Unapproved Heat Exposure
Not every plastic bowl is dishwasher-safe or suitable for hot water.
Follow the manufacturer’s temperature and dishwasher instructions.
Replace Damaged Plastic Bowls
Cracked, heavily scratched, warped, or deteriorating plastic bowls should be replaced.
Do not continue using bowls with damaged edges or loose fragments.
10. Comparing Common Pet Bowl Materials
| Material | Main Advantages | Cleaning Considerations | Replacement Concerns |
|---|---|---|---|
| Stainless steel | Durable, generally easy to clean | Wash thoroughly and inspect seams | Corrosion, sharp damage, pitting |
| Ceramic | Stable, available in many designs | Clean glaze and inspect edges | Chips, cracks, damaged glaze |
| Plastic | Lightweight, affordable | Avoid abrasive cleaning and unsuitable heat | Deep scratches, cracks, persistent odors |
| Silicone | Flexible, useful for some travel bowls | Clean folds and creases thoroughly | Tears, deterioration, deformation |
| Glass | Nonporous when intact, easy to inspect | Handle carefully and clean thoroughly | Cracks, chips, breakage |
No material is perfect for every household.
Choose a bowl that is appropriate for your pet, easy to clean, stable during use, and made from materials suitable for food contact.
11. How to Clean Silicone and Travel Bowls
Collapsible silicone bowls are convenient for travel and outdoor activities.
Their flexible design can create folds where residue collects.
Open the Bowl Fully
Expand the bowl before washing so that all surfaces are accessible.
Clean Around the Folds
Use a soft brush or sponge to reach creases and corners.
Rinse Carefully
Remove detergent from all folded areas.
Dry Completely
Allow the bowl to dry fully before collapsing and storing it.
Storing a damp bowl in a closed travel bag can encourage unpleasant odors and unwanted buildup.
Inspect for Damage
Replace silicone bowls that become torn, sticky, distorted, or otherwise deteriorated.
Follow the manufacturer’s instructions regarding heat and dishwasher use.
12. How to Clean Automatic Pet Feeders
Automatic feeders can simplify feeding schedules, but they require attention to hygiene.
Different models have different cleaning requirements.
Disconnect Power Before Cleaning
Unplug the feeder or follow the manufacturer’s power-disconnection procedure before handling electrical components.
Remove Detachable Food-Contact Parts
Many feeders include removable bowls, food trays, or storage hoppers.
Wash only components approved for washing.
Clean Food Residue
Remove crumbs, oils, and accumulated debris from accessible food-contact surfaces.
Avoid Wetting Electrical Components
Do not immerse the main electrical unit unless the manufacturer explicitly states that it is designed for immersion.
Use the recommended cleaning method for nonremovable components.
Dry Before Reassembly
Ensure washed components are completely dry before refilling them with dry food or reconnecting the feeder.
Follow the Manufacturer’s Maintenance Schedule
Some devices require specific procedures for dispensing mechanisms, seals, or sensors.
Consult the product instructions rather than assuming every feeder can be cleaned in the same way.
13. How to Maintain Pet Water Fountains
Pet water fountains contain additional components that can accumulate residue.
These may include reservoirs, pumps, tubing, filters, and drinking surfaces.
Establish a Regular Cleaning Routine
Follow the manufacturer’s recommended cleaning frequency.
Inspect the fountain more often if you notice visible residue, reduced water flow, or contamination.
Disassemble Removable Components
Disconnect power and remove parts according to the instructions.
Avoid forcing components apart.
Clean the Reservoir
Wash accessible surfaces with an appropriate cleaning method.
Pay attention to corners and areas near the pump.
Clean the Pump Carefully
Some pumps have removable covers or small internal components.
Follow the manufacturer’s instructions for cleaning these areas.
Use appropriate brushes when recommended.
Maintain Filters
Filters may require replacement rather than washing.
Follow the specified replacement schedule and instructions.
A filter does not eliminate the need to clean the fountain.
Reassemble and Test
After cleaning, rinsing, and drying components as required, reassemble the fountain correctly.
Refill it and confirm that water circulates normally.
14. Remove Stubborn Residue and Mineral Deposits
Some feeding bowls develop buildup that ordinary rinsing does not remove.
The correct approach depends on the type of residue and bowl material.
Dried Food Residue
Soak the bowl briefly in warm water with suitable dishwashing detergent.
Allow the residue to soften before scrubbing.
Avoid scraping with sharp metal tools.
Greasy Residue
Use dishwashing detergent and warm water.
Scrub the affected surface thoroughly and rinse.
Repeat if necessary.
Mineral Deposits
Hard water may leave pale deposits.
For compatible materials, a diluted vinegar solution may help loosen mineral buildup.
Use it separately from other cleaning chemicals, follow material-care guidance, and rinse thoroughly afterward.
Persistent Odors
Wash the bowl carefully and inspect for scratches or damage.
If odors remain after proper cleaning, replacement may be more practical than repeated use of stronger cleaning products.
Slippery Film
Scrub the bowl thoroughly with detergent and water.
If the surface remains difficult to clean, inspect the material and consider replacing the bowl.
15. Keep the Entire Feeding Area Clean
A hygienic feeding environment includes more than the bowls themselves.
Food crumbs, water spills, and accumulated hair can affect nearby surfaces.
Clean Feeding Mats
Wash or wipe mats according to their materials and care instructions.
Dry them before placing bowls back on top.
Wipe Nearby Floors
Remove food particles and water spills promptly.
This helps maintain cleanliness and reduces slipping hazards.
Inspect Elevated Feeding Stands
Food and water can collect around bowl openings and beneath removable bowls.
Clean these areas regularly.
For wooden stands, avoid leaving moisture trapped against the surface.
Keep Storage Areas Clean
Food storage cabinets and nearby shelves should remain dry and free from spills.
Inspect them periodically for pests and damaged packaging.
Separate Feeding and Waste Areas
Where practical, keep food and water bowls away from litter boxes, waste disposal areas, and cleaning chemicals.
16. Prevent Cross-Contamination During Cleaning
Pet feeding equipment should be handled with attention to household hygiene.
Wash Hands After Handling Bowls
Wash your hands with soap and water after handling used pet bowls, raw pet food, or contaminated cleaning equipment.
Clean Shared Sink Surfaces
If pet bowls are washed in a kitchen sink, clean the sink and surrounding surfaces afterward.
Avoid allowing dirty pet equipment to contact clean dishes or food preparation surfaces.
Keep Cleaning Tools Organized
A dedicated pet bowl brush can make it easier to manage cleaning equipment.
Clean and dry the brush after use.
Use Extra Care With Raw Pet Food
Raw animal-based pet foods can carry harmful microorganisms.
Households using raw diets should follow appropriate food-safety precautions and veterinary guidance.
Cleaning alone cannot eliminate every risk associated with raw feeding.
Consider Vulnerable Household Members
Additional precautions may be appropriate when young children, older adults, pregnant individuals, or people with weakened immune systems live in the household.
Follow relevant food-safety and healthcare guidance.
17. Make Bowl Cleaning Easier in a Busy Household
A practical cleaning system should fit naturally into daily routines.
Keep Cleaning Supplies Accessible
Store suitable cleaning tools near the washing area.
Avoid leaving detergents or cleaning chemicals where pets can reach them.
Use Spare Bowls
Having a second set of clean bowls can make feeding more convenient while used bowls are being washed.
This is especially useful in multi-pet households.
Choose Dishwasher-Safe Bowls When Appropriate
Some stainless steel, ceramic, glass, silicone, and plastic bowls are dishwasher-safe.
Check the manufacturer’s instructions before using a dishwasher.
Follow any specific temperature or cycle requirements.
Build Cleaning Into Feeding Routines
After each meal:
- Remove leftover food.
- Wash the bowl.
- Rinse thoroughly.
- Allow it to dry.
- Prepare a clean bowl for the next feeding.
Repeating the same sequence helps turn cleaning into a manageable habit.
18. Cleaning Pet Bowls in Multi-Pet Households
Homes with several animals may have more bowls and more frequent cleaning needs.
Assign Bowls When Necessary
Individual bowls can be useful when pets have different diets, feeding schedules, or medical needs.
Avoid Mixing Special Diets
Pets receiving prescription diets should have clearly identified feeding equipment when appropriate.
Wash Bowls Between Uses
Do not assume a bowl is clean simply because another pet has finished using it.
Wash food-contact surfaces after meals.
Consider Illness and Infection Control
If a pet has a contagious illness or a condition requiring special hygiene measures, follow veterinary instructions about shared equipment and cleaning.
Organize Clean and Used Bowls
A designated area for clean bowls and another for bowls awaiting washing can reduce confusion.
Keep the two groups physically separated.
19. Common Pet Bowl Cleaning Mistakes
Even well-intentioned routines can overlook important details.
Mistake 1: Only Rinsing Bowls With Water
Rinsing may remove loose particles but does not reliably remove grease and attached residue.
Use suitable detergent and mechanical cleaning.
Mistake 2: Refilling Water Without Washing the Bowl
Fresh water does not remove residue already attached to the bowl.
Wash the bowl regularly.
Mistake 3: Ignoring the Underside and Rim
Food and water can collect around edges and beneath bowls.
Clean all accessible surfaces.
Mistake 4: Using Harsh Abrasives
Aggressive scrubbing tools may scratch surfaces or damage protective finishes.
Choose tools appropriate for the material.
Mistake 5: Mixing Cleaning Chemicals
Combining cleaning chemicals can create dangerous reactions.
Never mix bleach with vinegar, ammonia, or other cleaners.
Mistake 6: Using Products Without Checking Their Suitability
A cleaner intended for floors or bathrooms is not automatically appropriate for food-contact equipment.
Follow the label and manufacturer instructions.
Mistake 7: Reusing Damaged Bowls
Cracked, chipped, or deeply scratched bowls can be difficult to maintain and may present safety hazards.
Replace them when necessary.
Mistake 8: Forgetting Automatic Feeder Components
Food hoppers, removable trays, pumps, and other components also require maintenance.
Follow the equipment manufacturer’s instructions.
Mistake 9: Storing Damp Travel Bowls
Moisture trapped inside folded or closed equipment can contribute to odors and buildup.
Dry thoroughly before storage.
Mistake 10: Neglecting the Feeding Area
Clean bowls placed on dirty mats or contaminated surfaces do not create a fully maintained feeding station.
Include surrounding surfaces in the cleaning routine.
20. Troubleshooting Common Pet Bowl Problems
| Problem | Possible Cause | Recommended Action |
|---|---|---|
| Bowl feels slippery | Biofilm or accumulated residue | Scrub thoroughly with detergent and water |
| Persistent food odor | Residue or deteriorating material | Wash carefully and consider replacement |
| White mineral marks | Hard water deposits | Use a material-compatible cleaning method |
| Rust-like spots | Corrosion or surface contamination | Inspect and replace if damaged |
| Cracked ceramic | Impact or material damage | Replace the bowl |
| Deep scratches in plastic | Wear from use or abrasive cleaning | Replace with an easier-to-clean bowl |
| Water fountain flow decreases | Pump buildup or filter issue | Clean and maintain according to instructions |
| Bowl moves during feeding | Unstable base or slippery floor | Use a stable bowl or suitable nonslip mat |
| Food sticks to the bowl | Dried residue | Soak briefly before washing |
| Pet avoids a bowl | Possible odor, placement, design, or other issue | Inspect the setup and monitor the pet’s behavior |
If a pet suddenly refuses food or water, shows signs of pain, or experiences persistent changes in eating or drinking habits, consult a veterinarian promptly.
21. Frequently Asked Questions
1. How often should I wash my pet’s food bowl?
A practical hygiene routine is to wash food bowls after each meal using suitable dishwashing detergent and water.
2. How often should I clean my pet’s water bowl?
Wash water bowls daily and more frequently when needed. Refresh drinking water whenever it becomes dirty or stale.
3. Can I use regular dish soap to clean pet bowls?
Yes, a dishwashing detergent suitable for food-contact items is generally appropriate when used according to its instructions and rinsed thoroughly.
4. Are pet bowls safe to wash in a dishwasher?
Many are, but dishwasher suitability depends on the material and construction. Always check the manufacturer’s instructions.
5. Is stainless steel better than plastic for pet bowls?
Stainless steel is often durable and easy to clean, while plastic is lightweight and affordable. The best choice depends on quality, condition, cleaning requirements, and your pet’s needs.
6. Why does my pet’s water bowl feel slimy?
A slippery film can develop from microbial biofilm and accumulated organic material. Thorough cleaning helps remove it.
7. Can I use vinegar to clean pet bowls?
Diluted vinegar may help remove mineral deposits from compatible materials. It should not be treated as a universal disinfectant, and it must never be mixed with bleach or other incompatible chemicals.
8. Should I use bleach to disinfect pet bowls?
Routine washing does not generally require bleach. If disinfection is specifically needed, use a method appropriate for food-contact surfaces and follow product, veterinary, or public-health instructions precisely.
9. How do I remove dried food from a bowl?
Soak the bowl briefly in warm water with suitable dishwashing detergent, then scrub with an appropriate cleaning tool.
10. Why does a plastic pet bowl retain odors?
Plastic can become scratched or deteriorate over time, making residue harder to remove. Persistent odors may indicate that replacement is appropriate.
11. Should I replace scratched pet bowls?
Deep scratches that make thorough cleaning difficult are a reasonable reason to replace a bowl, especially when the material is deteriorating.
12. Can ceramic pet bowls go in the dishwasher?
Some can, but not all. Follow the manufacturer’s instructions and avoid using cracked or chipped ceramic bowls.
13. How do I clean an elevated pet feeding station?
Remove the bowls, clean them separately, and wipe the stand and surrounding surfaces. Avoid allowing moisture to remain trapped in wooden or other moisture-sensitive components.
14. Do automatic pet feeders need regular cleaning?
Yes. Food-contact components require cleaning according to the manufacturer’s instructions, even when food is dispensed automatically.
15. How often should a pet water fountain be cleaned?
Follow the manufacturer’s cleaning schedule and inspect it frequently. More frequent cleaning may be necessary depending on use and visible buildup.
16. Should I use a separate sponge for pet bowls?
A dedicated brush or sponge can be a practical way to organize cleaning and reduce confusion. Clean and dry the tool after use.
17. Is it safe to wash pet bowls in the kitchen sink?
Pet bowls can be washed in a kitchen sink with appropriate hygiene precautions. Clean the sink and surrounding surfaces afterward and wash your hands.
18. Can dirty pet bowls make animals sick?
Contaminated feeding equipment can contribute to exposure to harmful microorganisms. Regular cleaning is one way to reduce this risk, although illness can have many causes.
19. How do I keep outdoor pet water bowls clean?
Check them frequently for dirt, insects, algae, and other contamination. Replace the water and wash the bowls as needed, while keeping them away from excessive heat and environmental hazards.
20. When should I replace my pet’s feeding bowl?
Replace a bowl when it develops cracks, chips, deep scratches, corrosion, persistent odors, or other damage that affects safety or cleanability.
22. A Complete Pet Feeding Bowl Maintenance Checklist
Use this checklist to create a reliable routine.
After Every Meal
- Remove leftover food.
- Rinse away loose particles.
- Wash the food bowl with suitable detergent.
- Scrub the interior, rim, and underside.
- Rinse thoroughly.
- Allow the bowl to dry.
- Wipe up nearby spills.
Daily
- Empty and wash water bowls.
- Refill with fresh drinking water.
- Inspect bowls for visible residue.
- Clean feeding mats as needed.
- Check for damaged surfaces.
- Keep the feeding area free of food debris.
Weekly
- Inspect bowl stands and surrounding surfaces.
- Clean reusable cleaning tools.
- Check automatic feeding equipment.
- Review water fountain maintenance needs.
- Inspect hard-to-reach areas for buildup.
- Clean nearby storage surfaces as needed.
Periodically
- Inspect bowls for cracks, chips, and scratches.
- Review manufacturer cleaning instructions.
- Replace worn cleaning tools.
- Replace damaged feeding equipment.
- Review fountain filter replacement requirements.
- Reassess the feeding area’s cleanliness and layout.
Food Safety and Household Hygiene
- Wash hands after handling used feeding equipment.
- Keep cleaning chemicals securely stored.
- Avoid mixing cleaning products.
- Use appropriate products for food-contact surfaces.
- Clean shared sinks and work surfaces after use.
- Follow additional precautions when illness or special health risks are present.
Final Thoughts
Cleaning and maintaining pet feeding bowls is a small daily responsibility that contributes to a cleaner, more comfortable home and a safer feeding environment.
Food and water bowls come into frequent contact with moisture, saliva, and food residue, making consistent cleaning an important part of responsible pet care.
The most effective approach is also one of the simplest: remove leftover food, wash bowls thoroughly with appropriate detergent and water, rinse carefully, and inspect them regularly for damage.
Different materials require slightly different care. Stainless steel is generally durable and easy to maintain, ceramic bowls need regular inspection for chips and cracks, and plastic bowls may require replacement when scratches or deterioration make cleaning difficult.
Automatic feeders and water fountains also need regular maintenance, including attention to removable components, pumps, and filters.
Beyond the bowls themselves, maintaining clean feeding mats, stable stands, and surrounding surfaces helps create a more hygienic feeding station.
By establishing a manageable routine and choosing feeding equipment that is easy to clean, you can make bowl maintenance a natural part of everyday pet care.
A clean feeding bowl may seem like a small detail, but consistent attention to these everyday essentials helps create a healthier, more pleasant environment for the animals who share your home.