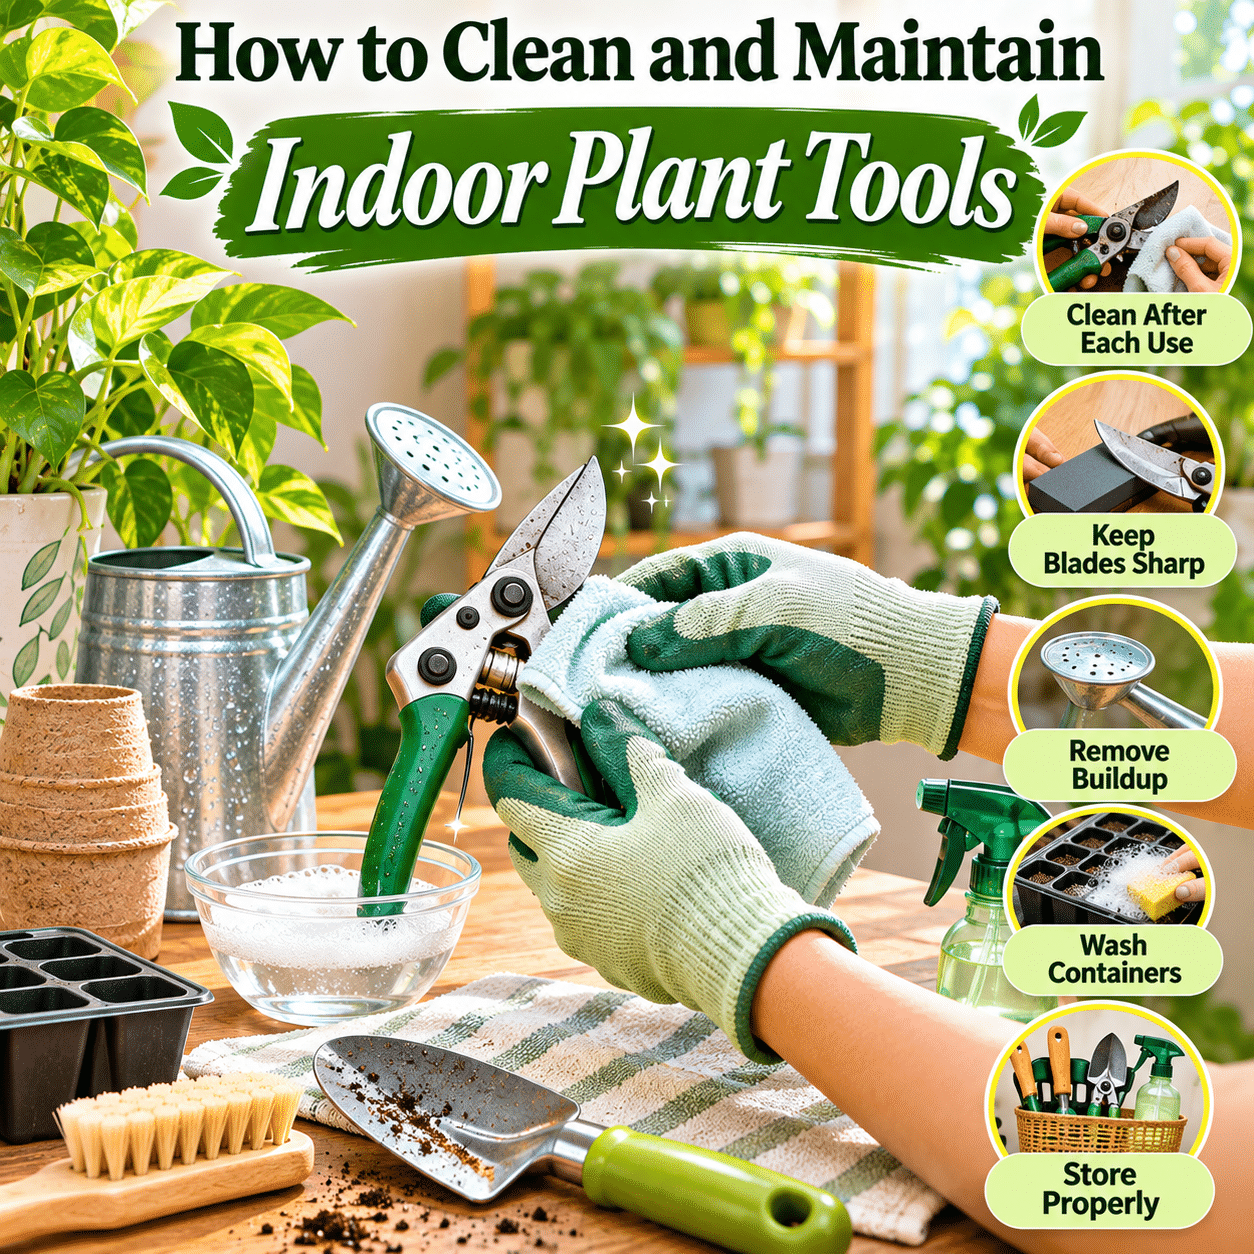
Indoor gardening is a rewarding way to bring greenery into everyday living spaces. From watering houseplants and trimming damaged leaves to repotting growing plants and starting seeds, even a small indoor garden benefits from having a few reliable tools.
However, gardening equipment needs regular attention to remain clean, safe, and effective. Pruning scissors can accumulate plant sap, watering cans may develop mineral deposits, and small trowels can collect old potting media. Seed trays, plant supports, and moisture meters can also become dirty through repeated use.
Neglecting these tools may make routine plant care more difficult. Dull cutting blades can crush stems instead of producing clean cuts, while contaminated equipment may transfer certain plant pathogens between plants.
Fortunately, maintaining indoor gardening tools does not require complicated equipment or expensive cleaning products. Simple habits such as removing debris, washing reusable containers, drying metal surfaces, and storing tools properly can make a meaningful difference.
The most effective approach is to understand what each tool needs, how frequently it should be cleaned, and when additional disinfection or maintenance may be necessary.
This guide explains how to clean and maintain common indoor plant tools, including pruning scissors, watering cans, trowels, repotting equipment, seed trays, moisture meters, plant supports, and gardening accessories.
It also explores practical storage methods, common maintenance mistakes, and simple routines that help keep indoor gardening equipment ready for everyday use.
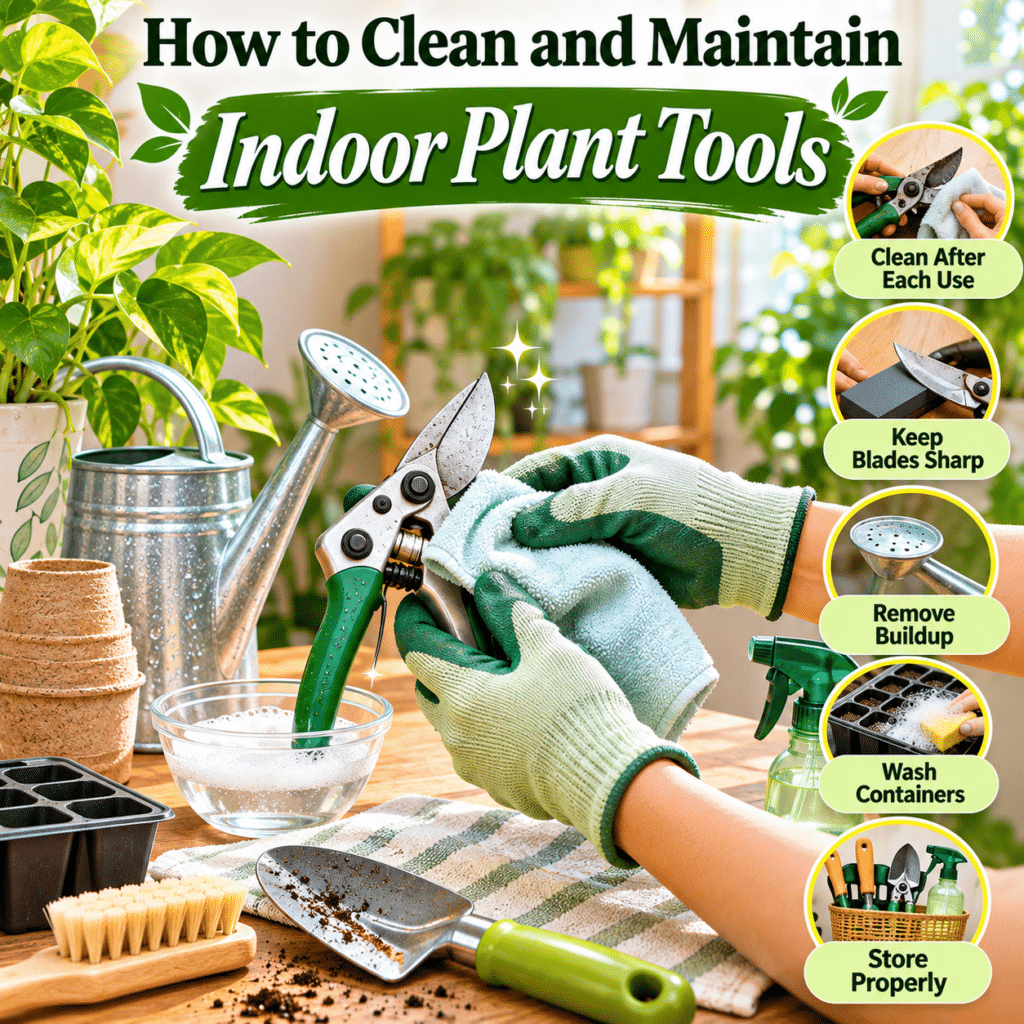
1. Understand Why Cleaning Indoor Plant Tools Matters
Gardening tools come into contact with potting media, water, plant tissues, and other materials during routine care.
Over time, these materials can accumulate on tool surfaces.
Regular cleaning helps:
- Remove soil and organic debris.
- Maintain cutting performance.
- Reduce unnecessary wear.
- Prevent some forms of corrosion.
- Improve handling and safety.
- Reduce the risk of transferring certain plant pathogens.
- Extend the useful life of equipment.
- Keep indoor gardening areas organized.
Clean tools are also easier to inspect for damage.
A simple cleaning routine can reveal loose screws, worn handles, dull blades, or cracked containers before they cause problems.
2. Understand the Difference Between Cleaning and Disinfecting
Cleaning and disinfecting are related but different activities.
Cleaning removes visible dirt, plant sap, dust, potting media, and other residues.
Disinfecting uses an appropriate chemical or other validated method to reduce or inactivate certain microorganisms on a surface.
Cleaning should generally come first because organic debris can interfere with disinfection.
Not every tool requires chemical disinfection after every use.
However, disinfection becomes especially important when tools have contacted diseased plant material or when equipment will be reused for vulnerable seedlings.
Always follow the disinfectant manufacturer’s instructions, including surface compatibility, dilution, required contact time, ventilation, and rinsing requirements.
3. Identify the Tools in Your Indoor Gardening Collection
Before establishing a maintenance routine, identify the tools you use regularly.
Common indoor gardening equipment includes:
- Pruning scissors.
- Hand pruners.
- Small trowels.
- Soil scoops.
- Watering cans.
- Spray bottles.
- Moisture meters.
- Seed-starting trays.
- Nursery pots.
- Repotting mats.
- Plant stakes.
- Trellises.
- Plant ties.
- Gardening gloves.
- Plant brushes.
- Grow lights.
- Plant stands.
Different materials require different cleaning methods.
Metal blades, plastic containers, wooden handles, and electronic instruments should not all be treated identically.
4. Create a Simple Tool-Cleaning Routine
A practical maintenance system can be divided into three levels.
After each use: Remove loose debris, wipe away moisture, and return tools to a suitable storage location.
Periodically: Wash frequently used equipment, inspect moving parts, and check for signs of wear.
When contamination is suspected: Clean thoroughly and disinfect appropriate surfaces before using them on other plants.
This approach avoids unnecessary work while keeping equipment in good condition.
The exact frequency depends on how often tools are used and the types of tasks performed.
5. Gather Basic Cleaning Supplies
Most indoor gardening tools can be maintained with ordinary household cleaning materials.
Useful supplies include:
- Mild dish soap.
- Clean water.
- Soft cloths.
- A small cleaning brush.
- An old toothbrush reserved for gardening.
- A nonabrasive sponge.
- A clean drying towel.
- A suitable blade-sharpening tool.
- Manufacturer-recommended lubricant.
- Protective gloves.
- A labeled cleaning container.
For situations requiring disinfection, use a product appropriate for the tool material and intended purpose.
Avoid mixing cleaning chemicals.
Never combine bleach with ammonia, acids, or other incompatible products.
6. Prepare a Safe Cleaning Area
Choose a location where gardening equipment can be cleaned without contaminating food preparation surfaces.
A utility sink, outdoor washing area, or protected work surface may be suitable.
If using a household sink, clean the sink afterward.
Keep sharp tools away from children and pets.
Use gloves when handling cutting blades or cleaning products.
Provide ventilation when required by the product label.
Avoid splashing dirty water onto nearby plants or household items.
7. Remove Loose Soil Before Washing
Dry soil and potting media are often easier to remove before wet cleaning.
Use a soft brush or cloth to remove loose particles from trowels, scoops, and other equipment.
Pay attention to:
- Blade edges.
- Tool joints.
- Handle connections.
- Container corners.
- Drainage openings.
- Textured surfaces.
Removing loose material first makes washing more effective.
It also reduces the amount of debris entering household drains.
8. Wash Tools With Mild Soap and Water
For many non-electronic tools, mild soap and water are sufficient for routine cleaning.
Apply a small amount of detergent to a damp cloth or sponge.
Gently scrub dirty surfaces.
Use a small brush for difficult-to-reach areas.
Rinse when appropriate for the material.
Dry thoroughly before storage.
Avoid prolonged soaking of tools with wooden handles, exposed metal joints, or components that may corrode.
9. Dry Tools Thoroughly After Cleaning
Moisture left on metal surfaces can contribute to corrosion.
Water trapped inside joints or handles may also cause deterioration.
After washing:
- Remove excess water.
- Wipe surfaces with a clean towel.
- Pay attention to joints and crevices.
- Allow remaining moisture to evaporate.
- Store tools only when sufficiently dry.
For electronic devices, follow the manufacturer’s drying and cleaning instructions.
Never immerse equipment that is not designed to be submerged.
10. Clean Pruning Scissors After Use
Pruning scissors frequently contact leaves, stems, and plant sap.
Residue can accumulate along cutting edges and around the pivot.
After routine pruning:
- Remove visible plant material.
- Wipe away sap.
- Clean the blade surfaces.
- Dry the scissors.
- Check that the blades open and close smoothly.
If sap has dried onto the blades, use a cleaning method compatible with the blade material.
Avoid scraping delicate coatings with abrasive objects.
Regular cleaning helps maintain smooth cutting performance.
11. Disinfect Pruning Tools When Disease Is Suspected
Pruning tools can transfer certain pathogens through contaminated plant material.
If a plant shows signs of infectious disease, clean and disinfect the cutting tool before using it on another plant.
The same precaution may be appropriate between cuts when managing certain diseases.
Remove sap and debris first.
Then use a suitable disinfectant according to its label.
Observe the required contact time.
Allow the tool to dry or rinse it when directed.
Disinfection reduces risk but does not guarantee that every possible pathogen has been eliminated.
12. Understand the Limitations of Rubbing Alcohol
Alcohol is sometimes used to disinfect small pruning tools.
However, its effectiveness depends on the formulation, concentration, contact time, and microorganisms involved.
Not every alcohol product is appropriate for every surface or plant pathogen.
Alcohol can also affect some plastics, finishes, and coatings.
Use a product with suitable instructions for the intended application.
Keep alcohol away from flames, sparks, and heat sources.
Never apply it to energized electrical equipment.
13. Sharpen Pruning Blades When Necessary
Sharp pruning blades make cleaner cuts and generally require less force.
Dull blades may crush or tear plant tissues.
Signs that sharpening may be needed include:
- Increased cutting resistance.
- Ragged cuts.
- Crushed stems.
- Blades slipping rather than cutting.
- Visible dullness or minor edge damage.
Use a sharpening tool suitable for the blade design.
Follow the manufacturer’s instructions and preserve the original cutting angle.
Some specialty blades are not intended for home sharpening.
Replace damaged blades when sharpening cannot restore safe performance.
14. Maintain Pruner Hinges and Moving Parts
Pruning tools often contain springs, screws, and pivot joints.
These components can accumulate debris or become stiff over time.
Inspect moving parts periodically.
Remove trapped dirt with a small brush.
Tighten loose fasteners only according to the tool’s design.
Apply a small amount of suitable lubricant when recommended by the manufacturer.
Wipe away excess lubricant to prevent unnecessary residue buildup.
15. Inspect Pruning Tools for Damage
Before pruning, check that the tool operates safely.
Look for:
- Cracked handles.
- Loose blades.
- Damaged springs.
- Bent cutting edges.
- Excessive corrosion.
- Unstable locking mechanisms.
Do not continue using a tool that may fail during operation.
Repair or replace damaged equipment as appropriate.
Safe tools are especially important when pruning woody stems or larger indoor plants.
16. Clean Hand Trowels and Soil Scoops
Trowels and scoops come into direct contact with potting media.
After repotting or mixing soil:
- Brush away loose growing media.
- Wash remaining residue with mild soap and water.
- Clean around handle connections.
- Rinse as appropriate.
- Dry thoroughly.
For tools with wooden handles, avoid extended soaking.
If a tool was used with potentially contaminated media, additional disinfection may be appropriate.
17. Remove Stubborn Potting Media Residue
Some growing media adhere firmly to textured or scratched surfaces.
Allowing the material to soften briefly with water may make removal easier for water-safe tools.
Use a soft brush rather than aggressive scraping whenever possible.
Avoid abrasive cleaners that damage protective coatings.
For tools with joints or wooden components, use a damp cloth instead of prolonged immersion.
18. Prevent Rust on Metal Gardening Tools
Rust can develop when susceptible metals are repeatedly exposed to moisture.
To reduce corrosion:
- Dry tools after washing.
- Avoid storing them in damp containers.
- Keep metal surfaces free from accumulated residue.
- Inspect protective coatings.
- Apply appropriate protective products when recommended.
- Store equipment in a dry location.
Stainless steel is generally more corrosion-resistant than ordinary carbon steel, but it is not completely immune to corrosion.
Proper maintenance remains useful.
19. Address Minor Surface Rust Carefully
Small areas of surface rust may sometimes be removed with a suitable nonaggressive cleaning method.
Use products and techniques compatible with the metal.
Avoid damaging cutting edges or protective finishes.
After treatment, clean and dry the tool.
Apply appropriate protection if recommended.
Severe corrosion that weakens the tool may require replacement.
Do not use heavily damaged equipment simply because it still appears functional.
20. Care for Wooden Tool Handles
Wooden handles can absorb moisture and may deteriorate when stored wet.
Clean them with a slightly damp cloth and mild soap when necessary.
Avoid soaking.
Dry promptly.
Inspect for splinters, cracks, or loose connections.
Some unfinished wooden handles may benefit from occasional treatment with a manufacturer-recommended conditioning product.
Avoid applying slippery oils that could reduce grip safety.
21. Clean Watering Cans Regularly
Watering cans can accumulate mineral deposits, algae, and sediment.
The likelihood depends on water quality, light exposure, and storage conditions.
To clean a watering can:
- Empty remaining water.
- Rinse the interior.
- Wash with mild soap when needed.
- Use a soft brush for accessible surfaces.
- Rinse thoroughly.
- Allow the container to dry.
Pay attention to narrow spouts and removable watering heads.
22. Remove Mineral Deposits From Watering Equipment
Hard water can leave mineral deposits inside watering cans and spouts.
These deposits may appear as white or chalky residue.
For compatible materials, a mild acidic descaling product may help dissolve mineral buildup.
Follow the manufacturer’s instructions.
Rinse thoroughly afterward.
Avoid acidic cleaners on materials that may be damaged by them.
Never mix acidic descalers with bleach or other incompatible chemicals.
23. Prevent Algae Growth in Watering Cans
Algae may develop when water remains in a container exposed to light.
Although algae do not always indicate a serious problem, buildup can make equipment harder to clean.
Helpful practices include:
- Emptying unused water.
- Cleaning the container periodically.
- Avoiding unnecessary long-term water storage.
- Keeping stored equipment out of strong light.
- Allowing containers to dry when practical.
Opaque containers may reduce light exposure inside stored water.
24. Clean Narrow Watering Spouts
Narrow spouts can collect sediment or mineral deposits.
A suitable small cleaning brush may help remove buildup.
Avoid forcing sharp objects into the opening.
For removable spout attachments, follow the manufacturer’s cleaning instructions.
Make sure the opening is clear before watering delicate plants.
A partially blocked spout may produce uneven water flow.
25. Maintain Spray Bottles and Plant Misters
Spray bottles are sometimes used for cleaning foliage, applying appropriate plant-care solutions, or temporarily wetting surfaces.
Their nozzles can become blocked by residue.
Routine maintenance includes:
- Emptying unused solutions when appropriate.
- Rinsing the bottle.
- Cleaning the nozzle.
- Checking the spray mechanism.
- Inspecting seals.
- Allowing components to dry.
Never reuse a bottle that previously contained hazardous household chemicals for watering or misting plants.
Clearly label bottles used for different purposes.
26. Avoid Mixing Residues From Different Spray Products
A spray bottle used for one plant-care product should not automatically be reused for another.
Residues may react or contaminate the new solution.
This is especially important for fertilizers, pesticides, cleaning chemicals, and disinfectants.
Follow product-label instructions for cleaning and reuse.
When practical, dedicate separate labeled bottles to different applications.
Do not transfer chemicals into unlabeled containers.
27. Clean Moisture Meter Probes
Moisture meters may accumulate potting media residue on their probes.
After use, gently remove adhering material.
For simple non-electronic probes, a soft cloth may be sufficient.
Follow the manufacturer’s cleaning instructions.
Avoid scratching or damaging sensitive probe surfaces.
Do not immerse the electronic housing unless the device is specifically designed for that purpose.
28. Protect Electronic Moisture Meters
Electronic moisture meters may contain batteries, displays, and electrical components.
Keep the housing protected from water.
Avoid leaving devices outdoors or in persistently humid conditions unless rated for such environments.
Check battery compartments periodically.
Replace batteries according to the manufacturer’s instructions.
Store the device in a dry location.
29. Understand Why Moisture Meter Maintenance Matters
Dirty or corroded probes may affect the reliability of some measurements.
However, inconsistent readings can also result from the growing medium’s composition, salinity, and probe contact.
Cleaning helps maintain the instrument but does not eliminate all measurement limitations.
Use moisture meters as supplementary tools alongside physical checks of the growing medium.
30. Clean Soil Thermometers and Other Sensors
Soil thermometers, humidity monitors, and environmental sensors may be useful in indoor gardening.
Clean exposed surfaces gently.
Avoid abrasive products on displays and sensor openings.
Keep moisture away from electrical contacts.
Follow device-specific instructions for calibration, battery replacement, and storage.
Some sensors require specialized cleaning procedures.
Do not assume that all instruments can be washed with water.
31. Clean Seed-Starting Trays Between Uses
Seed-starting trays are reused frequently in indoor gardening.
Old growing media and plant debris can remain in tray corners and drainage holes.
Before reusing a tray:
- Remove old potting mix.
- Brush away loose debris.
- Wash the tray with soap and water.
- Rinse thoroughly.
- Disinfect when appropriate.
- Allow it to dry or follow the disinfectant’s instructions.
This is particularly important if previous seedlings experienced damping-off or other suspected infectious problems.
32. Clean Reusable Nursery Pots
Nursery pots may accumulate mineral deposits, roots, and old potting media.
Remove all previous growing material before cleaning.
Wash the inside and outside surfaces.
Pay attention to drainage holes.
If a previous plant suffered from suspected infectious root disease, appropriate disinfection may reduce contamination risk.
Inspect pots for cracks and damaged rims.
Discard containers that can no longer support plants safely.
33. Maintain Biodegradable Seed Containers Appropriately
Biodegradable seed-starting pots are designed for particular growing uses and may not be intended for repeated cleaning.
Some materials weaken after becoming wet.
Do not attempt to reuse containers that have lost structural integrity.
Follow product guidance regarding transplanting and disposal.
Avoid treating biodegradable materials with cleaning chemicals unless specifically recommended.
34. Clean Repotting Mats
Repotting mats help contain loose growing media during indoor plant maintenance.
After use:
- Collect loose potting mix.
- Remove leaves and roots.
- Wipe away residue.
- Wash when appropriate for the material.
- Rinse if needed.
- Dry before folding or storage.
Moisture trapped inside a folded mat can encourage odors or material deterioration.
Inspect seams, snaps, and corners periodically.
35. Maintain Plant Stakes and Trellises
Plant supports may come into contact with moist potting media and plant tissues.
Cleaning requirements depend on the material.
Plastic and metal supports can often be washed and, when appropriate, disinfected.
Wooden and natural-fiber supports may absorb moisture and can be harder to disinfect thoroughly.
Inspect supports for:
- Mold-like growth.
- Rot.
- Cracks.
- Corrosion.
- Sharp edges.
- Structural weakness.
Replace supports that are damaged or difficult to clean adequately after disease exposure.
36. Clean Plant Ties and Clips
Reusable plant ties and clips can collect dirt or plant residue.
Remove them carefully to avoid damaging stems.
Wash reusable plastic components when appropriate.
Inspect for sharp edges or loss of flexibility.
Discard ties that have become brittle or damaged.
Soft ties should not be tightened so firmly that they restrict stem growth.
37. Maintain Moss Poles and Natural-Fiber Supports
Moss poles and similar supports often contain moisture-retentive materials.
They cannot always be cleaned or disinfected like smooth plastic or metal tools.
Routine care may include:
- Removing loose debris.
- Checking structural stability.
- Inspecting for unwanted growth.
- Monitoring moisture.
- Replacing deteriorated material.
If a support is heavily contaminated by suspected disease, replacement may be more practical than attempting to disinfect the entire structure.
38. Clean Gardening Gloves
Gardening gloves protect hands from dirt, minor abrasions, and some plant materials.
Cleaning methods depend on the glove material.
Fabric gloves may be washable according to their care labels.
Rubber or waterproof gloves can often be wiped or washed.
Leather gloves usually require specialized care.
Remove visible debris after use.
Dry gloves thoroughly before storage.
Replace gloves that have holes, damaged seams, or reduced protective function.
39. Wash Plant-Cleaning Brushes and Cloths
Soft brushes and cloths are often used to remove dust from foliage.
These accessories may collect plant debris and residues.
Wash reusable cloths according to their material instructions.
Clean brushes gently and allow them to dry.
Avoid transferring residues from diseased plants to healthy plants.
Use separate cleaning materials when contamination is suspected.
40. Maintain Grow Lights and Plant Equipment Safely
Grow lights and other electrical equipment require different maintenance from ordinary hand tools.
Before cleaning:
- Turn off the equipment.
- Disconnect it from the power source.
- Allow hot components to cool.
- Follow the manufacturer’s cleaning instructions.
- Use only approved cleaning methods.
- Allow all appropriate surfaces to dry before reconnecting power.
Dust accumulation may reduce light output or interfere with ventilation.
Inspect cords, plugs, mounting hardware, and fixtures periodically.
Never spray cleaning liquids directly onto energized electrical equipment.
Do not use damaged electrical devices.
Practical Step-by-Step Guide: How to Clean Indoor Plant Tools
A simple maintenance process can be applied to many common non-electronic gardening tools.
Step 1: Gather the Used Equipment
Collect pruning tools, trowels, scoops, trays, and other items that need cleaning.
Separate electronic devices and delicate materials.
Step 2: Inspect for Damage
Check blades, handles, joints, and container surfaces.
Identify any equipment requiring repair or replacement.
Step 3: Remove Loose Debris
Brush away potting media, leaves, and plant residue.
Dispose of potentially diseased plant material appropriately.
Step 4: Wash Compatible Tools
Use mild soap and water for tools that can safely be washed.
Clean textured surfaces and joints carefully.
Step 5: Rinse Thoroughly
Remove soap residue when rinsing is appropriate for the material.
Avoid immersing wooden handles or electronic components.
Step 6: Disinfect When Necessary
For tools exposed to suspected infectious plant disease, apply a suitable disinfectant after cleaning.
Follow the product’s directions and required contact time.
Step 7: Dry the Equipment
Use a clean towel to remove moisture.
Allow joints and hidden areas to dry sufficiently.
Step 8: Maintain Moving Parts
Inspect hinges and springs.
Apply appropriate lubrication when recommended.
Step 9: Sharpen Cutting Tools if Needed
Use a suitable sharpening method.
Maintain the blade’s original geometry.
Step 10: Organize the Tools
Return equipment to a clean, dry storage area.
Keep sharp tools protected.
Step 11: Record Repairs or Replacements
Make note of tools that need sharpening, new batteries, replacement parts, or complete replacement.
Step 12: Repeat the Routine Consistently
Perform quick cleaning after use and more detailed maintenance when needed.
How to Organize an Indoor Gardening Tool Station
A dedicated storage area can make plant care more convenient.
The station does not need to be large.
A drawer, small cabinet, storage basket, or compact utility shelf may be sufficient.
Consider organizing equipment by function.
Cutting tools: Pruning scissors, shears, and replacement blades.
Repotting tools: Trowels, scoops, and repotting mats.
Watering equipment: Watering cans and appropriate spray bottles.
Monitoring tools: Moisture meters and thermometers.
Propagation supplies: Seed trays, labels, and small containers.
Maintenance supplies: Brushes, cleaning cloths, and approved lubricants.
Keep chemicals stored according to their labels and away from children, pets, food, and gardening supplies that could become contaminated.
Practical Indoor Plant Tool Maintenance Checklist
Use this checklist to keep gardening equipment in reliable condition.
After Each Use
- Remove loose potting media.
- Wipe plant sap from cutting blades.
- Remove trapped leaves and roots.
- Dry tools that became wet.
- Empty unnecessary standing water.
- Return equipment to its storage location.
Cutting Tools
- Pruning blades are clean.
- Cutting edges remain sharp.
- Hinges move smoothly.
- Handles are secure.
- Springs and locks function properly.
- Tools exposed to suspected disease have been cleaned and disinfected appropriately.
Watering Equipment
- Watering cans are free from excessive residue.
- Spouts are not blocked.
- Spray nozzles function properly.
- Bottles are clearly labeled.
- Unused solutions are managed according to their labels.
Repotting Equipment
- Trowels and scoops are clean.
- Metal surfaces are dry.
- Wooden handles are undamaged.
- Repotting mats are clean and dry.
- Nursery pots are suitable for reuse.
Seed-Starting Supplies
- Old growing media have been removed.
- Seed trays are washed.
- Containers have appropriate drainage.
- Previously contaminated trays have received suitable treatment.
- Damaged containers have been replaced.
Electronic Equipment
- Moisture meter probes are clean.
- Displays and housings are dry.
- Batteries are in suitable condition.
- Grow lights are free from excessive dust.
- Electrical cords and plugs are undamaged.
- Cleaning follows manufacturer instructions.
Storage
- Tools are stored in a dry location.
- Sharp blades are protected.
- Equipment is easy to locate.
- Cleaning chemicals are stored safely.
- Damaged tools are separated for repair or replacement.
Common Indoor Plant Tool Problems and Solutions
| Problem | Possible cause | Practical solution |
|---|---|---|
| Pruning scissors become sticky | Dried plant sap | Clean with a compatible product and dry |
| Pruning blades make ragged cuts | Dull or damaged cutting edges | Sharpen appropriately or replace |
| Scissors become difficult to open | Dirt or corrosion in the pivot | Clean and lubricate as recommended |
| Metal trowels develop rust | Moisture exposure | Remove minor rust safely and improve drying |
| Wooden handles become rough | Moisture or surface wear | Clean, dry, and condition when appropriate |
| Watering can develops white deposits | Mineral buildup | Use a compatible descaling method |
| Watering can develops green buildup | Algae growth | Empty, clean, and reduce prolonged light exposure |
| Spray bottle stops misting | Blocked nozzle or damaged mechanism | Clean or replace the nozzle |
| Moisture meter gives inconsistent readings | Dirty probe, media characteristics, or device limitations | Clean and verify readings using other methods |
| Seed trays develop persistent residue | Old growing media or mineral deposits | Wash thoroughly before reuse |
| Reusable pots retain old roots | Incomplete cleaning | Remove debris and wash |
| Repotting mat develops odors | Moisture trapped during storage | Clean and dry before folding |
| Plant ties become brittle | Material aging or environmental exposure | Replace damaged ties |
| Moss pole deteriorates | Moisture and natural material breakdown | Replace deteriorated components |
| Grow light becomes dusty | Accumulated airborne particles | Disconnect power and clean according to instructions |
| Gardening gloves develop odors | Moisture and trapped debris | Wash appropriately and dry thoroughly |
| Tools transfer suspected disease | Inadequate cleaning or disinfection | Clean and disinfect suitable surfaces between affected plants |
Regular inspection helps prevent small maintenance issues from becoming larger problems.
Simple Maintenance Schedule for Indoor Gardening Tools
A flexible schedule can help organize maintenance without creating unnecessary work.
| Frequency | Suggested activities |
|---|---|
| After each use | Remove debris, wipe sap, dry tools, and store properly |
| Weekly or during regular plant care | Inspect frequently used tools and clean watering equipment when needed |
| Monthly | Check blade sharpness, hinges, handles, and storage conditions |
| Between seed-starting batches | Wash trays, pots, and propagation equipment; disinfect when appropriate |
| After contact with suspected infectious disease | Clean and disinfect suitable tools before reuse |
| Before major repotting sessions | Inspect tools, clean work surfaces, and prepare containers |
| Periodically | Review electronic equipment, batteries, cords, and lighting fixtures |
| When damage appears | Repair or replace unsafe equipment |
These intervals are practical guidelines rather than strict requirements.
A tool used every day may need more attention than one used only occasionally.
Frequently Asked Questions
1. How often should I clean indoor plant tools?
Remove debris and moisture after each use.
Wash tools when residue accumulates.
Disinfect appropriate equipment after contact with suspected infectious plant disease or when preparing sensitive propagation materials.
2. Can I clean gardening tools with dish soap?
Mild dish soap and water are suitable for routine cleaning of many non-electronic tools.
Always consider the material and manufacturer instructions.
Soap removes dirt and residue but should not automatically be treated as a disinfectant.
3. Do pruning scissors need to be disinfected after every plant?
Routine cleaning is helpful.
Disinfection is particularly important when pruning diseased plants or when a specific pathogen presents a transmission risk.
Follow appropriate plant-health guidance for higher-risk situations.
4. Can rubbing alcohol be used on pruning tools?
Some alcohol-based products are used for disinfecting suitable surfaces.
However, effectiveness depends on the product and application.
Follow the label and consider material compatibility, contact time, and fire safety.
5. How do I remove sticky sap from pruning scissors?
Wipe away fresh sap promptly.
For dried residue, use a cleaning product compatible with the blade material.
Avoid abrasive methods that damage cutting edges or coatings.
6. How can I prevent gardening tools from rusting?
Clean and dry metal tools after use.
Store them in a dry location.
Maintain protective coatings and apply suitable lubricants or protective products when recommended.
7. Should I sharpen indoor plant pruning scissors?
Sharpening may be necessary when blades become dull and produce ragged cuts.
Use a method appropriate for the blade design.
Replace blades that are severely damaged or not intended for home sharpening.
8. How do I clean a watering can?
Empty the container, remove sediment, wash with mild soap when needed, rinse thoroughly, and allow it to dry.
Use compatible cleaning methods for mineral deposits.
9. Why does my watering can develop green residue?
Algae may grow when water remains in a container exposed to light.
Regular cleaning, emptying unused water, and appropriate storage can reduce buildup.
10. Can I reuse seed-starting trays?
Yes, if they remain structurally sound.
Remove old media, wash thoroughly, and disinfect when appropriate, especially after previous seedling disease problems.
11. Should I disinfect old nursery pots?
Cleaning is important before reuse.
Disinfection is particularly useful when the previous plant experienced suspected infectious disease.
Use a method compatible with the container material.
12. Can I wash an electronic moisture meter?
Usually, only the parts specified by the manufacturer should be cleaned with moisture.
Avoid immersing electronic housings unless the device is designed for it.
13. How should I clean plant supports?
Cleaning depends on the material.
Smooth plastic or metal supports are often easier to wash and disinfect.
Natural-fiber supports may require replacement if they become severely deteriorated or contaminated.
14. What is the best way to store indoor gardening tools?
Choose a clean, dry, accessible location.
Protect sharp blades, separate chemicals from ordinary supplies, and avoid storing wet equipment in closed containers.
15. When should I replace a gardening tool?
Replace tools when damage compromises safety or performance and practical repair is not possible.
Examples include cracked handles, severely corroded blades, damaged electrical cords, and unstable containers.
Final Thoughts
Cleaning and maintaining indoor plant tools is a simple but valuable part of responsible houseplant care.
Although gardening equipment is designed to handle soil, water, and plant material, regular maintenance helps preserve its performance and reduces avoidable problems.
Clean pruning scissors make plant care easier, properly maintained watering equipment delivers water more reliably, and reusable seed trays provide a better starting point for new seedlings.
Equally important is understanding when ordinary cleaning is sufficient and when additional disinfection is appropriate. Tools that have contacted suspected infectious plant material deserve particular attention before being used elsewhere.
A practical maintenance routine does not need to be complicated. Removing debris after use, washing equipment when necessary, drying metal surfaces, checking for damage, and organizing storage can prevent many common issues.
Over time, these small habits can extend the useful life of gardening equipment and make indoor plant care more convenient.
Whether you maintain a single windowsill plant or an extensive collection of indoor greenery, keeping your tools clean and functional supports a more organized and enjoyable gardening experience.
Healthy indoor gardening begins with thoughtful plant care, and well-maintained tools make that care easier, safer, and more consistent every day.