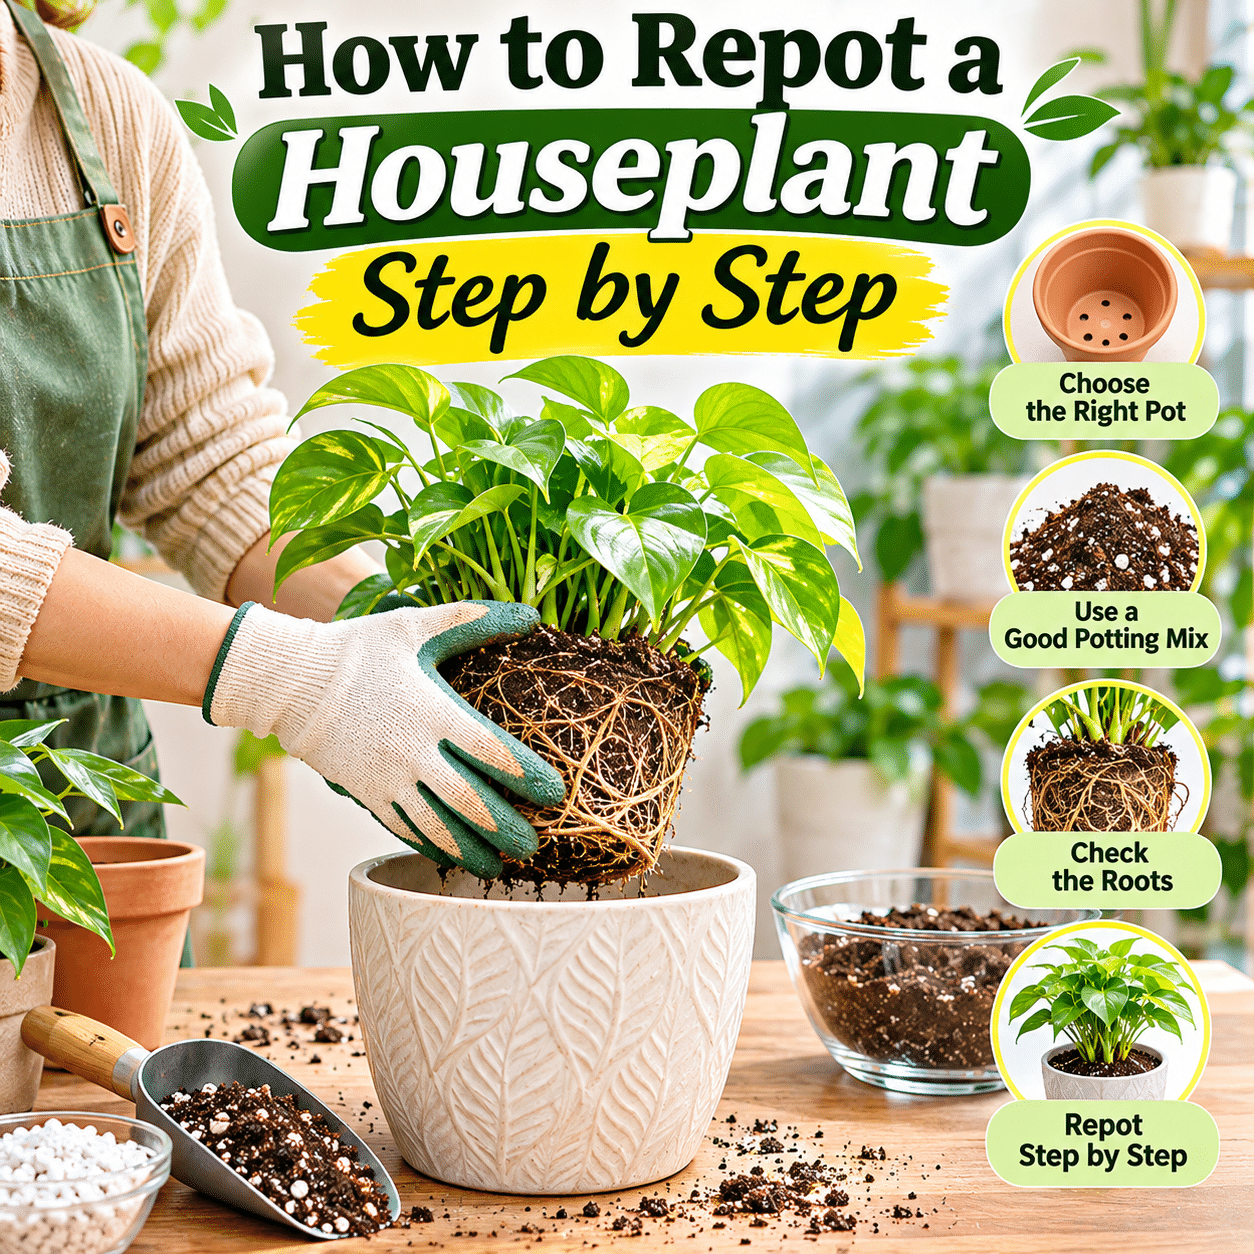
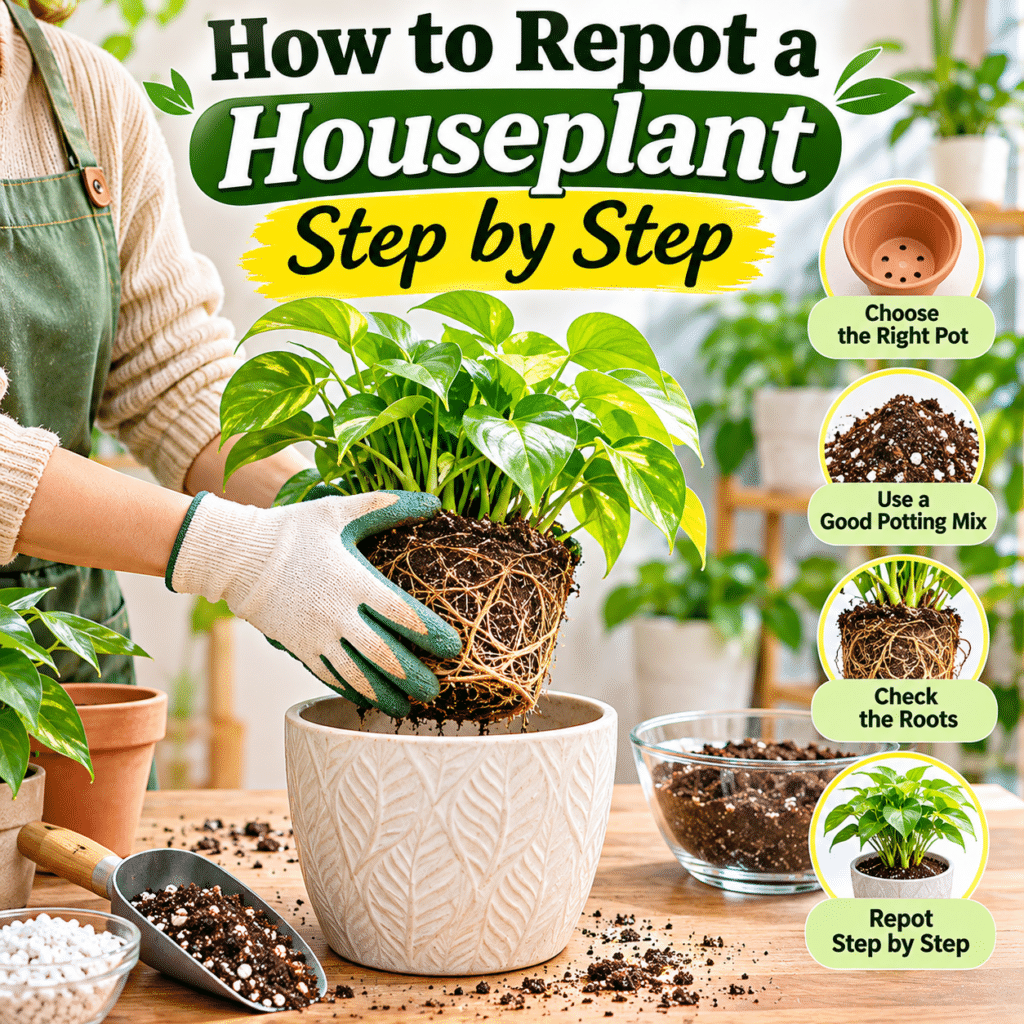
Repotting is an essential part of caring for indoor plants. As houseplants grow, their roots gradually occupy more space, potting materials break down, and the conditions inside their containers can change. Providing a suitable growing environment helps plants maintain healthy roots, absorb water and nutrients, and continue developing over time.
However, repotting is not simply a matter of transferring a plant into a larger decorative container. Choosing the right pot, selecting appropriate potting media, handling roots carefully, and providing proper aftercare can all influence how successfully a plant adjusts to its new environment.
Some houseplants need repotting because their roots have outgrown their containers. Others may benefit from fresh potting media, improved drainage, or attention to unhealthy roots.
At the same time, unnecessary repotting can disturb a plant’s root system and temporarily interrupt its growth. Understanding when repotting is truly needed is just as important as knowing how to perform the process.
Different plants also respond differently to root disturbance. A fast-growing tropical foliage plant may tolerate repotting relatively well, while a sensitive or slow-growing species may require additional care.
This guide explains how to recognize when a houseplant needs repotting, prepare the necessary supplies, choose suitable containers and growing media, complete the repotting process safely, and support healthy recovery afterward.
Whether you are caring for your first indoor plant or maintaining an established collection, a thoughtful repotting routine can help keep your plants comfortable and manageable for years to come.
1. Understand What Repotting Means
Repotting involves removing a plant from its current container and placing it into a container with suitable growing media.
The new container may be larger, the same size, or occasionally smaller, depending on the condition of the roots and the purpose of repotting.
Common reasons for repotting include:
- Providing additional room for root growth.
- Replacing deteriorated potting media.
- Improving drainage and aeration.
- Addressing root-related problems.
- Replacing a damaged container.
- Adjusting the growing environment to suit the plant.
Repotting should be viewed as a maintenance activity rather than an automatic requirement whenever a plant grows larger.
The goal is to create a healthy balance between root space, moisture retention, drainage, and stability.
2. Understand Why Houseplants Eventually Need Repotting
Indoor plants grow within a limited volume of potting media.
Over time, roots may occupy an increasing proportion of the available space.
Meanwhile, organic components in the potting mix can gradually decompose, become compacted, or lose some of their original structure.
These changes may affect:
- Water movement.
- Air availability around roots.
- Moisture retention.
- Nutrient management.
- Root development.
- Container stability.
Repotting can help address these conditions when they become problematic.
However, not every plant needs a larger pot. Sometimes replacing the growing medium while retaining the same container is sufficient.
3. Recognize the Signs That a Plant May Need Repotting
Several observations may suggest that a houseplant has outgrown its container or needs fresh growing media.
Common signs include:
- Roots emerging from drainage holes.
- Roots circling densely around the inside of the pot.
- Water passing through the container unusually quickly.
- Potting media drying much faster than before.
- Reduced growth despite otherwise suitable care.
- A plant becoming unstable or top-heavy.
- Potting media becoming severely compacted.
- A container cracking because of root pressure.
These symptoms are clues rather than definitive proof.
For example, slow growth may result from insufficient light, seasonal changes, or other environmental conditions.
Inspect the plant and its growing media before deciding to repot.
4. Understand What Root-Bound Means
A plant becomes root-bound when its root system occupies much of the available container space.
Roots may begin growing in circles along the inner walls or bottom of the pot.
In advanced cases, the root mass can become densely packed, leaving relatively little growing medium between the roots.
Potential consequences include:
- Reduced access to moisture.
- More frequent watering needs.
- Restricted root development.
- Difficulty maintaining consistent growing conditions.
- Reduced stability.
Some plants tolerate relatively crowded roots, while others benefit from more growing space.
The degree of root crowding matters more than the simple presence of visible roots.
5. Learn How to Inspect the Root System
When root crowding is suspected, gently inspect the plant.
If the plant is healthy and the container allows easy removal, support the base of the plant and carefully slide the root ball out.
Avoid pulling forcefully on stems or leaves.
Look for:
- Dense roots surrounding the outer surface.
- Thick layers of roots at the bottom.
- Roots circling repeatedly.
- Very little visible potting media.
- Roots growing through drainage openings.
If the root ball remains loose and the roots have adequate space, a larger pot may not be necessary.
Handle delicate species carefully because unnecessary disturbance can cause stress.
6. Understand When Repotting Is Not Necessary
A healthy plant does not always need repotting simply because it has been in the same container for a long time.
Repotting may be unnecessary when:
- The plant is growing normally.
- Water drains appropriately.
- Potting media remains structurally suitable.
- Roots are not excessively crowded.
- The container is stable.
- No root-related problems are evident.
Some species grow slowly and may remain comfortable in the same container for extended periods.
Others prefer relatively snug root conditions.
Avoid repotting solely because of an arbitrary calendar schedule.
7. Choose an Appropriate Time of Year
For many commonly grown houseplants, the beginning of their active growing period is a convenient time to repot.
During active growth, plants may be better able to produce new roots and adjust to changes.
In temperate regions, this often corresponds with spring or early summer.
However, indoor growing conditions vary.
In tropical climates or homes with stable lighting and temperature, some plants may grow throughout much of the year.
The best timing depends on the species and its actual growth cycle.
8. Know When Repotting Should Not Be Delayed
Although timing matters, certain problems may require prompt attention.
Examples include:
- Severely degraded potting media.
- A container that no longer drains properly.
- Significant root damage.
- Suspected root rot.
- A broken container that cannot safely support the plant.
- A serious growing-media problem that cannot be corrected through routine care.
In these situations, waiting for the ideal season may allow conditions to worsen.
However, repotting alone does not resolve every problem.
Identify the underlying cause and address it during the process.
9. Avoid Unnecessary Repotting During Plant Stress
A plant already experiencing significant environmental stress may respond poorly to additional root disturbance.
Potential stressors include:
- Sudden temperature changes.
- Severe underwatering.
- Recent relocation.
- Intense sunlight exposure.
- Pest infestations.
- Major pruning.
- Extended periods of unsuitable growing conditions.
If the problem is not urgent, stabilize the plant before repotting.
If root disease or unsafe potting conditions are responsible for the stress, carefully repotting may be part of the solution.
10. Choose the Right Pot Size
Selecting an appropriately sized container is one of the most important repotting decisions.
A pot that is too small may restrict root growth.
A pot that is excessively large may hold more wet potting media than the roots can use efficiently.
For many established houseplants, moving to a container approximately 1–2 inches (2.5–5 cm) wider than the previous pot is a reasonable starting guideline.
However, this is not a universal rule.
Consider:
- Root system size.
- Plant species.
- Growth rate.
- Container depth.
- Potting media characteristics.
- Watering habits.
The new container should provide modest additional growing space without surrounding the roots with an unnecessarily large volume of wet media.
11. Understand Why Oversized Pots Can Cause Problems
A larger pot does not automatically produce a healthier plant.
When a relatively small root system occupies a very large container, unused potting media may remain wet for extended periods.
This can reduce oxygen availability around roots and increase the risk of moisture-related problems.
The risk depends on several factors, including drainage, potting media composition, temperature, light, and watering practices.
Choose container size according to the root system rather than the appearance of the foliage alone.
12. Consider Pot Depth as Well as Width
Container depth can influence root development and moisture distribution.
Some plants develop relatively shallow root systems.
Others produce deeper or more extensive roots.
A very deep pot may contain substantial growing media below the active root zone.
A shallow pot may provide insufficient space for species with deeper roots.
Choose a container shape that suits the plant’s natural root structure.
For plants with unusual root systems, species-specific guidance is particularly helpful.
13. Understand the Importance of Drainage Holes
Drainage holes allow excess water to leave the container after watering.
They help reduce the likelihood of water remaining trapped around the roots.
For many common houseplants, a pot with functional drainage holes is the most practical choice.
A decorative container without drainage can be used as an outer cover pot.
In this arrangement, the plant remains in a smaller nursery pot with drainage holes.
Remove excess water from the outer container after watering.
Avoid assuming that a layer of stones at the bottom of a pot can replace proper drainage.
14. Compare Common Pot Materials
Different container materials influence moisture retention, weight, and maintenance.
| Pot material | Main characteristics | Practical considerations |
|---|---|---|
| Terracotta | Porous and allows moisture to evaporate through the walls | May require more frequent watering |
| Glazed ceramic | Often retains moisture longer than unglazed clay | Can be heavy; check for drainage |
| Plastic | Lightweight and generally retains moisture well | Easy to handle but may be less stable for large plants |
| Resin | Available in many sizes and designs | Drainage and durability vary |
| Concrete | Heavy and stable | Can be difficult to move |
| Fabric containers | Allow substantial air exchange | May dry quickly and require careful moisture management |
No single material is ideal for every plant.
Choose based on the plant’s needs and your growing environment.
15. Choose a Stable Container
Container stability becomes increasingly important as a plant grows.
Tall plants with heavy foliage can become top-heavy.
A narrow or lightweight container may tip over easily.
Consider the relationship between:
- Plant height.
- Foliage spread.
- Container width.
- Container weight.
- Placement surface.
A stable pot reduces the risk of damage to the plant and surrounding furniture.
For large houseplants, ensure that the floor or plant stand can safely support the loaded container.
16. Select the Right Potting Mix
Potting media provide physical support while helping manage moisture, nutrients, and air around roots.
Different houseplants require different growing conditions.
A suitable mix should balance water retention and drainage according to the plant’s needs.
For example:
- Many tropical foliage plants benefit from a moisture-retentive but well-aerated mix.
- Numerous succulents require a faster-draining medium.
- Many orchids need a specialized, airy growing medium.
- Some moisture-loving plants prefer a mix that retains water more consistently.
Avoid assuming that ordinary garden soil is suitable for indoor containers.
Garden soil can become dense or drain poorly when used in pots.
17. Understand Common Potting Mix Ingredients
Commercial potting mixes may contain several components.
Common examples include:
Coco coir: Helps retain moisture and contributes to the growing medium’s structure.
Peat moss: Retains moisture and is used in many traditional potting mixes.
Perlite: Creates air spaces and can improve drainage.
Pumice: Provides mineral structure and supports aeration.
Pine bark: Adds coarse particles and is often used in mixes for epiphytic or aroid plants.
Compost: May contribute nutrients and organic matter, depending on its quality and composition.
Sand: Can be useful in some specialized mixes when the particle size and proportions are appropriate.
The effectiveness of a potting mix depends on how its ingredients work together.
Adding a single ingredient does not automatically improve every growing medium.
18. Avoid Using Garden Soil Without Proper Preparation
Soil collected from outdoor gardens may contain fine particles that compact inside containers.
It may also contain weed seeds, insects, or plant pathogens.
Indoor containers have different drainage and aeration conditions from garden beds.
For most houseplants, a reputable container-growing mix is more practical than unmodified garden soil.
If a specialized soil-based mixture is appropriate for a particular plant, follow a reliable horticultural formulation.
19. Understand Why a Drainage Layer Is Usually Unnecessary
A common gardening practice involves placing gravel, stones, or broken pottery at the bottom of a container.
However, a coarse layer beneath finer potting media does not necessarily improve drainage.
It can create a moisture transition zone that leaves water held in the finer medium above the coarse layer.
It also reduces the volume available for roots.
For most ordinary houseplant containers, a suitable potting mix and functional drainage holes are preferable.
If media escape through large drainage openings, a small piece of mesh can help retain the mix without sealing the holes.
20. Gather Your Repotting Supplies
Preparing supplies before starting makes the process easier.
Useful materials include:
- A suitable new container.
- Fresh potting mix.
- A clean work surface.
- Gardening gloves.
- A small scoop or trowel.
- Clean pruning scissors or shears.
- A watering can.
- A drainage tray.
- A soft brush or cloth.
- Newspaper or a reusable protective mat.
For large plants, additional assistance may be helpful.
Use clean tools to reduce the risk of transferring pests or pathogens between plants.
21. Prepare a Clean Workspace
Repotting can release loose potting media, old leaves, and water.
Choose an area that is easy to clean.
A balcony, patio, utility area, or protected indoor table may work well.
Cover delicate surfaces with a reusable mat or protective sheet.
Keep children and pets away from loose potting materials, sharp tools, and plants that may be irritating or toxic.
Wash your hands after handling potting media.
People with respiratory sensitivities or compromised immune systems may need additional precautions to avoid inhaling dust or aerosols from growing media.
22. Prepare the New Pot
Inspect the new container before using it.
Check for:
- Cracks.
- Sharp edges.
- Blocked drainage holes.
- Loose components.
- Unstable construction.
If reusing an old container, remove previous growing media and clean it thoroughly.
Disinfect reused containers when disease contamination is suspected, using an appropriate method for the material and following product safety instructions.
Rinse when required and allow the container to dry as appropriate.
23. Prepare the Potting Mix
Fresh potting media should be suitable for the plant and manageable to work with.
Some dry mixes are easier to handle after being lightly moistened.
However, avoid soaking the mix until it becomes muddy or excessively compacted.
Break apart large compressed clumps gently.
If using a commercial mix, follow any preparation instructions provided by the manufacturer.
Keep unused media stored in a clean, closed container or bag to limit contamination.
24. Decide Whether to Water Before Repotting
The ideal moisture level before repotting depends on the plant and the condition of its root ball.
For many ordinary foliage plants, slightly moist potting media can help the root ball remain cohesive.
Extremely dry media may crumble or become difficult to separate from the container.
Very wet media may be messy and can make some roots more vulnerable to damage.
Succulents, cacti, and plants with damaged roots may require a different approach.
Avoid applying a single watering rule to every species.
25. Remove the Plant From Its Current Pot Carefully
Support the plant near the base without squeezing delicate stems.
Gently tilt the container and ease the root ball outward.
For flexible plastic nursery pots, lightly pressing the sides may help release the growing media.
For rigid containers, tapping the outside can sometimes loosen the root ball.
Avoid pulling the plant by its leaves or stems.
If roots have grown through drainage holes, carefully free them where possible.
For a severely stuck plant, protecting the root system may be more important than preserving an inexpensive container.
26. Inspect the Roots After Removal
Once the plant is out of its container, examine the root system.
Healthy roots vary in appearance depending on the species.
They may be white, cream, tan, brown, or naturally pigmented.
Look for roots that are firm and structurally sound.
Potential warning signs include:
- Mushy or collapsing roots.
- Unpleasant odors.
- Extensive root discoloration accompanied by decay.
- Severely damaged root sections.
- Dense circling roots.
- Areas of persistent waterlogging.
Root color alone is not enough to diagnose disease.
Evaluate texture, smell, growing conditions, and overall plant health.
27. Loosen Circling Roots When Necessary
If roots are tightly circling the outside of the root ball, some gentle loosening may help encourage outward growth.
Use your fingers to separate accessible roots carefully.
Avoid tearing apart the entire root system unnecessarily.
For severely compacted root balls, limited root pruning or strategic cuts may sometimes be appropriate.
However, these techniques are not suitable for every species.
Plants with delicate roots may recover more slowly from aggressive disturbance.
Use the least disruptive method that addresses the problem.
28. Understand When Root Pruning Is Appropriate
Root pruning involves removing selected root sections.
It may be useful when:
- Roots are severely damaged.
- Root rot has affected part of the system.
- A plant must remain in a particular container size.
- Dense circling roots cannot otherwise be corrected.
Use clean, sharp tools.
Remove only what is necessary.
Avoid extensive root pruning without species-specific guidance.
The plant’s ability to recover depends on its health, growth stage, and environmental conditions.
29. Recognize and Address Suspected Root Rot
Root rot refers to deterioration of root tissues, often associated with prolonged unsuitable moisture conditions and sometimes disease-causing organisms.
Possible signs include mushy roots, unpleasant odors, and declining foliage.
If root rot is suspected:
- Remove the plant carefully.
- Inspect the root system.
- Remove clearly decayed tissue with clean tools when appropriate.
- Discard contaminated growing media.
- Clean or replace the container.
- Use a suitable fresh growing medium.
- Correct the watering or drainage conditions that contributed to the problem.
Severely affected plants may not recover.
Do not assume that repotting alone guarantees successful treatment.
30. Add the First Layer of Fresh Potting Mix
Place a suitable amount of fresh potting mix in the bottom of the new container.
The amount depends on the size of the root ball and the depth of the pot.
Position the plant so that the top of the root ball sits at approximately the same level as it did in the previous container.
Leave enough space below the rim to make watering practical.
Avoid placing a thick layer of gravel beneath the potting mix.
The goal is to provide an appropriate planting depth and enough room for healthy root development.
31. Position the Plant at the Correct Depth
Planting depth matters because burying stems or crowns too deeply can contribute to moisture-related problems in some species.
For many ordinary houseplants, maintain approximately the same planting depth as before.
Keep the crown or stem base at its appropriate level.
Some plants have specialized structures, such as rhizomes, bulbs, or exposed roots, that require particular positioning.
Follow species-specific guidance when these features are present.
32. Center and Stabilize the Plant
Place the root ball in the new container.
Adjust its position so that the plant stands naturally.
For upright plants, centering the root ball often provides balanced support.
For climbing plants, consider the position of existing supports.
For asymmetrical or trailing plants, a slightly different placement may be more practical.
Hold the plant gently while adding growing media around the roots.
Avoid forcing stems into an unnatural position.
33. Fill the Gaps Around the Root Ball
Add fresh potting mix gradually around the sides of the root ball.
Use your fingers or a small scoop to distribute the material.
Gently settle the mix to reduce large empty spaces.
Do not press it down so firmly that air spaces are eliminated.
Excessive compaction can interfere with water movement and oxygen availability.
The growing medium should support the plant while retaining an appropriate structure.
34. Leave Space for Watering
Avoid filling the container completely to the rim.
Leaving a small gap between the potting media surface and the top edge helps prevent water and loose media from overflowing.
The appropriate gap depends on container size.
Make sure the plant remains at the correct planting depth.
Do not bury the crown simply to create additional watering space.
35. Water Appropriately After Repotting
For many healthy foliage plants repotted into a suitable mix, watering thoroughly after repotting helps settle the media around the roots.
Allow excess water to drain.
However, watering immediately is not appropriate for every situation.
Some succulents, cacti, or plants with substantial root injuries may benefit from a short dry recovery period, depending on the species and conditions.
Follow the needs of the particular plant.
Avoid automatically soaking every newly repotted plant.
36. Avoid Overwatering During Recovery
A recently repotted plant may temporarily use water differently because its roots have been disturbed.
Watering too frequently can leave the new growing medium excessively wet.
Check moisture conditions before watering again.
Consider:
- Plant species.
- Pot size.
- Potting mix.
- Light exposure.
- Temperature.
- Root condition.
Do not water solely because a fixed number of days has passed.
A consistent observation-based approach is more reliable.
37. Choose a Suitable Recovery Location
After repotting, place the plant in conditions appropriate for its species.
For many tropical foliage plants, stable temperatures and suitable indirect light can support recovery.
Avoid sudden exposure to intense sunlight if the plant is not acclimated.
Protect sensitive plants from strong drafts and extreme temperature changes.
A plant that normally requires strong light should not necessarily be moved into a dark room.
The goal is to reduce unnecessary stress while maintaining appropriate growing conditions.
38. Understand Transplant Shock
Transplant shock is a general term used to describe stress following disturbance or relocation.
Possible symptoms include:
- Temporary drooping.
- Slower growth.
- Leaf yellowing.
- Limited leaf loss.
- Changes in water use.
Not every plant experiences noticeable transplant shock.
Symptoms may also indicate watering problems, root damage, or unsuitable environmental conditions.
Monitor the plant carefully rather than assuming that all post-repotting changes are harmless.
39. Be Cautious With Fertilizer After Repotting
Fresh potting mixes may already contain fertilizer or nutrient amendments.
Adding additional fertilizer immediately may be unnecessary.
A stressed or root-damaged plant may also be more sensitive to excessive fertilizer concentrations.
Check the potting mix label and consider the plant’s condition.
Resume fertilizing according to the species’ needs, active growth, and the nutrients already present in the medium.
Avoid using fertilizer as a substitute for correcting poor drainage or unhealthy roots.
40. Monitor the Plant During the Following Weeks
Repotting is not complete when the plant enters its new container.
The adjustment period provides an opportunity to identify problems early.
Observe:
- Leaf firmness.
- Leaf color.
- New growth.
- Potting media moisture.
- Drainage performance.
- Container stability.
- Signs of pests or disease.
Some plants resume growth quickly.
Others may take longer, especially during slower growing periods.
Avoid repeated unnecessary changes while the plant adjusts.
Practical Step-by-Step Guide: How to Repot a Houseplant
The following process works as a general framework for many common container-grown foliage plants.
Always adjust it to the needs of the particular species.
Step 1: Confirm That Repotting Is Needed
Inspect the plant’s growth, roots, container, and potting media.
Look for excessive root crowding, deteriorated media, or other conditions that justify repotting.
Step 2: Select an Appropriate Container
Choose a pot that provides suitable space for the root system.
For many plants, a modest increase in diameter is preferable to a dramatic increase.
Make sure drainage is adequate.
Step 3: Choose the Correct Potting Mix
Select a growing medium appropriate for the plant.
Consider its moisture retention, aeration, and drainage characteristics.
Step 4: Prepare the Workspace
Gather supplies and protect the work surface.
Clean reusable tools and containers as needed.
Step 5: Remove the Plant Gently
Support the base of the plant and ease the root ball out.
Avoid pulling on stems or foliage.
Step 6: Examine the Roots
Look for healthy root structure, excessive circling, or signs of decay.
Identify any problems that require attention.
Step 7: Make Necessary Root Adjustments
Gently loosen tightly circling roots when appropriate.
Remove clearly damaged or decayed roots only when necessary.
Avoid excessive disturbance.
Step 8: Add Fresh Potting Mix
Place enough mix in the bottom of the new container to establish the correct planting height.
Step 9: Position the Plant
Set the root ball into the container.
Maintain an appropriate planting depth and natural orientation.
Step 10: Fill Around the Roots
Add potting mix gradually.
Settle it gently without compressing it excessively.
Step 11: Water According to the Plant’s Needs
For many healthy foliage plants, water to settle the medium and allow excess moisture to drain.
Use a different approach when species-specific requirements or root injuries call for it.
Step 12: Provide Suitable Aftercare
Return the plant to appropriate light and temperature conditions.
Monitor moisture and avoid unnecessary disturbance.
Step 13: Observe Recovery
Watch the plant over the following weeks.
Adjust watering and placement only when observations indicate a need.
Practical Repotting Checklist
Use this checklist to prepare for and complete a repotting session.
Before Repotting
- I have confirmed that repotting is necessary.
- I know the plant’s basic growing requirements.
- I have chosen a suitable container size.
- The new pot has appropriate drainage.
- I have selected a suitable potting mix.
- I have gathered clean tools and supplies.
- My work surface is protected.
- I have considered whether the plant is currently stressed.
During Repotting
- I removed the plant without pulling on delicate stems.
- I inspected the roots.
- I checked for excessive root crowding.
- I removed damaged roots only when necessary.
- I avoided unnecessary root disturbance.
- I positioned the plant at the correct depth.
- I filled gaps with suitable growing media.
- I avoided excessive compaction.
- I left enough room for watering.
After Repotting
- I followed appropriate watering guidance for the species.
- Excess drainage water has been managed.
- The container is stable.
- The plant receives suitable light.
- The plant is protected from extreme temperature changes.
- I have avoided unnecessary fertilizer.
- I will monitor moisture conditions.
- I will observe the plant for signs of recovery or stress.
Common Repotting Problems and Solutions
| Problem | Possible cause | Practical solution |
|---|---|---|
| Plant wilts after repotting | Root disturbance, moisture stress, or environmental changes | Check moisture and root conditions; maintain suitable growing conditions |
| Leaves turn yellow | Watering stress, root damage, or other causes | Evaluate drainage, moisture, and overall plant health |
| Potting mix stays wet too long | Oversized container, poor aeration, or excessive watering | Review pot size, media, and watering frequency |
| Water runs through very quickly | Dry or poorly wetted media, or dense root crowding | Check root conditions and rewet suitable media carefully |
| Plant becomes unstable | Incorrect pot size or insufficient support | Adjust planting position or use appropriate support |
| Roots are difficult to separate | Severe root crowding | Loosen carefully and avoid unnecessary tearing |
| Plant stops growing temporarily | Adjustment period or unsuitable conditions | Monitor light, temperature, moisture, and recovery |
| Mold appears on the media surface | Persistent moisture or organic material | Improve moisture management and airflow; investigate recurring problems |
| Roots appear mushy | Possible root decay | Inspect roots and correct drainage or moisture problems |
| Leaves develop scorched patches | Excessive sunlight after relocation | Provide appropriate light and gradual acclimation |
| Plant tips over | Container too light or narrow | Use a more stable container or suitable support |
| Potting mix sinks after watering | Media settling around the roots | Add a small amount of mix without burying the crown |
| Plant is planted too deeply | Incorrect root ball positioning | Correct planting depth carefully |
| New pot has no drainage holes | Inadequate water escape | Use a drainage-equipped inner pot or suitable alternative |
Repotting problems are easier to manage when their underlying causes are identified early.
Frequently Asked Questions
1. How do I know when my houseplant needs repotting?
Look for excessive root crowding, rapidly drying potting media, deteriorated growing media, or a container that no longer supports the plant properly.
Inspect the roots when necessary.
A healthy plant does not automatically need repotting simply because time has passed.
2. How often should indoor plants be repotted?
Repotting frequency depends on species, growth rate, root development, and potting media condition.
Fast-growing plants may need attention more frequently than slow-growing species.
Evaluate the plant rather than following a rigid schedule.
3. What is the best season to repot houseplants?
For many houseplants, the beginning of active growth is a convenient time.
In temperate climates, this often occurs in spring.
In stable tropical or indoor conditions, growing cycles may differ.
4. Should I always use a bigger pot?
No.
A larger pot is useful when roots need additional space.
If the main problem is deteriorated potting media, the same container may remain suitable.
A smaller pot may occasionally be appropriate when a plant has lost a substantial portion of its root system.
5. How much bigger should the new pot be?
For many common houseplants, increasing the pot diameter by approximately 1–2 inches (2.5–5 cm) is a useful starting guideline.
However, choose the size according to the actual root system and plant requirements.
6. Can I repot a plant into a pot without drainage holes?
For most common houseplants, a container with drainage holes is easier to manage.
A decorative pot without drainage can serve as an outer container around a nursery pot that drains properly.
Avoid allowing water to accumulate inside the outer pot.
7. Should I remove all the old soil when repotting?
Usually not.
For a healthy plant, retaining much of the existing root ball can reduce unnecessary disturbance.
Removing more old media may be appropriate when dealing with root rot, contamination, or severely unsuitable growing conditions.
8. Should I loosen the roots before repotting?
Gently loosening tightly circling roots may be helpful for some plants.
However, excessive root disturbance can cause stress.
The appropriate approach depends on the root system and species.
9. Is it normal for a plant to droop after repotting?
Some plants temporarily droop following root disturbance.
However, wilting can also indicate watering problems, root injury, or environmental stress.
Check the plant’s conditions rather than assuming the symptom is always normal.
10. Should I water immediately after repotting?
Many healthy foliage plants benefit from appropriate watering after repotting.
However, some succulents, cacti, or plants with significant root injuries may require a different approach.
Follow species-specific care guidance.
11. Can I fertilize immediately after repotting?
Immediate fertilization is often unnecessary, especially when fresh potting media already contain nutrients.
Avoid overfertilizing plants with disturbed or damaged roots.
Resume feeding according to plant needs and growing conditions.
12. Can repotting damage a houseplant?
Yes.
Rough handling, excessive root pruning, incorrect planting depth, unsuitable media, and poor watering practices can cause damage.
Careful preparation and gentle handling reduce these risks.
13. How long does it take a houseplant to recover from repotting?
Recovery time varies widely.
Some plants show little noticeable stress, while others may take several weeks or longer to resume normal growth.
Species, root condition, season, and environmental conditions all influence recovery.
14. Can I repot a flowering houseplant?
Yes, but repotting during flowering may disturb some species and occasionally cause buds or flowers to drop.
If repotting is not urgent, waiting until flowering has finished may be preferable for sensitive plants.
15. What should I do if my plant looks worse after repotting?
Check the moisture level, drainage, planting depth, root condition, temperature, and light exposure.
Avoid making multiple unnecessary changes at once.
If the plant continues declining, investigate root damage, disease, or unsuitable growing conditions.
Final Thoughts
Repotting a houseplant is an important maintenance skill that becomes easier with observation and practice.
The process begins with recognizing whether repotting is genuinely necessary. From there, choosing an appropriate container, selecting suitable growing media, handling roots carefully, and providing thoughtful aftercare all contribute to a successful transition.
A larger pot is not always better, and frequent repotting does not automatically produce healthier plants. The goal is to create a balanced growing environment that provides sufficient root space, appropriate moisture, reliable drainage, and adequate aeration.
Every plant responds differently, so species-specific needs should guide decisions about timing, root handling, watering, and recovery.
With patience and careful attention, repotting can become a straightforward part of indoor plant care rather than an intimidating task.
Successful repotting is not about giving a plant the biggest container possible. It is about providing the right amount of space, the right growing conditions, and the gentle care needed for healthy roots and lasting growth.